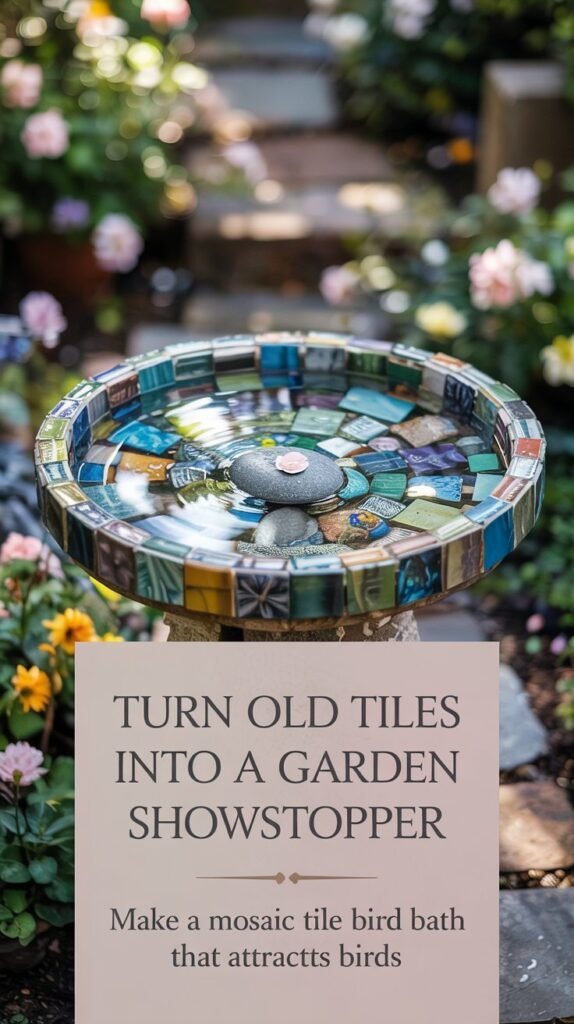
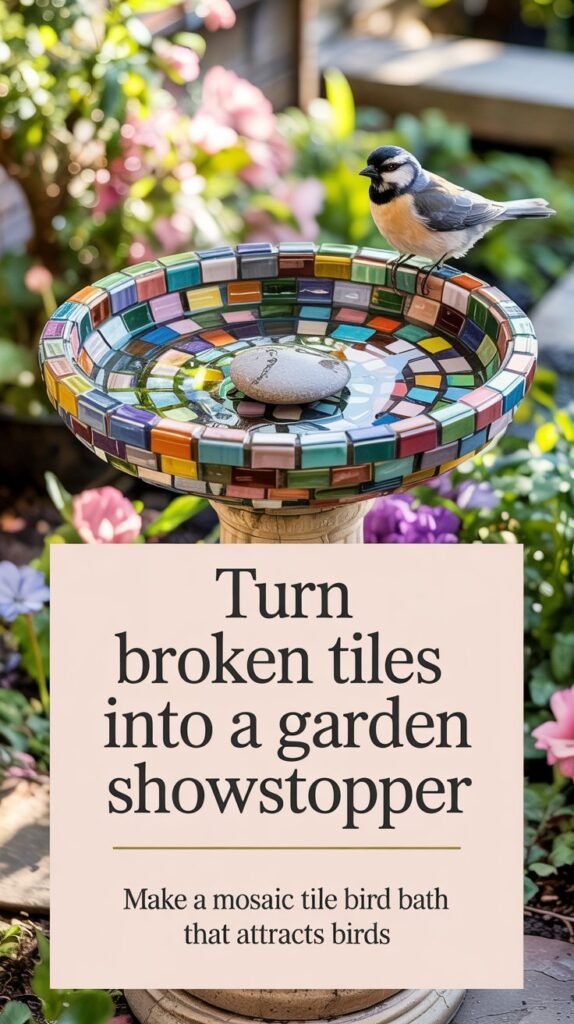
How to Make a Mosaic Tile Bird Bath
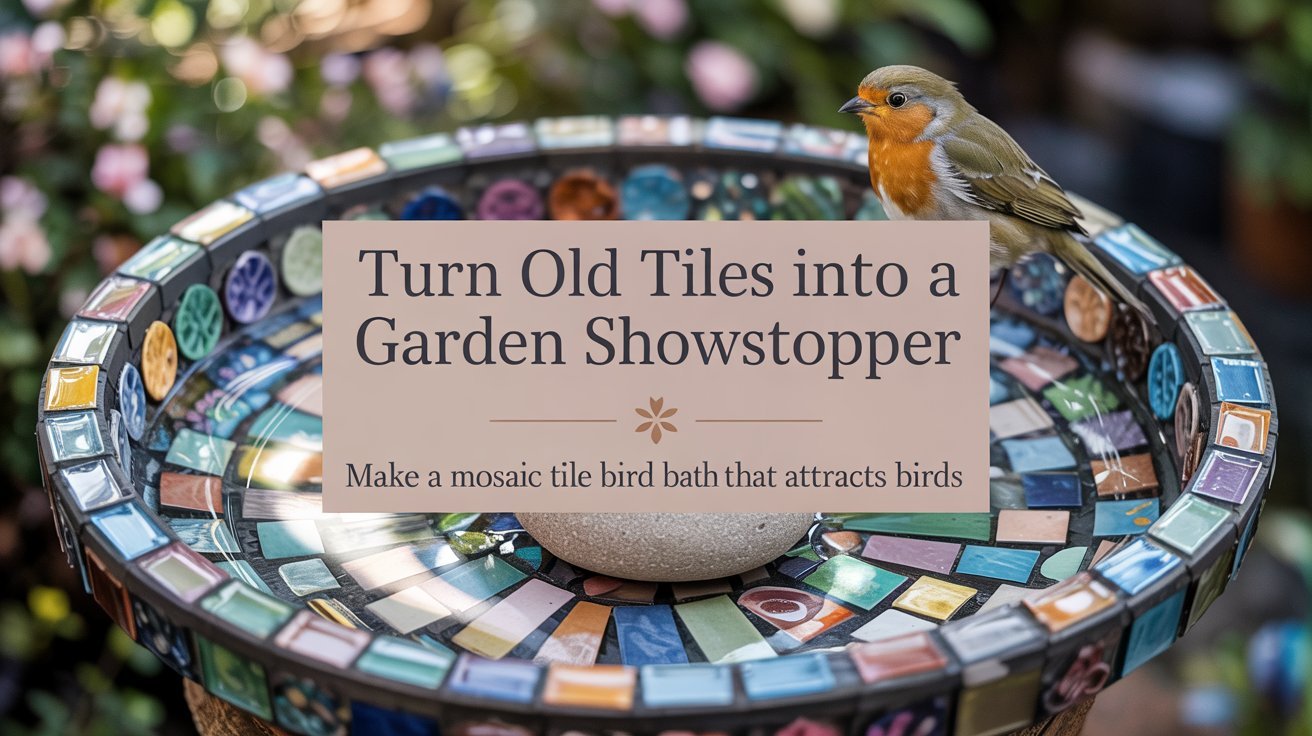
Hear the tiny clink of glass and feel the cool sparkle of sunlight on tiles as birds splash and preen in your garden. A mosaic tile bird bath brings both beauty and wildlife to your outdoor space, creating a colorful focal point that changes with the light. This delightful project transforms simple materials into a durable, personalized garden feature that will bring joy for years to come.
You’ll decorate a simple bird bath base with ceramic or glass tiles, grout the gaps, then seal it for weather protection. The best part? You can customize every aspect, from colors to patterns,making each creation uniquely yours. Let’s gather our supplies and create something magical for our feathered friends!
Project Snapshot
- Difficulty: Moderate
- Time: 1–2 hours active work + 24–48 hours drying/cure time
- Cost Estimate: $30–$50 (depends on tiles and base)
- Materials Needed: Base, tiles, adhesive, grout, sealer, basic tools and safety gear
What You’ll Need
Gathering the right materials before you begin will make this project flow smoothly. Here’s everything you’ll need to create your mosaic bird bath:
Shopping List
- Concrete bird bath base or large shallow terra cotta saucer (30–40 cm / 12–16″)
- Ceramic tiles, glass gems or broken dishes (mixed sizes)
- Outdoor tile adhesive (suitable for ceramic/glass)
- Outdoor grout (sandless, exterior formula)
- Grout sealer (outdoor/masonry)
- Tile nippers or tile cutter
- Rubber gloves and safety glasses
- Sponges and buckets for cleaning
- Masking tape (optional)
- Pencil and paper for planning your design
Step-by-Step Instructions
Step 1: Pick and Prepare Your Base
Choose a shallow bowl or dish that’s 30–40 cm (12–16″) across with a depth of about 2–4 cm (1 inch). This size allows small birds to splash easily without drowning. A concrete pedestal base provides stability, but a large terra cotta saucer works beautifully too.
Thoroughly clean your base with mild soap and water to remove any dirt, dust, or manufacturing residue. Allow it to dry completely before proceeding, moisture can prevent proper adhesion of tiles.
Step 2: Plan Your Design
Before applying any adhesive, lay out your tiles on a flat surface to create your design. This planning stage helps you visualize the finished project and make adjustments before committing.
Consider creating a simple pattern or picture with your tiles. Flowers, spirals, and concentric circles work beautifully for bird baths. Sketch your design on paper first, then arrange your tiles accordingly.
Use tile nippers to cut pieces as needed for your design. For intricate patterns, you can use masking tape to hold tiny pieces together for easier placement.
Step 3: Apply Adhesive
Following the manufacturer’s directions, mix your outdoor tile adhesive to a consistency similar to thick peanut butter. Work in small sections so the adhesive doesn’t dry out before you place your tiles.
Using a putty knife or spatula, spread a thin layer (about 5mm thick) of adhesive on a small section of your base. Start from the center and work your way outward for the most balanced design.
If working in hot weather, slightly dampen the base before applying adhesive to prevent it from drying too quickly.
Step 4: Place Tiles
Press your tiles firmly into the adhesive, maintaining even spacing of about 2–3 mm (1/8″) between pieces. This gap allows room for grout, which will help secure the tiles and complete your design.
Start with larger tiles in the center of your design and use smaller pieces toward the edges. This approach creates visual interest and makes it easier to fit tiles around the curved rim.
Work in small sections, and use a toothpick or craft stick to remove any excess adhesive that squeezes up between the tiles. Wipe away adhesive from the tile faces immediately with a damp cloth.
Step 5: Let Adhesive Set
Once all tiles are placed, allow the adhesive to cure fully before grouting. This typically takes 24 hours, but check your product directions for specific timing.
Cover your project with plastic if working outdoors to protect it from dust, debris, or unexpected rain during the curing process. Place it in a safe location where it won’t be disturbed.
This waiting period is crucial, rushing to the grouting stage before adhesive is fully cured can cause tiles to shift or detach.
Step 6: Grout the Mosaic
Mix your outdoor grout according to package directions until it reaches a smooth, yogurt-like consistency. For bird baths, a sandless grout works best as it’s less likely to scratch delicate bird feet.
Wearing rubber gloves, spread grout over the entire tiled surface with a rubber float or your gloved hands. Work in a circular motion, ensuring grout fills all gaps between tiles. Press firmly to eliminate air pockets.
For colored grout, consider how it will complement your tiles, light gray or beige tends to work well with most designs, while terracotta tones create a warm, natural look.
Step 7: Clean Tile Faces
After applying grout, wait about 15-20 minutes until it begins to firm up but before it hardens completely. The grout should look matte rather than shiny when it’s ready to clean.
Using a damp (not wet) sponge, gently wipe the tile surfaces in a circular motion to remove excess grout. Rinse your sponge frequently in clean water and wring it out well between wipes.
Be careful not to dig into the grout lines, the goal is to clean the tile faces while leaving the grout level between tiles. After the initial cleaning, use a soft, dry cloth to buff away any remaining haze from the tiles.
Step 8: Seal the Grout
After allowing the grout to cure for 24-48 hours, apply grout sealer according to the product instructions. This crucial step protects your creation from moisture damage, staining, and frost cracking.
Use a small paintbrush to apply sealer directly to the grout lines, or follow product directions for spray-on application. Some sealers can be applied to both grout and tiles for overall protection.
Apply 2-3 coats of sealer for maximum protection, allowing each coat to dry completely before applying the next. This creates a water-resistant barrier that will significantly extend the life of your mosaic bird bath.
Step 9: Final Setup
Once the sealer has fully cured (usually 24 hours), your mosaic bird bath is ready for placement in your garden! Choose a location that’s visible from your home so you can enjoy watching the birds.
If using a pedestal, ensure it’s on level ground for stability. For saucer-style bird baths, you can place them on an overturned flowerpot or decorative stand.
Fill with fresh water to a depth of about 1 inch (2.5 cm), birds prefer shallow water for safety. Place a few small stones in the water to give birds a place to perch while drinking.
Pro Tips for a Perfect Mosaic Bird Bath
Design Tips
- Use a shallow depression (about 2–4 cm / 1 inch deep) so birds can easily bathe without risk of drowning
- If your tiles are sharp or uneven at the rim, sand the edges or use small pebbles to protect birds’ feet
- For an easy start, use store-bought mosaic kits or pre-cut glass gems from craft stores
- Consider using a bird or flower motif in your design,these natural themes complement the garden setting
Material Tips
- Dollar stores often carry inexpensive glass gems perfect for mosaic projects
- Broken ceramic plates and cups can be repurposed as mosaic tiles – a great way to upcycle
- For outdoor durability, choose vitreous glass tiles or frost-resistant ceramic tiles
- White grout tends to show dirt quickly, consider light gray, beige, or terracotta instead
Seasonal Care
- In cold climates, lift and store the basin indoors during hard frosts to prevent grout cracking
- Allow full adhesive/grout cure before filling with water,usually 24–48 hours
- In hot summer months, place the bird bath in partial shade to keep water cooler
- Add a small solar fountain attachment to create moving water, which attracts more birds
Dos and Don’ts
Do
- Use outdoor-rated adhesive and grout for longevity
- Wear gloves and eye protection when cutting tiles
- Choose non-toxic, smooth tiles around the water edge
- Allow adequate drying time between each step
- Clean and refresh water every 2-3 days for bird health
Don’t
- Skip sealing the grout, moisture will damage it faster
- Use porous tiles without sealing,staining can occur
- Put the bath in direct midday sun all year; water heats up and birds avoid hot baths
- Rush the curing process – patience ensures durability
- Make the water too deep – birds prefer shallow baths
Care and Maintenance
Your beautiful mosaic bird bath will bring years of enjoyment with proper care. Here’s how to keep it looking its best:
- Regular Cleaning: Clean weekly with mild soap and a soft brush; rinse thoroughly to remove algae and debris
- Water Maintenance: Top up water every 2–3 days; refresh more often in warm weather to prevent mosquito breeding
- Seasonal Care: Reapply grout sealer yearly or as needed, especially in wet climates
- Winter Protection: Store the basin indoors during freezing conditions to prevent cracking
- Algae Prevention: Add a few copper pennies to the water to naturally inhibit algae growth
Limitations and Safety
SAFETY TIP: Always wear safety glasses and gloves when cutting tiles or working with grout and adhesives. Work outdoors or in a well-ventilated area when using chemical adhesives or sealers.
While mosaic bird baths are beautiful and durable, they do have some limitations to consider:
- Mosaic bird baths require time for adhesive and grout to cure – plan for 2-3 days of drying time
- In very cold or wet climates, grout can slowly deteriorate without regular sealing
- Extremely thin or delicate glass tiles may not last in outdoor exposure
- Heavy bird baths may require assistance to move or reposition
- Some adhesives and sealers contain chemicals that require proper ventilation during application
Ready to Create Your Mosaic Bird Bath?
Your handcrafted mosaic tile bird bath will become a magical focal point in your garden, a place where light dances across colorful tiles and feathered friends gather to splash and preen. The process of creating it is just as rewarding as watching birds enjoy your handiwork.
Remember that each mosaic is uniquely yours, there’s no wrong way to arrange your tiles as long as you follow the basic construction techniques. Let your creativity flow and enjoy the process of bringing this functional art piece to life!
If you like this article, you’ll love 25 DIY Garden Ornaments Ideas to Add Charm to Your Backyard