How to Make a Simple Concrete Leaf Bird Bath Step‑by‑Step Guide
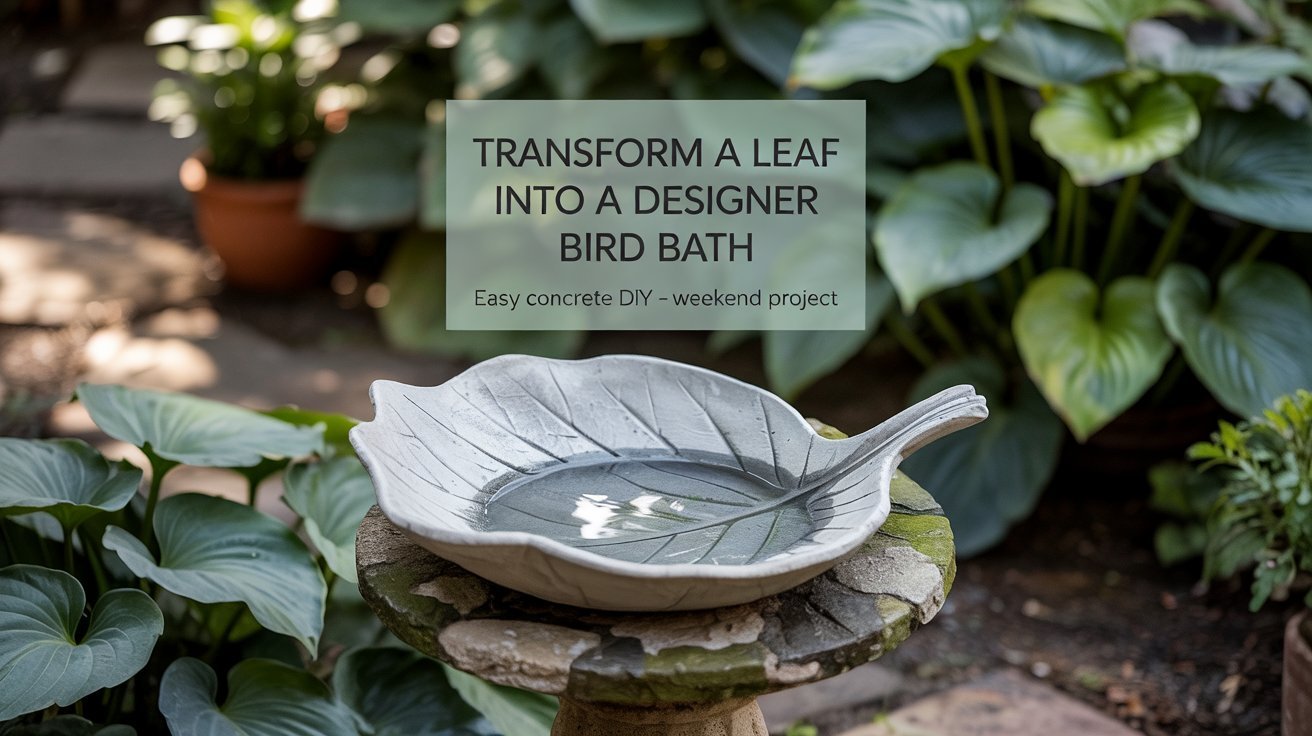
A concrete leaf bird bath gives your garden a natural, sculptural feature that birds love and that blends beautifully with plants. This project uses a large leaf as a mold for quick‑setting concrete to create an organic, shallow basin. It’s inexpensive, weatherproof when sealed, and suitable for a weekend craft session.
Quick facts
- Difficulty: Moderate
- Time: ~30–60 minutes active; 24–48 hours drying/curing
- Cost estimate: NZ$15–$50 (depends on materials you already have)
- Best leaves: rhubarb, hosta, elephant ear, gunnera, choose large, sturdy leaves with pronounced veins
Materials
- Large leaf (rhubarb/hosta/elephant ear) fresh is best for release
- Quick‑setting concrete mix (small bag, e.g. 5–10 kg) — follow manufacturer’s instructions
- Large plastic container or bucket for mixing
- Sand (for forming a mound)
- Cooking spray or vegetable oil (release agent)
- Disposable gloves, dust mask (when mixing dry concrete), safety glasses
- Trowel or flat spatula
- Plastic sheet or tarp (work surface)
- Concrete sealer (outdoor, water‑based or solvent‑based)
- Pedestal option: flat stone, short stump, large pot, or garden sculpture to support the finished bird bath
- Optional: masonry pigment (if you want coloured concrete), sponge, fine brush for cleaning veins
Safety
- Mix concrete outdoors or in a well‑ventilated area. Concrete dust is hazardous, wear a dust mask.
- Wear gloves and eye protection.
- Keep pets and children away from the work area and wet concrete.
Step‑by‑step instructions
- Choose and prepare the leaf
- Pick a large leaf with a clear vein pattern and no holes. Clean off dirt and moisture.
- Place the leaf vein‑side up on a tarp or work surface. If the leaf is delicate, support it on a thin backing (cardboard) to help flip later.
- Make the sand mound (the mould base)
- Build a mound of damp sand on your work surface sized to match the leaf. The sand mound gives shape and support so the concrete conforms to the leaf’s curvature.
- Smooth the top of the sand mound and press the leaf, vein‑side up, onto the sand so the veins are pronounced.
- Apply release agent
- Lightly spray or rub cooking spray (or vegetable oil) on the outer side of the leaf (the side that will contact concrete) to help with demoulding.
- Mix the concrete
- Wearing a dust mask, mix the quick‑setting concrete in your container following the bag instructions. Only mix enough you can work with before it sets.
- Aim for a workable, scoopable consistency (not too soupy). If using pigment, add per manufacturer guidelines.
- Apply concrete over the leaf
- Using a trowel or spatula, spread a 10–15 mm (about 1/2 inch) layer of concrete over the leaf. Keep the thickness even; thinner may crack, thicker becomes heavy.
- Build a slightly thicker rim where you want the bird bath edge to be (this helps hold water).
- Smooth and texture
- Smooth the surface with a trowel. If you want a more natural look, lightly press a sponge over the surface to remove excess water and create a subtle texture. You can use a clean, soft brush to accentuate the veins for detail.
- Curing
- Cover the concrete loosely with plastic to retain moisture and allow it to cure slowly. Follow the concrete manufacturer’s recommended curing time; generally quick‑set mixes may be firm in a few hours but best left 24–48 hours before demoulding and longer before full use.
- Avoid direct sun and wind during initial curing as rapid drying can cause cracking.
- Demoulding
- Once firm, carefully flip the sand mound and remove the sand to reveal the concrete leaf. Gently peel the real leaf away. If the leaf sticks in places, use a soft brush and water to clean the surface after it’s mostly cured.
- Let the piece continue to cure for another 24 hours if needed.
- Finishing touches
- Trim any rough edges with a rasp or sandpaper made for concrete.
- Wash and let dry fully.
- Apply an outdoor concrete sealer according to product instructions to make the bird bath water‑resistant and easier to clean. Apply 1–2 coats and allow curing time between coats.
- Mounting and placement
- Place the finished leaf on a stable pedestal: a flat rock, a short tree stump, a terracotta pot upside down, or a dedicated garden pedestal. Make sure it’s level.
- Position in a quiet, partially shaded spot near plants, but not under heavy foliage that drops debris into the water. Keep it within view so you can enjoy visiting birds.
Maintenance
- Change water every few days to keep it fresh and prevent mosquito larvae.
- Clean algae or dirt with a soft brush and water; avoid harsh chemicals that could harm wildlife.
- Reapply sealer every 1–2 years or as recommended by the sealer manufacturer.
Troubleshooting & tips
- Leaf sticks to concrete: always use a release agent and don’t let the concrete over‑cure onto the leaf. If some leaf fibres remain, gently scrub them off after the concrete is fully cured.
- Cracks: avoid mixing too dry or curing too quickly. Keeping the piece covered during initial curing helps prevent cracking.
- Heavy dish: keep thickness 10–15 mm and use a sturdy pedestal. For larger pieces, consider making a reinforced base with chicken wire or fibreglass mesh embedded in the concrete (advanced).
- Colour: add masonry pigments to the dry mix to tint the concrete; test small batches first.
Variations
- Make a set of small leaf saucers for multiple stations.
- Use silicone leaf moulds for repeated identical pieces.
- Combine with mosaic edges (adhere tile pieces after curing) for a decorative rim.
If you like this article, you’ll love 25 DIY Garden Ornaments Ideas to Add Charm to Your Backyard