DIY Acoustic Soundproof Panels That Look Like Art
Tired of echo-filled rooms but don’t want to compromise your carefully curated interior design? Decorative acoustic panels DIY projects offer the perfect solution. These dual-purpose panels reduce sound reflection and echo while serving as stunning wall art that enhances your space. In this guide, you’ll discover how to create professional-quality acoustic panels that guests will mistake for gallery-worthy art pieces, all while dramatically improving your room’s sound quality.
The Dual Benefits of Decorative Acoustic Panels
Before diving into the how-to, let’s understand why these panels are worth your time. Acoustic panels serve two essential purposes that transform any space:
Sound Improvement Benefits
- Reduces echo and reverberation by up to 80%
- Improves speech clarity in home offices and meeting spaces
- Enhances music and movie audio quality
- Creates a more peaceful environment by absorbing ambient noise
- Prevents sound from bouncing off hard surfaces
Aesthetic Benefits
- Serves as statement wall art that guests will admire
- Customizable to match any interior design style
- Creates visual interest through texture and pattern
- Adds dimension to flat walls
- Can be arranged in artistic configurations
The best part? You’ll spend a fraction of what commercial decorative acoustic panels cost. Most store-bought options run $150-300 per panel, while our DIY approach costs just $20-40 per panel depending on your fabric choices.
Materials and Tools You’ll Need
Gathering the right supplies is crucial for creating panels that look professional and perform effectively. Here’s everything you’ll need to create one 24″ x 48″ decorative acoustic panel:
Materials List
- Wood Frame Materials: 1″ x 4″ pine boards (8′ length) or pre-made canvas stretcher bars
- Sound Absorption: Rockwool Safe and Sound insulation (2″ thick) or Owens Corning 703/705 fiberglass
- Decorative Fabric: 1 yard of 54″+ wide fabric per panel (100% cotton or polyester blend)
- Backing Material: Thin cotton fabric or breathable landscape fabric
- Fasteners: Wood screws (1¼”), staples, picture hanging hardware
Tools Required
- Cutting Tools: Saw (circular, miter, or hand), utility knife, fabric scissors
- Assembly Tools: Drill/driver, staple gun, measuring tape, square
- Safety Equipment: Dust mask, gloves, eye protection (especially when cutting insulation)
- Optional: Iron for fabric, corner clamps for frame assembly
Pro Tip: For the most visually stunning panels, choose fabrics with patterns that complement your existing decor. Geometric patterns, abstract designs, and textured fabrics create the most artistic effect while still allowing sound to pass through to the absorption material.
Selecting Fabrics That Look Great and Perform Well
The fabric you choose makes all the difference in transforming functional acoustic panels into stunning wall art. Here’s how to select fabrics that deliver on both aesthetics and acoustics:
Acoustic Performance Considerations
- Breathability: Choose loosely woven fabrics that allow sound waves to pass through to the absorption material
- Test Method: Hold fabric up to your mouth and try to blow air through it—if air passes easily, sound will too
- Avoid: Vinyl, leather, or heavily treated fabrics that reflect rather than transmit sound
- Best Options: 100% cotton, light polyester, linen blends, and burlap offer excellent sound transparency
Visual Appeal Factors
Modern Geometric
Bold geometric patterns create visual interest and complement contemporary spaces. Look for triangles, hexagons, or abstract shapes in contrasting colors.
Subtle Textures
Textured fabrics like linen or tweed add dimension without overwhelming a space. These work well in minimalist or Scandinavian-inspired rooms.
Artistic Prints
Watercolor-inspired prints, abstract designs, or nature motifs can make panels look like intentional art pieces rather than acoustic treatments.
Step-by-Step Construction Guide
Now that you’ve gathered your materials and selected your fabric, it’s time to build your decorative acoustic panels. Follow these steps for professional-quality results:
1. Build the Wooden Frame
- Measure and cut your 1″ x 4″ pine boards to create a rectangular frame (typically 24″ x 48″ works well)
- Cut the ends at 45° angles for professional-looking mitered corners
- Apply wood glue to the joints and assemble the frame
- Secure corners with screws or corner brackets for added stability
- Sand any rough edges for a smooth finish
Time-Saving Alternative: If you’re not comfortable with woodworking, pre-made canvas stretcher bars from art supply stores work perfectly and come in various sizes with pre-mitered corners.
2. Prepare and Insert the Acoustic Insulation
- Put on protective gear (mask, gloves, long sleeves) before handling insulation
- Measure the interior dimensions of your frame
- Cut the Rockwool or fiberglass insulation to size using a utility knife (cut it slightly larger than the frame for a snug fit)
- Test fit the insulation in the frame—it should fit snugly without compressing too much
Safety First: Always wear protective gear when handling insulation. Rockwool and fiberglass can irritate skin, eyes, and lungs. Work in a well-ventilated area and clean up thoroughly afterward.
3. Apply the Decorative Fabric
- Iron your fabric to remove any wrinkles
- Cut fabric approximately 6″ larger than your frame on all sides
- Place the frame face-down on the fabric (centered)
- Starting from the middle of one side, pull fabric taut and staple to the back of the frame
- Continue stapling, working from the center outward on each side, maintaining even tension
- Create neat corners by folding fabric like you’re wrapping a present
- Trim excess fabric, leaving about 1″ beyond the staples
4. Add Backing and Hanging Hardware
- Cut backing fabric to the size of your frame
- Staple backing fabric to the frame, enclosing the insulation
- Attach picture hanging hardware to the back of the frame
- For heavier panels, use two hanging points for better stability
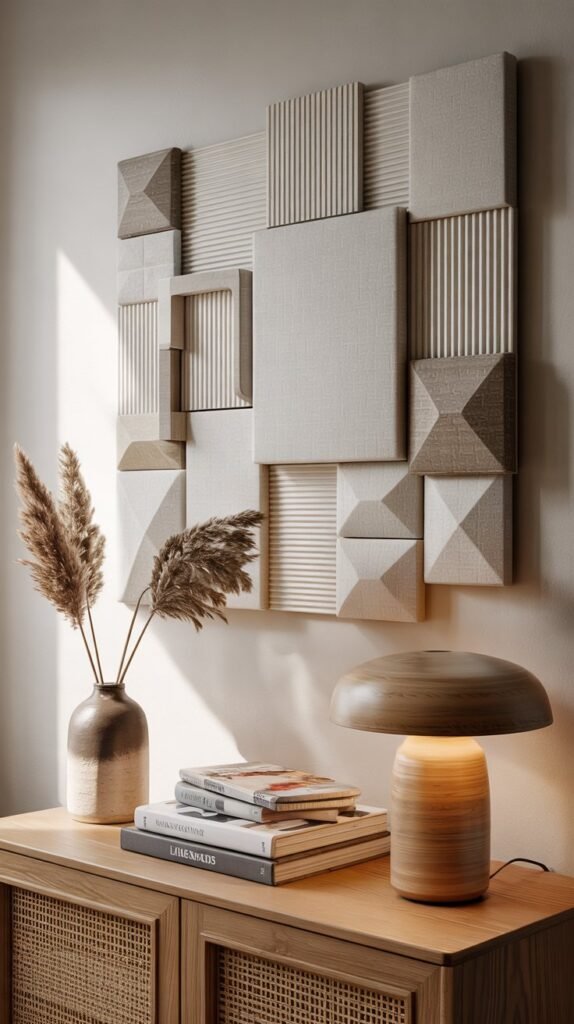
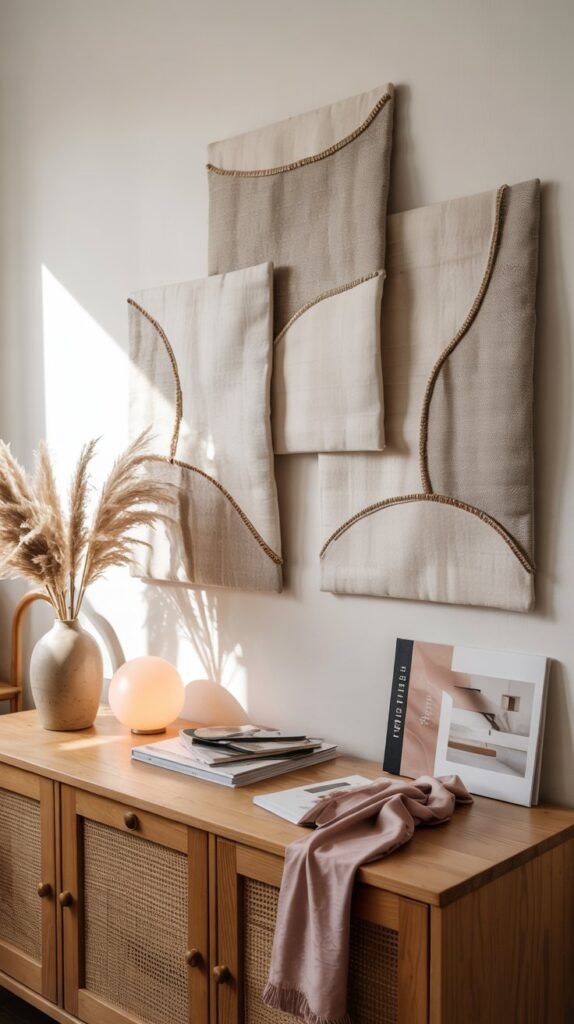
Creating an Artistic Panel Arrangement
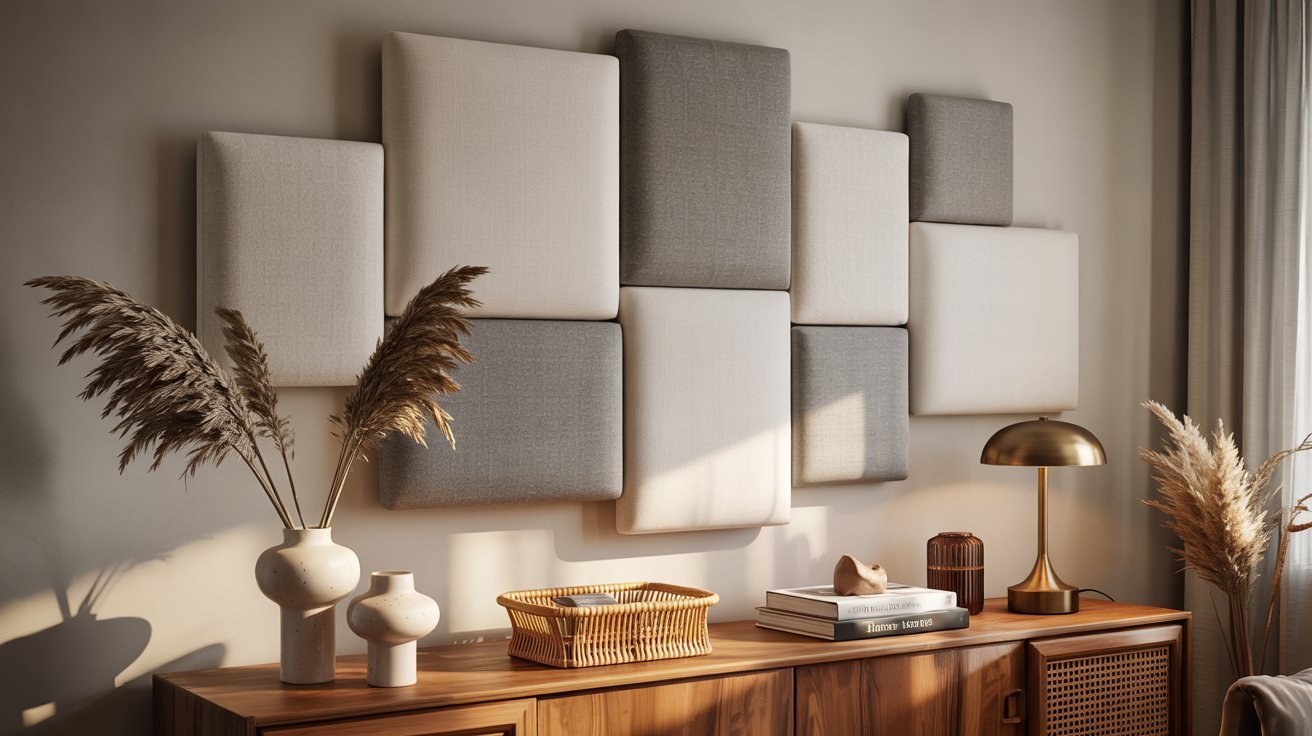
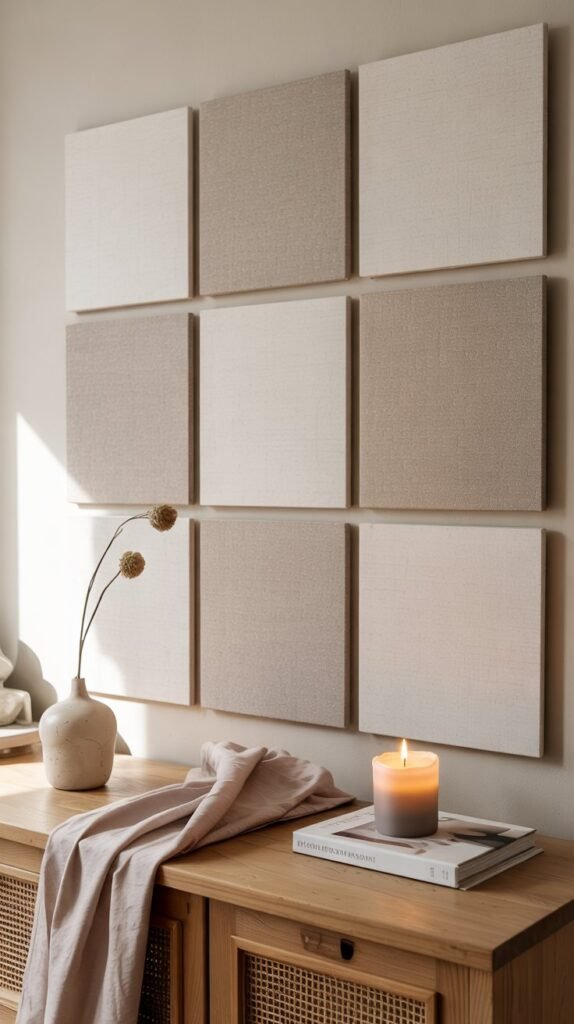
The way you arrange your decorative acoustic panels can transform them from functional sound absorbers into a stunning focal point. Here are some designer-approved layout ideas:
Grid Pattern
The most straightforward arrangement is a symmetrical grid. Use panels of the same size with complementary fabrics for a clean, modern look. Works well in home offices and media rooms.
Staggered Gallery
Create visual interest by staggering panels at different heights. Mix square and rectangular panels for added dimension. Perfect for living rooms and creative spaces.
Focal Point Cluster
Group panels of various sizes around a central point, like above a sofa or bed. Use a cohesive color palette with varying patterns for an artistic statement.
Installation Tips for Perfect Placement
- Plan Before Hanging: Use paper templates to test different arrangements without making holes
- Optimal Height: Center panels at ear level (when seated) for maximum acoustic benefit
- Strategic Placement: Focus on first reflection points—the walls where sound first bounces between you and speakers
- Spacing: Leave 2-4 inches between panels for the most pleasing visual effect
- Balance: Distribute panels evenly throughout the room for balanced acoustics
Money-Saving Strategies
- Bulk Purchasing: Buy materials for multiple panels at once—insulation typically comes in packs that can make 3-6 panels
- Fabric Sales: Look for remnants, end-of-roll discounts, or repurpose old curtains or bedsheets
- Tool Sharing: Borrow tools or use community workshop spaces instead of purchasing
- Recycled Materials: Use reclaimed wood for frames or repurposed materials when possible
Value Perspective: A set of six store-bought decorative acoustic panels could cost $900-1,800, while the same number of DIY panels might cost just $120-250—saving you up to 85% while achieving the same acoustic performance and aesthetic appeal.
Troubleshooting Tips and Creative Variations
Even the most straightforward DIY projects can present challenges. Here are solutions to common issues and creative variations to make your acoustic panels truly unique:
How do I fix uneven fabric tension?
If you notice wrinkles or uneven tension after stapling, don’t worry—simply remove the staples in that section, adjust the fabric tension, and restaple. Start from the center of each side and work outward for the most even results.
What if my corners look messy?
For professional-looking corners, fold fabric like wrapping a present: pull the fabric straight up from the corner, create a triangular fold, then wrap the sides in. If corners still look bulky, trim excess fabric before folding.
How can I make panels with curved or custom shapes?
For non-rectangular panels, create a template from cardboard first. Use a jigsaw to cut your frame pieces, then join them with corner brackets. Curved shapes require more fabric allowance and careful stapling to avoid puckers.
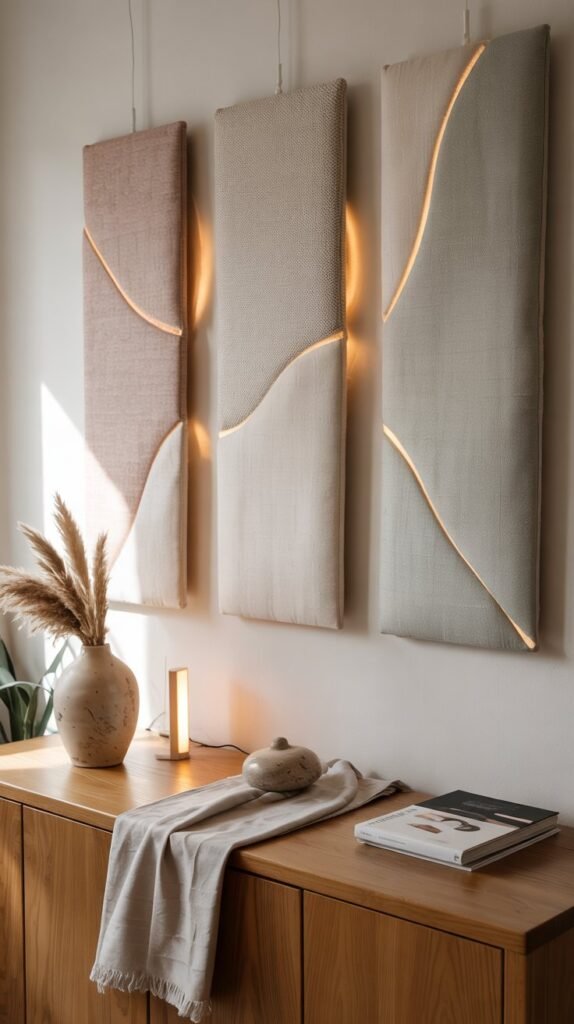
Creative Variations to Try
LED Backlit Panels
Add LED strip lights around the back perimeter of your panels for a floating, ambient glow effect. Perfect for home theaters or creating mood lighting.
Multi-Layer Fabric Art
Create artistic designs by layering cut fabric pieces on top of your base fabric. Secure additional fabric elements with fabric glue before stretching over the frame.
Geometric Panel Clusters
Build hexagonal or triangular frames that can be arranged in honeycomb or geometric patterns for a modern, sculptural wall feature.
Ready to Transform Your Space with Decorative Acoustic Panels?
Creating your own decorative acoustic panels DIY project combines the best of both worlds, significantly improved room acoustics and stunning wall art that enhances your decor. With just a weekend of work and a fraction of the cost of commercial options, you can transform echo-filled spaces into rooms with crystal-clear sound and eye-catching visual appeal.
Remember that acoustic treatment doesn’t have to look utilitarian or out of place in your carefully designed space. By selecting fabrics that complement your decor and arranging panels thoughtfully, you’ll create a feature that guests will assume is purely decorative, until they notice how much better everything sounds.