25 DIY Garden Ornaments Ideas to Add Charm to Your Backyard
Your garden is more than just plants and flowers, it’s an extension of your home and personality. Adding handcrafted garden ornaments can transform an ordinary outdoor space into a magical retreat that reflects your unique style. Whether you’re looking to create a whimsical wonderland, a serene sanctuary, or simply add a pop of color, these DIY garden ornaments ideas will help you craft a space that feels distinctly yours, without breaking the bank.
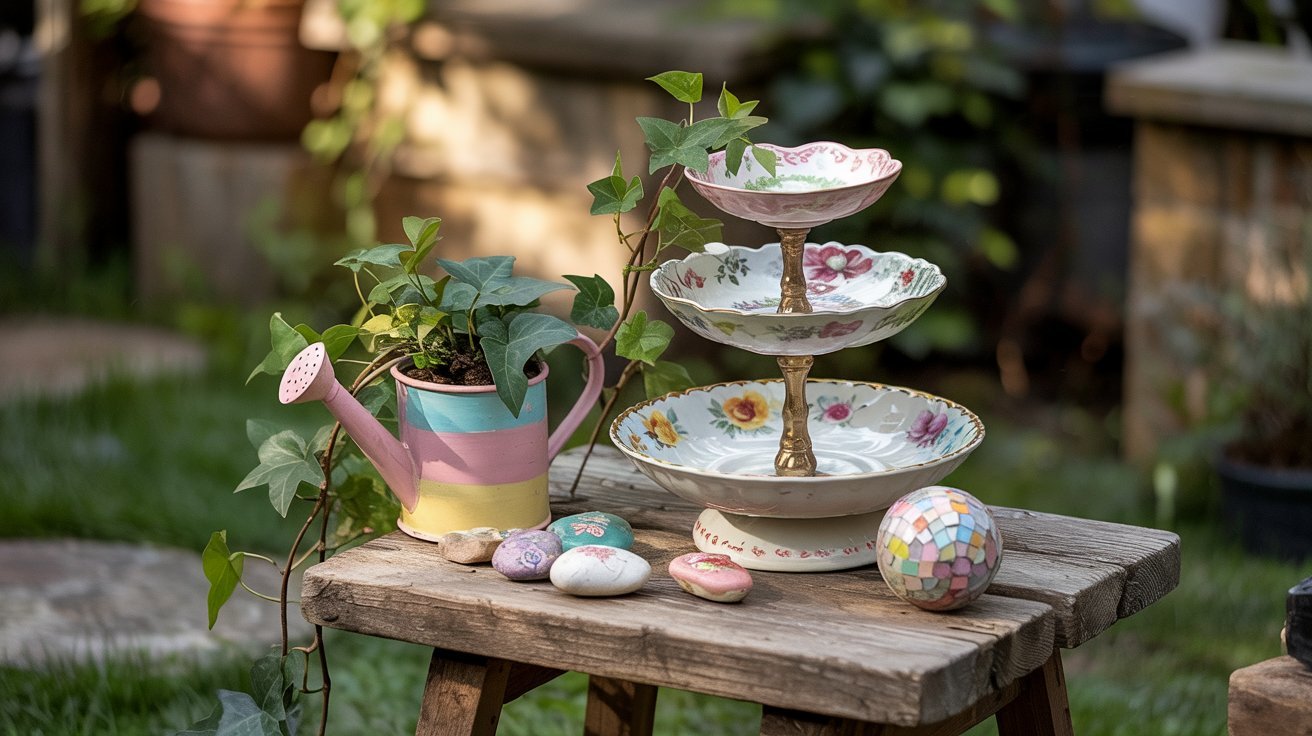
1. Vintage Teacup Bird Bath
Transform old teacups and saucers into a charming tiered bird bath that adds a touch of vintage elegance to your garden.
Materials Needed:
- 3-4 vintage teacups and saucers
- 1 dinner plate for the base
- Waterproof adhesive (E6000 works well)
- Metal rod or copper pipe (about 3 feet)
- Outdoor sealant spray
Instructions:
- Clean all dishes thoroughly and let dry completely
- Arrange your pieces from largest at bottom to smallest at top
- Apply adhesive between each piece, allowing proper drying time
- Secure the bottom plate to the metal rod by drilling a small hole
- Push the rod into soil about 8-10 inches deep
- Spray with outdoor sealant for weather protection
- Fill the top cup with fresh water
Difficulty Level: Easy to Moderate
Time Commitment: 30 minutes (plus drying time)
Cost Estimate: $10-$25 (less if using thrifted items)
2. Simple Concrete Leaf Bird Bath
Create a natural-looking bird bath by using large leaves as molds for concrete. The result is a stunning, organic shape that blends beautifully with your garden.

Materials Needed:
- Large leaves (rhubarb, hosta, or elephant ear work best)
- Quick-setting concrete mix
- Large plastic container for mixing
- Cooking spray
- Sand
- Pedestal or large rocks (optional)
Instructions:
- Create a mound of sand and place leaf vein-side up
- Spray leaf with cooking spray as a release agent
- Mix concrete according to package directions
- Spread concrete over leaf in a 1/2-inch layer
- Let dry for 24-48 hours
- Gently flip and remove leaf
- Seal with concrete sealer if desired
Difficulty Level: Moderate
Time Commitment: 30 minutes (plus 1-2 days drying time)
Cost Estimate: $15-$30
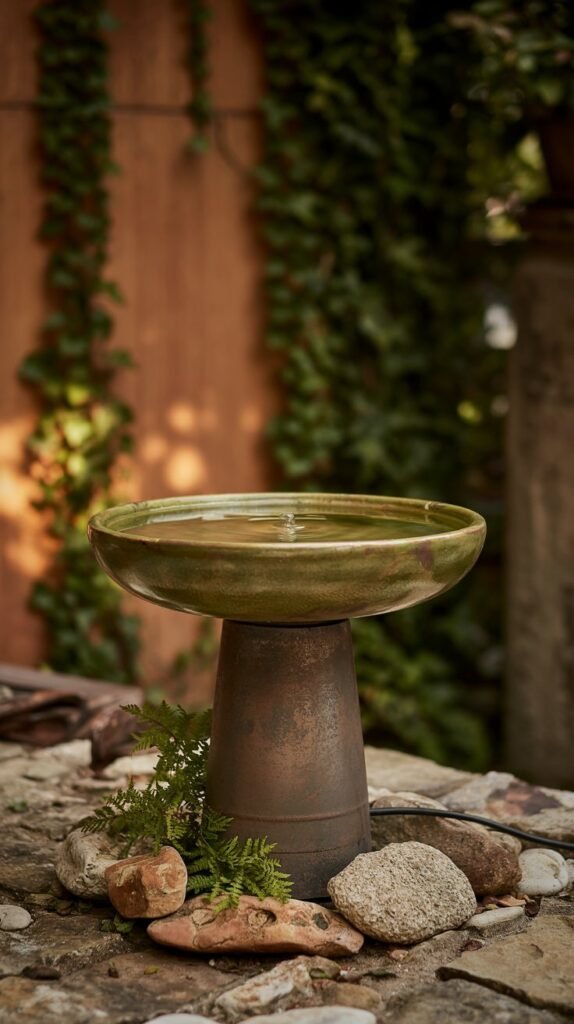
3. Repurposed Lamp Bird Bath
Give new life to an old lamp by transforming it into an elegant bird bath that adds height and visual interest to your garden.
Materials Needed:
- Old floor or table lamp (metal base works best)
- Shallow glass or ceramic bowl
- Outdoor spray paint
- Waterproof adhesive
- Outdoor clear sealant
Instructions:
- Remove electrical components from the lamp
- Clean the lamp base thoroughly
- Spray paint with outdoor paint in your chosen color
- Allow paint to dry completely (24 hours)
- Attach bowl to the top using waterproof adhesive
- Seal any areas that might collect water
- Place in garden and fill bowl with water
Difficulty Level: Easy
Time Commitment: 20 minutes (plus drying time)
Cost Estimate: $5-$20 (using thrifted items)
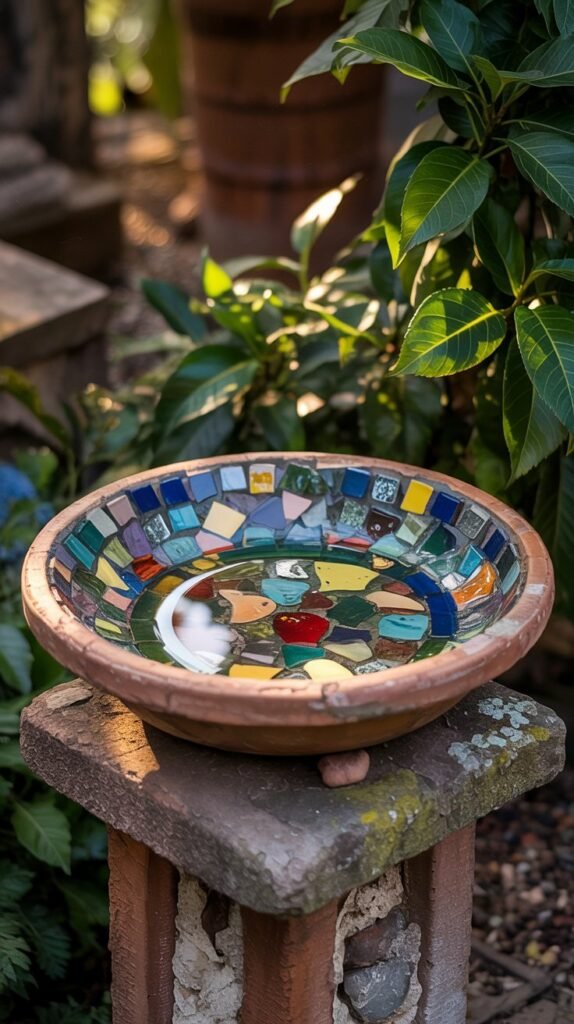
4. Mosaic Tile Bird Bath
Create a colorful focal point by decorating a simple bird bath with mosaic tiles. This project allows for endless customization to match your garden’s color scheme.
Materials Needed:
- Concrete bird bath base (or terra cotta pot and saucer)
- Ceramic tile pieces or broken dishes
- Tile adhesive
- Grout (outdoor formula)
- Grout sealer
- Rubber gloves and safety glasses
Instructions:
- Clean the bird bath thoroughly
- Arrange tile pieces in desired pattern before gluing
- Apply adhesive and place tiles one by one
- Allow adhesive to dry completely (24 hours)
- Apply grout between tiles, wiping excess with damp sponge
- Let grout dry and apply grout sealer
- Wait 48 hours before filling with water
Difficulty Level: Moderate
Time Commitment: 1-2 hours (plus drying time)
Cost Estimate: $30-$50
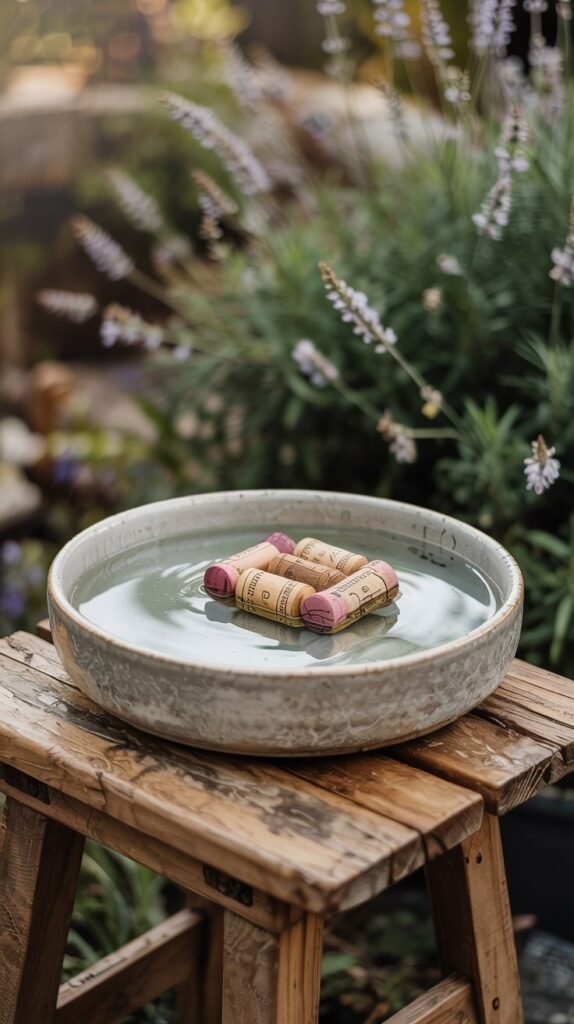
5. Floating Wine Cork Bird Bath
This simple yet effective wine cork bird bath uses recycled wine corks to create a floating platform that birds can safely perch on while bathing.
Materials Needed:
- Wide, shallow bowl or container
- 20-30 wine corks
- Hot glue gun and glue sticks
- Decorative rocks (optional)
- Small plants for surrounding area (optional)
Instructions:
- Clean and dry all corks thoroughly
- Arrange corks in a circular pattern that fits your container
- Hot glue corks together side by side
- Create a stable, flat raft of corks
- Place in shallow container and fill with water
- Add decorative rocks around the edge if desired
Difficulty Level: Easy
Time Commitment: 15-20 minutes
Cost Estimate: $5-$15 (free if reusing materials)
Upcycled Garden Pot and Planter Ideas
Give new life to everyday objects by transforming them into unique planters that add personality to your garden.
6. Colorful Boot Planters
Old boots and shoes make charming planters that add whimsy and color to garden steps or fence lines.
Materials Needed:
- Old boots or shoes
- Drill with small bit
- Outdoor spray paint (optional)
- Potting soil
- Small plants or flowers
- Small rocks for drainage
Instructions:
- Clean shoes thoroughly and let dry
- Drill several drainage holes in the bottom
- Paint if desired and allow to dry
- Add small rocks at the bottom for drainage
- Fill with potting soil
- Plant flowers or succulents
- Arrange in your garden or on steps
Difficulty Level: Easy
Time Commitment: 15 minutes
Cost Estimate: $5-$15 (mostly for plants)
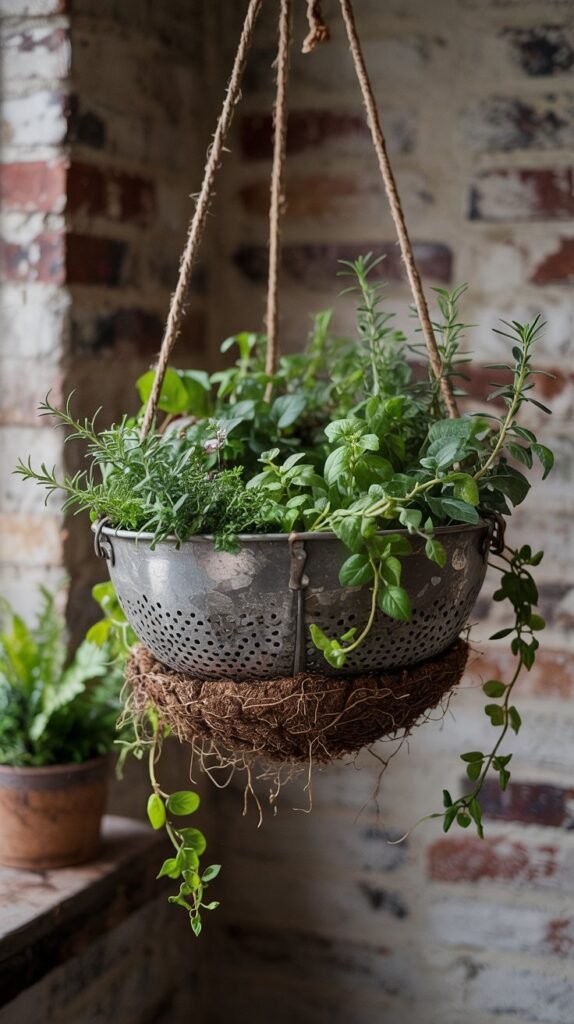
7. Colander Hanging Planters
Metal colanders make perfect hanging planters with built-in drainage, ideal for herbs or trailing flowers.
Materials Needed:
- Metal colander
- Spray paint (optional)
- Coconut coir liner or moss
- Potting soil
- Plants of your choice
- Chain or rope for hanging
- S-hooks or carabiners
Instructions:
- Clean colander and spray paint if desired
- Line colander with coconut coir or moss
- Fill with potting soil
- Plant flowers or herbs
- Attach chains or rope to the handles
- Hang from a hook, branch, or shepherd’s hook
Difficulty Level: Easy
Time Commitment: 20 minutes
Cost Estimate: $10-$25
8. Broken Pot Fairy Garden
Don’t throw away that cracked terra cotta pot! Transform it into a magical multi-level fairy garden that will delight visitors of all ages.
Materials Needed:
- Broken terra cotta pot
- Potting soil
- Small plants (succulents work well)
- Miniature fairy garden accessories
- Small pebbles or gravel
- Moss
- Waterproof glue (optional)
Instructions:
- Arrange broken pot pieces to create a tiered effect
- Secure pieces with waterproof glue if needed
- Fill the base and spaces between shards with soil
- Plant small plants at different levels
- Add pebbles to create paths
- Decorate with fairy garden accessories
- Add moss for a finished look
Difficulty Level: Moderate
Time Commitment: 30 minutes
Cost Estimate: $15-$40 (depending on accessories)
9. Vintage Ladder Plant Display
An old wooden ladder creates a stunning vertical garden display that adds height and visual interest to any corner of your yard.
Materials Needed:
- Old wooden ladder
- Sandpaper
- Outdoor wood sealer or paint
- Potted plants in various sizes
- Decorative elements (optional)
Instructions:
- Clean ladder thoroughly
- Sand rough edges for safety
- Apply wood sealer or paint
- Allow to dry completely
- Position ladder in desired location
- Arrange potted plants on steps
- Secure ladder to wall or fence if needed for stability
Difficulty Level: Easy
Time Commitment: 30 minutes (plus drying time)
Cost Estimate: $0-$20 (excluding plants)
10. Tin Can Wind Chime Planters
Combine the gentle sound of wind chimes with the beauty of hanging plants by creating these dual-purpose garden ornaments.
Materials Needed:
- Various sized tin cans
- Outdoor spray paint
- Drill with small bit
- String or fishing line
- Beads or small metal objects
- Small plants (succulents or air plants)
- Potting soil
Instructions:
- Clean cans and remove labels
- Drill drainage holes in bottoms and small holes around rims
- Spray paint in desired colors
- Thread string through rim holes
- Add beads or metal objects as chimes
- Fill cans with soil and plants
- Hang from a branch or hook
Difficulty Level: Moderate
Time Commitment: 30 minutes
Cost Estimate: $10-$20
Creative Yard Sculpture Ideas
Add artistic flair to your garden with these unique sculpture projects that range from simple to sophisticated.
11. Kitchen Utensil Flowers
Transform old spoons, forks, and other kitchen tools into whimsical metal flowers that never need watering.
Materials Needed:
- Old metal utensils (spoons, forks, etc.)
- Metal rods or pipes for stems
- Spray paint in various colors
- Drill with metal bit
- Bolts and nuts
- Pliers and wire cutters
- Outdoor metal sealer
Instructions:
- Clean all metal pieces thoroughly
- Bend utensils into petal shapes using pliers
- Drill holes in center of each “petal”
- Attach petals to center using bolts
- Attach assembled flower to metal rod
- Spray paint in desired colors
- Seal with outdoor metal sealer
- “Plant” in garden by pushing rod into soil
Difficulty Level: Moderate to Difficult
Time Commitment: 30 minutes per flower
Cost Estimate: $5-$20
12. Bowling Ball Mosaic Garden Spheres
Old bowling balls become dazzling garden art when covered with colorful glass or tile pieces.
Materials Needed:
- Old bowling ball
- Glass gems, broken tiles, or mirror pieces
- Outdoor adhesive (like E6000)
- Outdoor grout
- Grout sealer
- Rubber gloves
- Sponge
Instructions:
- Clean bowling ball thoroughly
- Plan your design (random or pattern)
- Apply adhesive to back of each piece and attach to ball
- Work in small sections, allowing adhesive to set
- Once covered, let dry for 24 hours
- Apply grout between pieces
- Wipe excess grout with damp sponge
- Apply grout sealer when dry
Difficulty Level: Moderate
Time Commitment: 1-2 hours (plus drying time)
Cost Estimate: $20-$40
13. Copper Pipe Garden Sculpture
Create an elegant, modern sculpture using copper pipes that will develop a beautiful patina over time.
Materials Needed:
- Copper pipes in various diameters
- Copper pipe fittings (elbows, tees, caps)
- Pipe cutter
- Copper pipe glue or solder
- Sandpaper
- Metal stake or rebar for support
Instructions:
- Sketch your design on paper
- Cut copper pipes to desired lengths
- Sand cut edges smooth
- Assemble pieces using fittings
- Secure with copper pipe glue or solder
- Attach to metal stake for ground support
- Install in garden
Difficulty Level: Moderate to Difficult
Time Commitment: 1 hour
Cost Estimate: $30-$60
14. Concrete Hand Planters
Create unique planters shaped like hands that add an artistic, sculptural element to your garden.
Materials Needed:
- Disposable gloves (latex or nitrile)
- Quick-setting concrete mix
- Plastic container for mixing
- Vaseline or cooking spray
- Small plants (succulents work well)
- Potting soil
- Drill with small bit
Instructions:
- Apply Vaseline to outside of one glove
- Mix concrete according to package directions
- Fill glove with concrete mixture
- Shape hand as desired (prop fingers with sand)
- Let dry for 24-48 hours
- Carefully cut away glove
- Drill drainage hole in palm
- Fill with soil and plant
Difficulty Level: Moderate
Time Commitment: 30 minutes (plus drying time)
Cost Estimate: $15-$25
15. Wine Bottle Garden Border
Create a colorful, eye-catching border for garden beds using recycled wine bottles.
Materials Needed:
- Empty wine bottles (various colors if possible)
- Garden spade
- Level
- Sand (optional)
Instructions:
- Remove labels and clean bottles thoroughly
- Dig a trench along garden edge (about 6″ deep)
- Place bottles upside down in trench
- Check that bottles are level and evenly spaced
- Fill in soil around bottles, tamping firmly
- Add sand at base for additional drainage if needed
Difficulty Level: Easy
Time Commitment: 30 minutes
Cost Estimate: $0 (using recycled bottles)
Decorative Garden Accent Ideas
These smaller decorative elements add personality and charm to every corner of your garden.
16. Painted Garden Rocks
Transform ordinary stones into colorful garden accents with a little paint and creativity.
Materials Needed:
- Smooth rocks in various sizes
- Acrylic paints
- Paintbrushes
- Clear outdoor sealer spray
- Pencil for sketching designs
Instructions:
- Clean rocks and let dry completely
- Sketch design on rocks with pencil
- Paint designs using acrylic paints
- Allow paint to dry completely
- Spray with clear outdoor sealer
- Let dry for 24 hours before placing in garden
Difficulty Level: Easy
Time Commitment: 20-30 minutes per rock (plus drying time)
Cost Estimate: $10-$20 for supplies
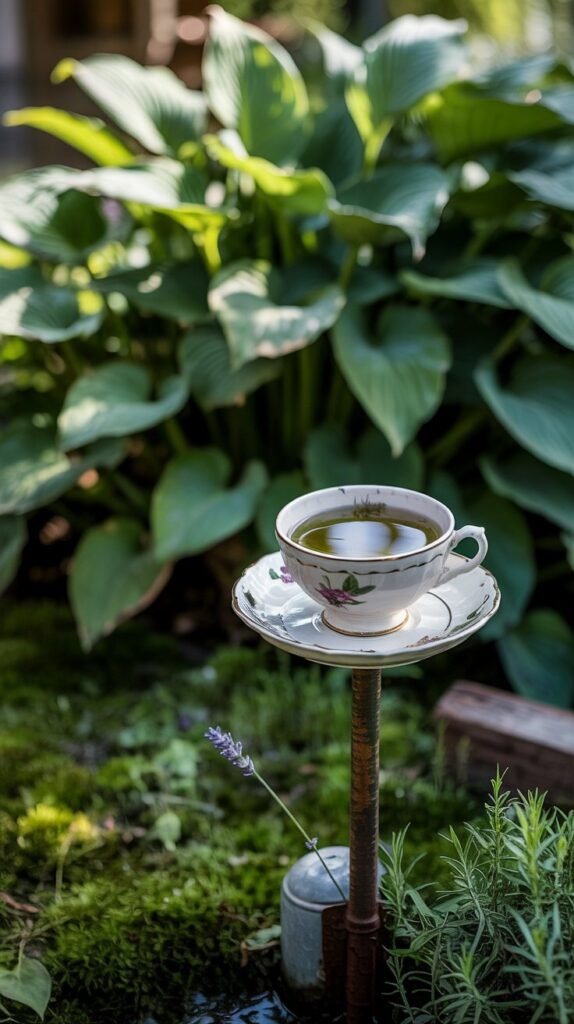
17. Teacup Toadstool Garden Ornaments
Create whimsical toadstools using teacups and saucers that add a touch of fairy-tale charm to your garden.
Materials Needed:
- Old teacups and saucers
- Wooden dowels or metal rods
- Outdoor adhesive
- Outdoor acrylic paint
- Clear outdoor sealer
- Drill with small bit
Instructions:
- Drill small hole in center of saucer
- Paint teacup and saucer in mushroom colors
- Add details like dots or patterns
- Let paint dry completely
- Glue upside-down teacup to saucer
- Insert dowel through hole in saucer
- Seal with clear outdoor sealer
- Place in garden
Difficulty Level: Easy
Time Commitment: 30 minutes (plus drying time)
Cost Estimate: $5-$15 (using thrifted items)
18. Mason Jar Solar Lights
Create magical evening ambiance with these simple solar-powered lights in Mason jars.
Materials Needed:
- Mason jars with lids
- Solar garden lights
- Wire or strong adhesive
- Decorative wire for hanging (optional)
- Colored glass beads (optional)
Instructions:
- Remove the solar light from its stake
- Trace the light on the Mason jar lid
- Cut a hole in the lid slightly smaller than the light
- Push the light through the hole
- Secure with wire or adhesive
- Add decorative elements to jar if desired
- Place in sunny spot or hang with decorative wire
Difficulty Level: Easy
Time Commitment: 15 minutes
Cost Estimate: $10-$20
19. Decorative Garden Stepping Stones
Create personalized stepping stones that add both function and beauty to your garden paths.
Materials Needed:
- Concrete stepping stone mix
- Plastic molds (or cake pans)
- Decorative items (glass gems, tiles, shells)
- Cooking spray
- Mixing container and stirring stick
- Concrete sealer
Instructions:
- Spray mold with cooking spray
- Mix concrete according to package directions
- Pour into mold and smooth surface
- Arrange decorative items in concrete
- Let dry for 24-48 hours
- Remove from mold
- Apply concrete sealer
- Place in garden path
Difficulty Level: Easy to Moderate
Time Commitment: 30 minutes (plus drying time)
Cost Estimate: $15-$30
20. Butterfly Puddling Station
Attract beautiful butterflies to your garden with this simple puddling station that provides essential minerals.
Materials Needed:
- Shallow dish or plant saucer
- Sand
- Small rocks or pebbles
- Sea salt or Epsom salt
- Overripe fruit (optional)
Instructions:
- Place dish in sunny location near flowers
- Fill dish with sand
- Add a few small rocks for landing spots
- Mix a pinch of salt into the sand
- Moisten with water (keep damp, not flooded)
- Add small pieces of overripe fruit if desired
- Refresh water every few days
Difficulty Level: Very Easy
Time Commitment: 10 minutes
Cost Estimate: $0-$10
Additional Garden Ornament Ideas
Here are five more creative DIY garden ornaments to inspire your outdoor space.
21. Vintage Key Wind Chimes
Create a melodic garden accent using old keys that produces a gentle, tinkling sound in the breeze.
Materials Needed:
- Collection of old keys
- Small tree branch or driftwood
- Fishing line or thin wire
- Colorful beads
- Drill with small bit
- Outdoor string or rope for hanging
Instructions:
- Clean keys thoroughly
- Drill small holes in branch if needed
- Cut fishing line in varying lengths
- Thread keys and beads onto lines
- Secure lines to branch
- Attach hanging rope to branch
- Hang in garden where breeze will catch it
Difficulty Level: Easy
Time Commitment: 30 minutes
Cost Estimate: $5-$15
22. Decorative Garden Gate
Create a charming entrance to a garden section using an old window frame or salvaged door.
Materials Needed:
- Old window frame or salvaged door
- Hinges
- Wooden posts
- Concrete mix
- Decorative hardware
- Outdoor paint or sealer
- Post hole digger
Instructions:
- Clean and prepare frame or door
- Apply paint or sealer
- Dig holes for posts (at least 2 feet deep)
- Set posts in concrete and allow to cure
- Attach hinges to post and gate
- Add decorative hardware
- Plant climbing vines nearby if desired
Difficulty Level: Moderate to Difficult
Time Commitment: 1-2 hours (plus concrete curing time)
Cost Estimate: $20-$50
23. Tire Planter
Transform an old tire into a colorful flower planter that adds a pop of color to your garden.
Materials Needed:
- Old tire
- Utility knife
- Outdoor spray paint
- Drill with small bit
- Potting soil
- Flowers or plants
- Landscape fabric (optional)
Instructions:
- Clean tire thoroughly
- Turn tire inside-out (requires strength)
- Drill drainage holes in bottom
- Spray paint in desired color
- Allow paint to dry completely
- Line with landscape fabric if desired
- Fill with potting soil
- Plant flowers or plants
Difficulty Level: Moderate
Time Commitment: 30 minutes (plus drying time)
Cost Estimate: $10-$20
24. Garden Tool Trellis
Repurpose old garden tools into a functional and decorative trellis for climbing plants.
Materials Needed:
- Old garden tools (rakes, hoes, shovels)
- Wire or zip ties
- Metal posts or rebar
- Hammer
- Wire cutters
- Spray paint (optional)
Instructions:
- Clean tools thoroughly
- Paint tools if desired
- Pound metal posts into ground
- Arrange tools in desired pattern
- Secure tools to posts with wire or zip ties
- Plant climbing vines at base
- Train plants to grow on trellis
Difficulty Level: Moderate
Time Commitment: 30 minutes
Cost Estimate: $0-$10
25. Fairy Door Garden Accent
Add a touch of magic to your garden with a miniature fairy door attached to a tree or garden wall.
Materials Needed:
- Small piece of wood
- Craft sticks or small twigs
- Acrylic paint
- Small hinges and doorknob (optional)
- Outdoor adhesive
- Clear outdoor sealer
- Miniature accessories (optional)
Instructions:
- Cut wood to door size (about 4-6 inches tall)
- Create door frame with craft sticks or twigs
- Paint door and frame
- Add details like hinges and doorknob
- Seal with outdoor sealer
- Attach to tree or wall with adhesive
- Add miniature accessories like a welcome mat
Difficulty Level: Easy
Time Commitment: 30 minutes (plus drying time)
Cost Estimate: $5-$15
Weatherproofing and Maintenance Tips
Keep your DIY garden ornaments looking beautiful year-round with these simple weatherproofing and maintenance strategies.
Weatherproofing Materials
- Use marine-grade varnish for wooden items
- Apply clear outdoor sealer to painted surfaces
- Choose rust-resistant metals or apply rust inhibitor
- Seal grout on mosaic projects with grout sealer
- Use UV-resistant paints for items in direct sunlight
Seasonal Maintenance
- Clean ornaments seasonally with gentle soap and water
- Touch up paint as needed
- Reapply sealants annually
- Store delicate items indoors during harsh winter months
- Check for loose parts and repair as needed
Strategic Placement for Maximum Impact
The location of your garden ornaments can dramatically affect their visual impact and the overall feel of your outdoor space.
Create Focal Points
Place larger, more dramatic ornaments at the end of pathways or in corners to draw the eye and create visual destinations in your garden.
Consider Height Variation
Arrange ornaments at different heights to create visual interest. Hang items from trees, mount on walls, and place others at ground level.
Group in Odd Numbers
Arrange similar items in groups of three or five for a more aesthetically pleasing and natural-looking display.
Start Creating Your Magical Garden Today
With these 25 DIY garden ornaments ideas, you’re well on your way to creating a personalized outdoor space that reflects your creativity and style. Remember, the most charming gardens evolve over time, so start with one or two projects that inspire you most and gradually add more as inspiration strikes. Your garden is a canvas for self-expression,have fun bringing it to life with these handcrafted treasures!