DIY Vertical Vegetable Gardens for Small Spaces: Complete Guide
Looking at your tiny balcony or narrow side yard and thinking there’s no room for growing your own food? Think again! Vertical vegetable gardens are the perfect solution for urban dwellers, apartment residents, and anyone with limited outdoor space. By growing upward instead of outward, you can transform even the smallest areas (as little as 2–6 square feet) into productive mini-farms that yield fresh herbs, vegetables, and even some fruits throughout the growing season.
In this comprehensive guide, we’ll walk you through exactly how to build several types of vertical gardening systems that are perfect for small spaces, share which plants thrive in vertical settings, and provide essential care tips to ensure your garden flourishes. Whether you’re a complete beginner or have some gardening experience, these space-saving solutions will help you grow more food in less space, without breaking the bank.
Why Vertical Vegetable Gardens Make Sense for Small Spaces
Benefits of Vertical Gardening
- Maximizes limited space – grow 3x more in the same footprint
- Improves air circulation, reducing plant diseases
- Makes harvesting easier – no bending or kneeling
- Creates better sun exposure for plants
- Keeps vegetables cleaner and away from ground pests
- Adds visual interest and beauty to small outdoor spaces
- Can serve as privacy screens on balconies or patios
Challenges to Consider
- Requires more frequent watering than ground gardens
- Some systems need sturdy mounting or support
- Limited root space for some plants
- May need to consider weight restrictions on balconies
- Initial setup requires some DIY skills
The good news? All of these challenges can be easily addressed with proper planning and the right approach. Let’s dive into the practical systems you can build for your vertical vegetable garden.
4 DIY Vertical Gardening Systems You Can Build This Weekend
Each of these systems is designed for small spaces and can be customized to fit your specific area. We’ve included options for different skill levels, budgets, and space constraints.
1. Wall-Mounted Pocket Planter
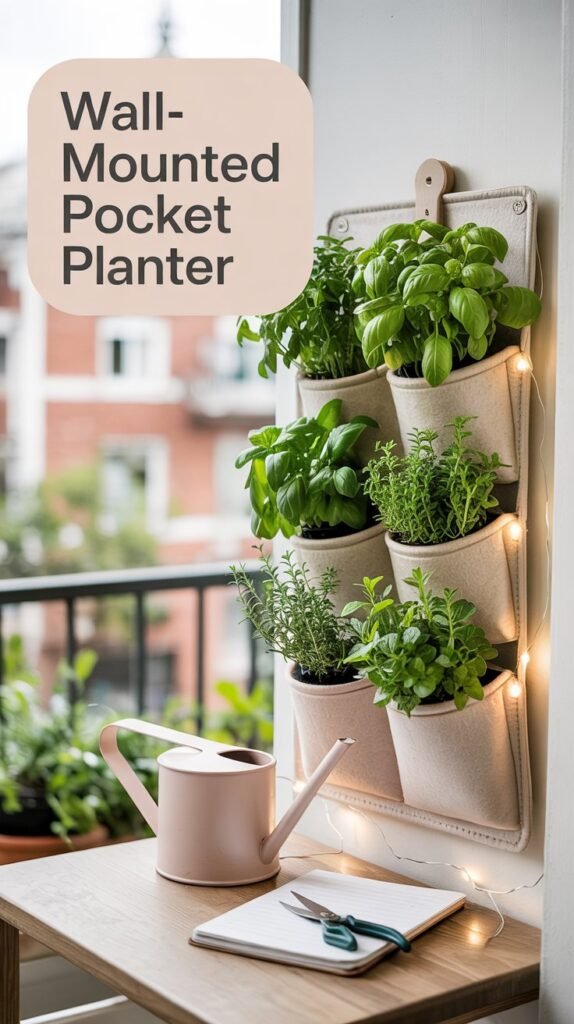
Perfect for: Balconies, fences, or any vertical wall space; ideal for herbs and leafy greens
Materials needed:
- Heavy-duty felt fabric (2 yards)
- Waterproof backing material (shower curtain or landscape fabric)
- Heavy-duty stapler and staples
- Grommets kit
- Sewing machine or fabric glue
- Potting mix (lightweight, moisture-retentive)
- Wall anchors and screws
DIY Instructions:
- Cut felt fabric into a rectangle 3 feet wide by 4 feet tall
- Cut waterproof backing to the same size
- Lay the waterproof backing flat, place felt on top
- Sew or glue the two layers together along the edges and in horizontal lines every 8 inches to create rows
- Sew or glue vertical lines to create pockets (6-8 inches wide)
- Install grommets in the top corners and middle for hanging
- Mount securely to wall using anchors and screws
- Fill pockets with potting mix and plant your chosen herbs or greens
Pro tip: Start planting from the bottom row and work your way up to avoid soil spillage.
2. Tiered Wooden Planter Stand
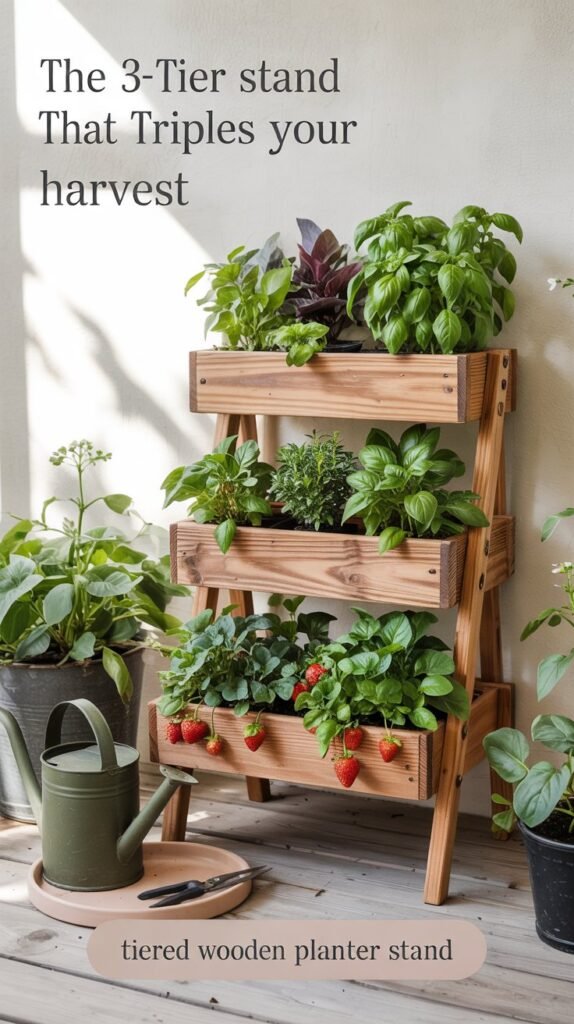
Perfect for: Patios, balconies, or narrow side yards; great for mixed vegetables
Materials needed:
- 1×8 lumber (untreated pine or cedar) – 4 boards at 8ft each
- 1×2 lumber for supports – 2 boards at 8ft each
- Exterior wood screws
- Drill with bits
- Measuring tape and pencil
- Sandpaper
- Exterior wood sealer or paint (optional)
- Landscape fabric
- Potting mix
DIY Instructions:
- Cut lumber to create three planter boxes of decreasing sizes (36″, 30″, and 24″ long)
- For each box, cut two pieces for the sides and two for the ends
- Assemble boxes using wood screws, pre-drilling holes to prevent splitting
- Cut 1×2 lumber to create corner supports for stacking
- Sand all edges smooth and apply sealer if desired
- Line each box with landscape fabric for drainage and soil retention
- Stack boxes with the largest on bottom, using corner supports to secure
- Fill with potting mix and plant according to sun needs (sun-loving plants on top)
Pro tip: Add small wheels to the bottom tier for easy movement if needed.
3. Hanging Gutter Garden
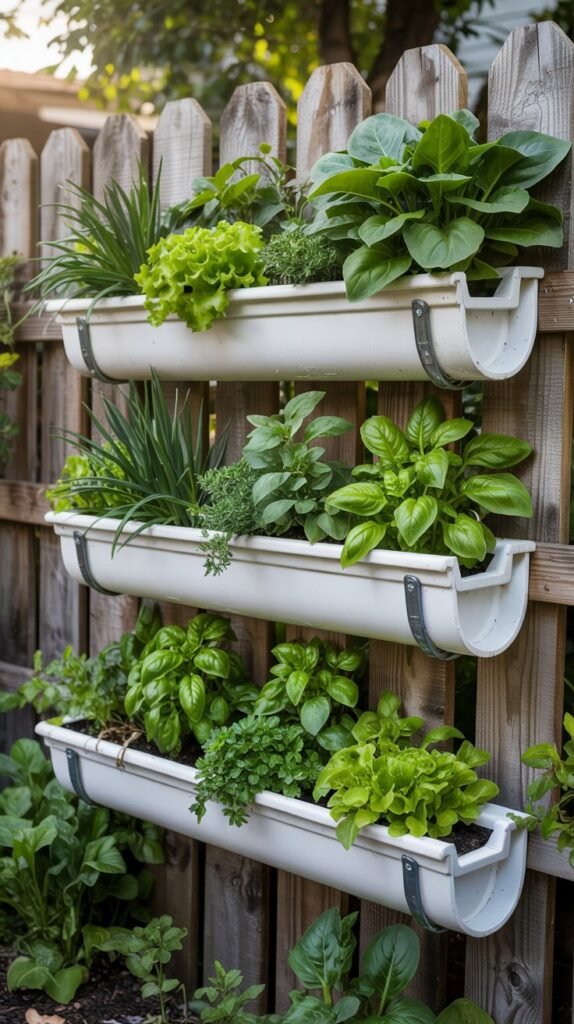
Perfect for: Fences, railings, or walls with good sun exposure; ideal for shallow-rooted plants
Materials needed:
- Vinyl rain gutters (10-foot sections)
- Gutter end caps
- Gutter mounting brackets
- Drill with bits
- Hacksaw or miter saw
- Level
- Screws and wall anchors
- 1/4″ drill bit for drainage holes
- Lightweight potting mix
DIY Instructions:
- Cut gutters to desired length (3-4 feet sections work well)
- Attach end caps to both ends of each gutter section
- Drill drainage holes every 6 inches along the bottom
- Mark mounting locations on wall or fence, ensuring they’re level
- Install mounting brackets using screws and anchors
- Attach gutters to brackets, staggering heights for better sun exposure
- Fill with lightweight potting mix
- Plant shallow-rooted vegetables like lettuce, spinach, radishes, or herbs
Pro tip: Angle gutters slightly for proper drainage and prevent waterlogging.
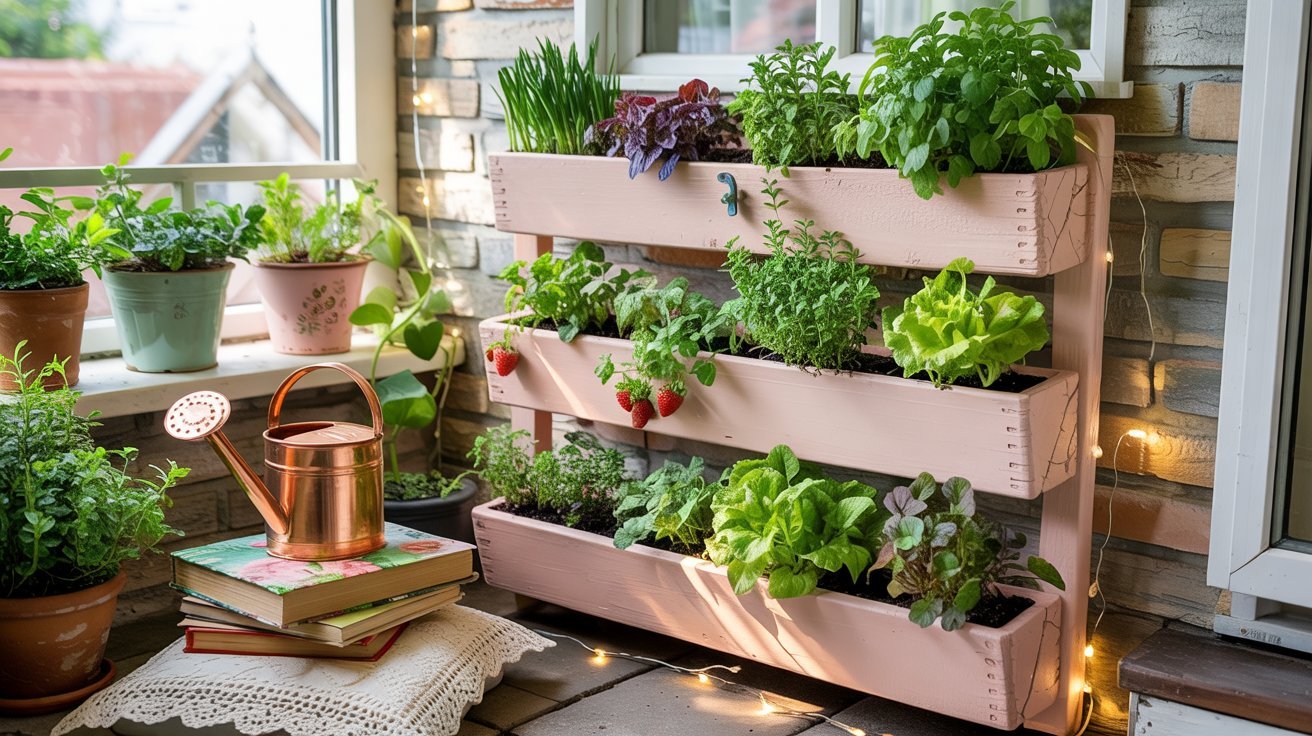
4. Upcycled Pallet Garden
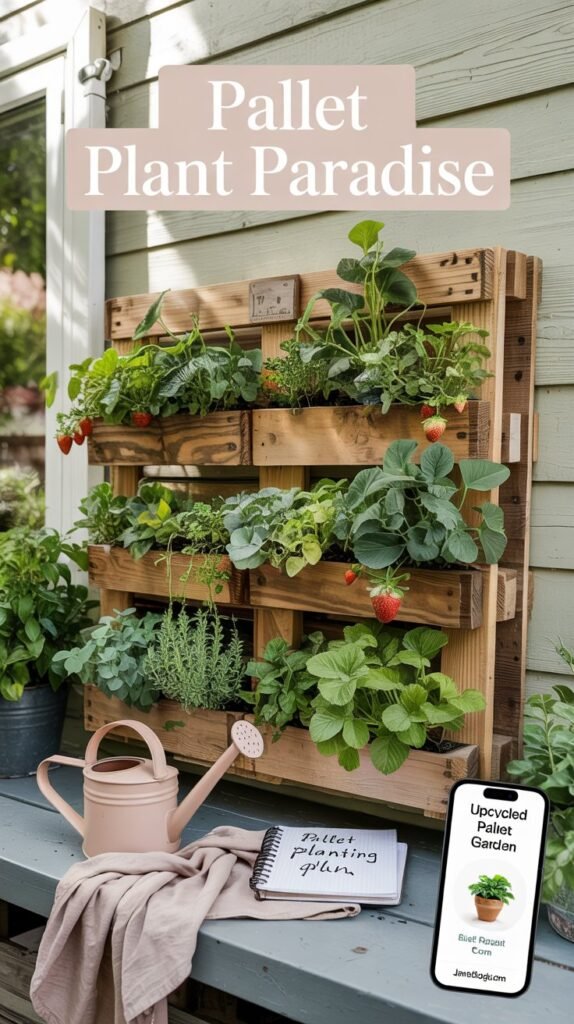
Perfect for: Any vertical space with good sun; versatile for mixed plantings
Materials needed:
- Wooden pallet (heat-treated, marked with “HT” stamp)
- Sandpaper (medium and fine grit)
- Staple gun and heavy-duty staples
- Landscape fabric (double layer)
- Potting mix
- Optional: Wood sealer or paint
- Wall anchors if mounting to wall
DIY Instructions:
- Select a pallet that’s in good condition and heat-treated (not chemically treated)
- Sand all surfaces thoroughly to remove splinters
- Apply wood sealer or paint if desired (allow to dry completely)
- With pallet laying flat, staple landscape fabric to the back, bottom, and sides
- Create a second layer of landscape fabric for durability
- Stand pallet upright and begin filling with potting mix from the top
- Pack soil firmly into all spaces between slats
- Cut small X-shaped openings in the fabric between slats for planting
- Insert plants through openings, starting from the bottom and working up
- Secure pallet to wall or fence if needed for stability
Pro tip: Keep the pallet flat for 1-2 weeks after planting to allow roots to establish before standing upright.
Best Plants for Vertical Vegetable Gardens
Not all vegetables are suitable for vertical growing. Here are the best options based on the type of vertical system you’re using:
| Plant Type | Best For | Sunlight Needs | Recommended Varieties |
| Cherry Tomatoes | Hanging baskets, tiered planters | Full sun (6-8 hours) | ‘Tumbling Tom’, ‘Tiny Tim’, ‘Micro Tom’ |
| Leafy Greens | Pocket planters, gutter gardens | Partial sun (4-6 hours) | ‘Baby Oakleaf’, ‘Tom Thumb’, ‘Salad Bowl’ |
| Herbs | All vertical systems | Varies by herb | Basil, thyme, oregano, mint, chives |
| Bush Beans | Tiered planters, pallet gardens | Full sun (6-8 hours) | ‘Bush Blue Lake’, ‘Mascotte’, ‘Provider’ |
| Peppers (Compact) | Tiered planters | Full sun (6-8 hours) | ‘Redskin’, ‘Pretty N Sweet’, ‘Cajun Belle’ |
| Strawberries | Pocket planters, gutter gardens | Full sun (6-8 hours) | ‘Alpine’, ‘Tristan’, ‘Berri Basket’ |
| Cucumbers (Compact) | Trellised systems | Full sun (6-8 hours) | ‘Spacemaster’, ‘Bush Champion’, ‘Salad Bush’ |
| Radishes | Gutter gardens, pocket planters | Partial sun (4-6 hours) | ‘Cherry Belle’, ‘French Breakfast’, ‘Easter Egg’ |
Plant Spacing Tip: In vertical gardens, you can plant more densely than in traditional gardens. For most leafy greens and herbs, space plants 4-6 inches apart. For fruiting plants like tomatoes and peppers, allow 8-12 inches between plants.
Essential Watering Tips for Vertical Gardens
Vertical gardens dry out faster than traditional beds because they have more exposure to air and often limited soil volume. Proper watering is critical for success:
Manual Watering Methods
- Long-spout watering can: Helps reach upper plants without spillage
- Spray bottle: Good for seedlings and delicate herbs
- Watering wand: Extends reach and provides gentle shower
- Bottom watering: For systems with reservoirs, fill from bottom
Frequency: Check daily during warm weather. Most vertical gardens need watering every 1-2 days during summer.
Automated Watering Options
- Drip irrigation kit: Most efficient option, delivers water directly to roots
- Micro-sprinklers: Good for pocket planters and wide coverage
- Self-watering reservoirs: Can be added to some systems
- Timer systems: Automate watering schedule for consistency
Setup cost: Basic drip systems start around $25-40 and can save hours of maintenance time.
How to Check Soil Moisture
The finger test is reliable: insert your finger 1-2 inches into the soil. If it feels dry at that depth, it’s time to water. For more accuracy, consider an inexpensive moisture meter ($10-15).
Choosing the Right Soil for Vertical Vegetable Gardens
The right soil mix is crucial for vertical gardens. You need something lightweight (to reduce structural stress) yet moisture-retentive (to prevent rapid drying).
Ideal Soil Mix Recipe
Mix equal parts quality potting soil, coconut coir (or peat moss), and perlite or vermiculite. This creates a lightweight, well-draining mix that still retains moisture.
What to Include
- Quality potting mix: Base component (NOT garden soil)
- Coconut coir: Sustainable alternative to peat, holds moisture
- Perlite or vermiculite: Lightens mix, improves drainage
- Compost (20%): Adds nutrients and beneficial microbes
- Slow-release organic fertilizer: Provides ongoing nutrition
What to Avoid
- Garden soil: Too heavy, compacts easily, may contain diseases
- Sand: Adds unnecessary weight
- Heavy clay soils: Poor drainage, becomes waterlogged
- Moisture control mixes: Often too water-retentive for vertical systems
Weight Considerations: When fully saturated with water, soil becomes significantly heavier. For balconies or wall-mounted systems, calculate the total weight capacity before filling with soil. As a rule of thumb, one cubic foot of wet potting mix weighs approximately 40-50 pounds.
Budget-Friendly Tips
- Check local buy/sell groups for free pallets
- Visit ReStore or similar recycled building material centers for discounted lumber
- Use plastic bottles cut in half as small planters
- Start plants from seeds rather than buying seedlings
- Share costs with neighbors and split bulk soil purchases
Frequently Asked Questions About Vertical Vegetable Gardens
How much weight can my balcony support for a vertical garden?
Most residential balconies can support 50-75 pounds per square foot, but check with your building management to be certain. To reduce weight, use lightweight potting mix, plastic containers instead of ceramic, and distribute weight evenly across the balcony rather than concentrating it in one area.
How many hours of sunlight do vertical vegetable gardens need?
Most vegetables need 6-8 hours of direct sunlight daily. However, leafy greens and herbs can thrive with 4-6 hours. If your space gets less than 4 hours of direct sun, focus on shade-tolerant plants like lettuce, spinach, kale, and certain herbs like mint and parsley.
Can I grow root vegetables in vertical gardens?
Yes, but you need sufficient depth. Radishes and baby carrots work well in gutter systems (at least 6″ deep). For potatoes, consider dedicated grow bags or deep containers. Shallow root vegetables like radishes and green onions are best for most vertical systems.
How do I fertilize plants in a vertical garden?
Mix slow-release organic fertilizer into your potting mix when planting. Then supplement with liquid organic fertilizer (diluted to half-strength) every 2-3 weeks during the growing season. Vertical gardens in containers deplete nutrients faster than in-ground gardens, so regular feeding is important.
Start Growing Up: Your Vertical Garden Journey Begins
With just a few square feet of space, some basic materials, and a weekend of DIY effort, you can transform even the smallest outdoor area into a productive vertical vegetable garden. The systems we’ve shared are adaptable to your specific space constraints and skill level, allowing you to start small and expand as you gain confidence.
Remember that vertical gardening is as much about experimentation as it is about following plans. Don’t be afraid to customize these ideas to fit your unique space and needs. The reward of harvesting fresh vegetables from your own mini vertical farm makes every effort worthwhile.
Whether you’re growing herbs for your kitchen, salad greens for healthy meals, or compact vegetables for cooking, your vertical garden will provide both food and satisfaction. Plus, there’s something uniquely rewarding about transforming an underutilized space into a thriving ecosystem that nourishes both body and spirit.