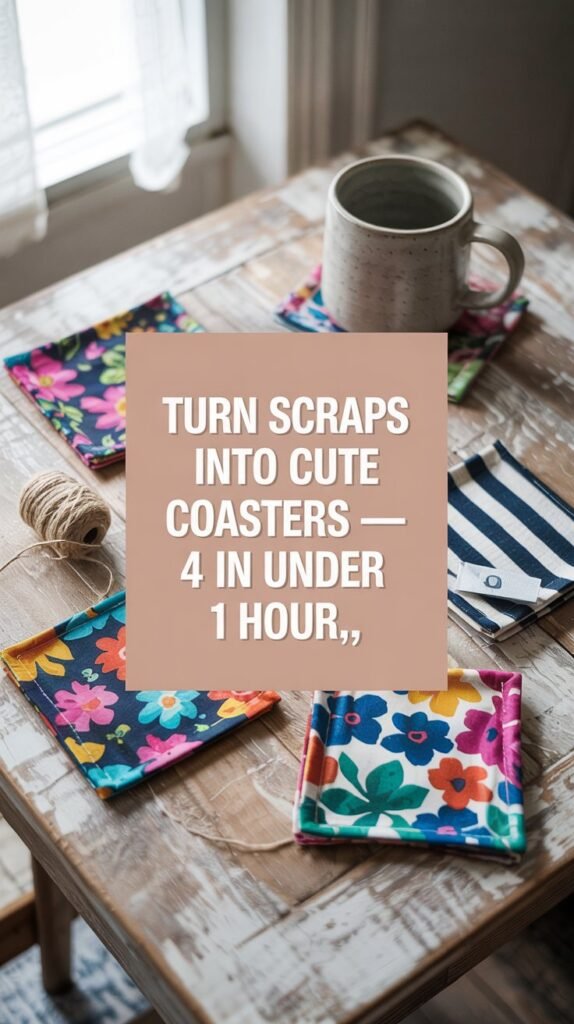
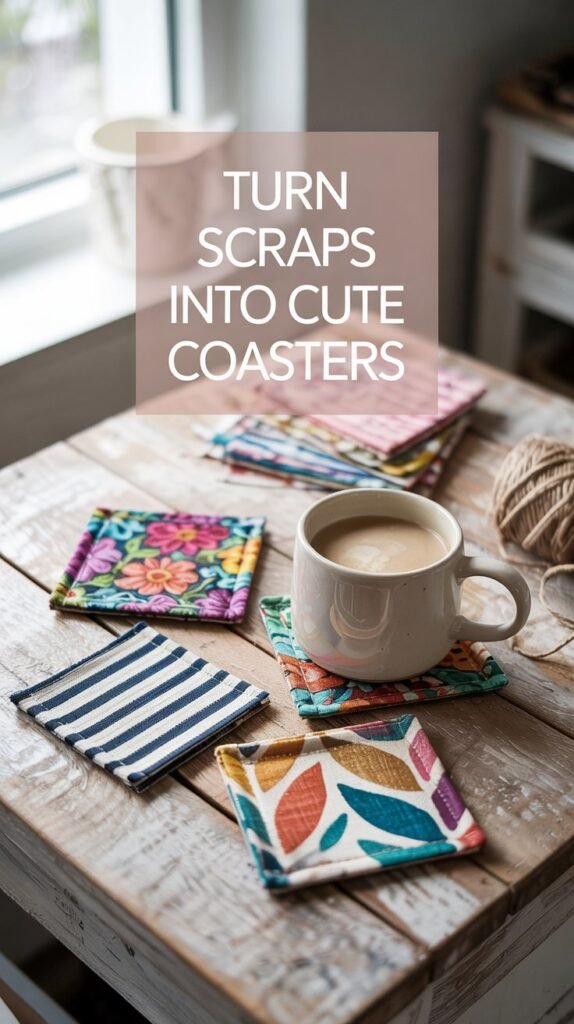
How to Make Fabric Coasters from Scraps
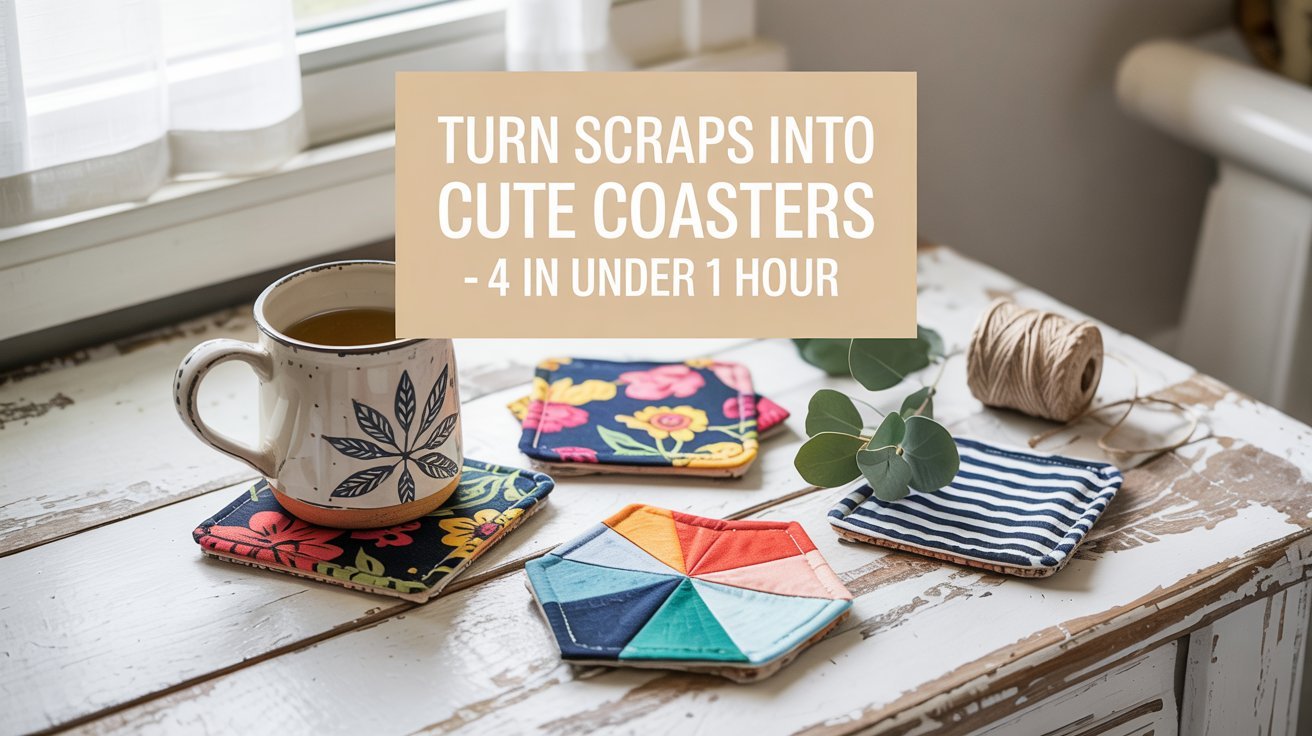
I made a full set of fabric coasters from scraps I already had and they’re SO cute I’ve made three sets since and gifted them to everyone I know. These coasters have absolutely taken over my life and I regret nothing.
I was looking at my fabric scrap pile and thought I’d try something quick and easy. Now I’ve made like thirty of these things and my whole family has a set. They’re that good.
No sewing machine needed. No experience needed. Genuinely under an hour for a full set of four. And they look SO bright and happy on a table, like little squares of joy.
What You Need to Make Fabric Coasters

The best part about this sewing project is you can use literally what you already have. If you’ve got a scrap bin, this is basically FREE to make.
- Cotton fabric scraps in fun patterns (the bolder the better honestly)
- Felt or thin batting for the middle layer
- Scissors for cutting fabric
- Pins to hold layers together
- An iron for pressing seams
- Fabric glue OR needle and thread, your choice!
That’s it. The materials are simple and most crafters already have these basics. The fabric scraps can be literally any cotton pieces you have sitting around.
Pro tip: Cotton flannel for the top layer makes coasters SO much more absorbent. Cold drink condensation? Handled.
Choosing Your Fabric for Coasters

This is the best part. You can use literally any cotton fabric and the more mismatched and colorful the better. Florals, stripes, geometric prints, vintage fabric, old shirt offcuts, mix it all up.
The whole charm of these fabric coasters is that every single one is different. I’ve used everything from quilting cotton to old dress fabric and they all turn out adorable.
Best Fabric Types
These materials work perfectly for making coasters that are both functional and beautiful.
- Quilting cotton (most common)
- Cotton flannel (extra absorbent)
- Linen blends (elegant look)
- Lightweight denim (durable)
Fabrics to Avoid
Some materials don’t work well for coasters due to absorbency or durability issues.
- Polyester (not absorbent)
- Silk (too delicate)
- Heavy canvas (too thick)
- Stretch fabrics (distort shape)
Pattern Recommendations
Bold patterns show up better and create more visual interest on small coaster squares.
- Large floral prints
- Bold geometric patterns
- Vintage-inspired prints
- Bright solid colors
Color Combinations
These color palettes create cohesive sets that look intentionally curated.
- Blush pink and sage green
- Teal and coral
- Classic blue and white
- Rainbow mismatched set
Small subtle patterns kind of disappear on coasters. Go bold with your prints, big florals and bright colors are everything.
How to Make Fabric Coasters: Step by Step
This tutorial breaks down into five simple steps. Seriously, if you can cut squares and press fabric, you can make coasters.
Step 1: Cut Your Squares
Cut your fabric and felt into squares measuring exactly four and a half inches on each side. For each coaster you need two fabric squares and one felt square.
So for a set of four coasters, that’s eight fabric squares and four felt squares total. Easy math and cutting is the most time-consuming part of this whole project.
Cutting tip: Stack multiple fabric layers and cut several squares at once to save time. A rotary cutter makes this step even faster than scissors.
Step 2: Make Your Fabric Sandwich
Place the felt square between your two fabric squares with the right side of the fabric facing OUT on both top and bottom. So pretty side up on top, pretty side down on the bottom, felt in the middle.
Iron the whole thing flat. This makes such a difference to the final result and helps everything stay in place.
Step 3: Pin It Together
Pin around all four edges to hold your layers together while you work. This stops everything shifting around and is worth the two minutes it takes.
Place pins about one inch apart around the entire edge. This keeps the batting from bunching when you’re adding your finishing edge.
Step 4: Glue OR Stitch the Edge
Here’s where you choose your own adventure. You can use fabric glue for speed or hand stitch for that handmade charm.
Fabric Glue Method
Apply fabric glue around the edges about one quarter inch in from the edge. Press firmly along the glued seam and leave to dry completely before using your coasters.
This method takes maybe five minutes per coaster and works great if you’re making a bunch as gifts.
Hand Stitch Method
Use a simple running stitch around the edges with a contrasting thread color. This looks SO cute and adds that handmade charm everyone loves.
Takes maybe ten extra minutes per coaster but honestly I think the stitched version looks better and is way sturdier for washing.
I’ve done both ways and loved both. The glue version is faster but the stitched version is sturdier and cuter for gifting.
Step 5: Press With Your Iron One More Time

Once everything is set, give it a final press with the iron. It flattens the edges beautifully and makes them look so neat and professional.
That’s it! You just made a coaster! Now make three more for a complete set.
Tips I Wish Someone Told Me First
The Pre-Wash Rule
Pre-wash your fabric scraps before cutting. Cotton shrinks and you don’t want warped coasters after the first wash. Just toss your scraps in with your regular laundry and press them before cutting.
Go Bold With Prints
Small subtle patterns kind of disappear on these coasters. Big florals and bright colors are everything. The bolder your fabric choice, the better your finished coasters look on the table.
Hand Stitching Makes It Special
If you’re hand stitching, use a contrasting thread color and it becomes a feature not just a detail. I love using bright embroidery thread on neutral fabric or vice versa.
The Felt Middle Layer Is Key
Don’t skip the felt or batting middle layer. It gives coasters that satisfying little bit of thickness and makes them way more absorbent for cold drinks.
Time-saving hack: Cut all your squares at once using a rotary cutter and ruler. You can stack multiple fabric layers and cut through several at the same time.
Gifting Ideas Because These Are SO Good as Gifts
Wrap a set of four in a piece of fabric tied with twine and you have the most adorable housewarming gift. Add a cute mug and some tea bags and you’ve got a full gift set for like ten dollars that looks like you spent way more.
People are always SHOCKED these are handmade. The reaction when you tell someone you made their gift yourself is absolutely worth the hour of crafting time.
Housewarming Gifts
New homeowners always need coasters. Make a set in colors that match their decor or go with a neutral palette that works with any style. Add a set of house keys to the photo for that perfect housewarming moment.
Perfect First Home Gift
Birthday Presents
Make coasters in the birthday person’s favorite colors or patterns. It’s a thoughtful handmade gift that shows you put time and effort into creating something special just for them.
Teacher Appreciation
Teachers deserve handmade love. A set of coasters paired with a coffee shop gift card makes the perfect end-of-year or holiday teacher gift. Way better than another mug they won’t use.
Practical Classroom Gift
Gift Presentation Ideas
The way you present these coasters makes all the difference. Here are some of my favorite wrapping ideas that make the gift feel extra special.
- Stack coasters and wrap in coordinating fabric secured with twine or ribbon
- Place in a small gift box lined with tissue paper
- Tie with baker’s twine and attach a handwritten tag
- Package with a matching tea towel or napkins
- Include the coasters in a larger gift basket with coffee or tea items
I’ve gifted fabric coasters for housewarmings, birthdays, teacher appreciation gifts, Christmas stockings, and just because for my friends. Every single time the reaction is amazing.
Fabric Combos I’m Obsessing Over Right Now
The fabric combinations are honestly half the fun of making coasters. Here are the color palettes I keep coming back to.
Soft and Pretty

Blush florals paired with sage green creates such a soft and pretty look. This combo works beautifully in farmhouse or cottage-style homes and makes an elegant gift set.
Bold and Cheerful

Bold sunflower prints are sunshine in coaster form. These bright happy patterns make me smile every time I see them on the table and they’re perfect for summer gifting.
Retro Beach House

Teal and coral together give off retro beach house energy. This color combo feels fresh and fun and works great for coastal-themed homes or summer lake house gifts.
Classic and Elegant

Classic blue toile is timeless and elegant. This traditional pattern works in any home and makes a sophisticated gift that never goes out of style.
Rainbow Chaos (My Personal Favorite)
Rainbow scraps in a mismatched set is chaotic and I love it. Every coaster is completely different and the whole set together creates this joyful explosion of color and pattern.
This is the way to use up all your favorite fabric scraps and make something that looks intentionally eclectic rather than random.
Taking Care of Your Fabric Coasters
These coasters are pretty low-maintenance but a little care keeps them looking their best for years. Here’s what you need to know about cleaning and storing your handmade coasters.
Important: If you used fabric glue, let it dry completely for at least twenty-four hours before using your coasters. This ensures the bond is fully set.
Washing Your Coasters
Hand wash is recommended to keep fabric coasters looking their best. Use cool water and a gentle detergent, then press with a towel to remove excess water.
Lay flat to dry or tumble on low heat. The batting inside may shift slightly with machine washing, which is why hand washing works better for longevity.
Storage Tips
Stack your coasters and store them in a drawer or basket near your coffee table. Keep them accessible so you actually use them instead of hiding them away.
- Store in a dry place away from direct sunlight to prevent fading
- Stack with tissue paper between if storing long-term
- Keep near your most-used beverage spot for easy access
- Rotate through multiple sets to extend the life of each one
Common Questions and Quick Fixes
Here are the most common issues people run into when making fabric coasters and exactly how to fix them.
My fabric keeps shifting while I work. How do I stop this?
Use more pins! Pin around all four edges and even add a pin or two in the center. Also make sure you’re ironing the layers together before pinning, which helps them stick.
Can I use a sewing machine instead of hand stitching?
Absolutely! A sewing machine makes this project even faster. Just stitch around the edge about one quarter inch in from the edge using a straight stitch. Back stitch at the corners for extra durability.
My coasters came out warped. What did I do wrong?
This usually happens when fabric wasn’t pre-washed before cutting. Cotton shrinks when washed, so always wash and dry your fabric scraps before cutting them into squares for coasters.
How many coasters should I make for one set?
Sets of four or six work best. Four coasters cover most typical entertaining needs, while six gives you extras for larger gatherings or to account for some being in the wash.
Can I make larger coasters for bigger mugs?
Yes! The same technique works for any size square. For larger mugs or bowls, cut your squares to five or even six inches. Just keep all three layers the same size.
What’s the best batting to use in the middle?
Felt works great because it doesn’t shift and adds nice thickness. Cotton batting or quilting batting also work well. Avoid anything too thick or it becomes hard to stitch through the layers.
Start Making Your Fabric Coasters Today

One hour. A pile of scraps. A set of coasters that genuinely make your table look curated and cute. I cannot think of a better way to spend a Sunday afternoon honestly.
These fabric coasters are the perfect beginner sewing project because they’re quick, forgiving, and immediately useful. You’ll have something beautiful and functional to show for your crafting time.
The best part is using up fabric scraps that were just sitting in a bin taking up space. Now those scraps become adorable little coasters that make you smile every time you set down your coffee cup.
Make a set for yourself first so you can see how easy and fun this project is. Then make three more sets because once people see your handmade coasters they’re going to want their own.
Quick recap: Pre-wash fabrics before use. Fabric glue needs full dry time before using coasters. Hand wash recommended to keep them looking their best.
Happy crafting! Now go raid that fabric scrap bin and make something beautiful.