10 Fast, Plant-Based privacy fence idea and Trellis Projects You Can Finish in 48 Hours
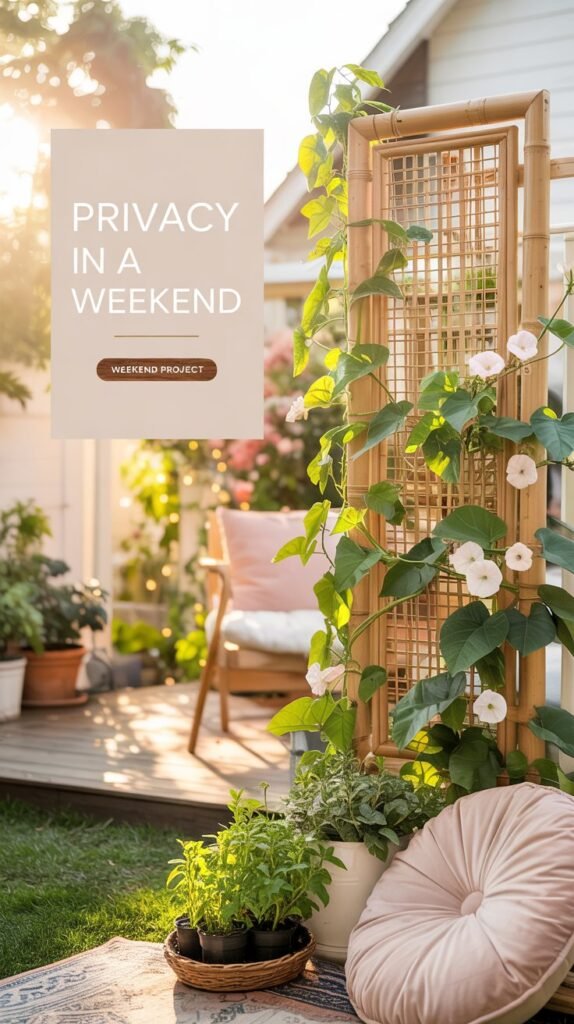
There’s something magical about having a private backyard sanctuary, a place where you can unwind without feeling like you’re on display. But creating that secluded outdoor retreat doesn’t have to mean weeks of construction or waiting years for plants to grow. With the right approach to backyard privacy DIY projects, you can transform your space in just one weekend, combining the natural beauty of plants with simple structures for immediate results.
These 10 plant-based privacy fence and trellis ideas are designed specifically for busy homeowners who want quick results without sacrificing style. Each project can be completed in under 48 hours, uses readily available materials, and incorporates fast-growing plants that will continue to enhance your privacy as they mature. Ready to reclaim your outdoor space? Let’s build something beautiful together!
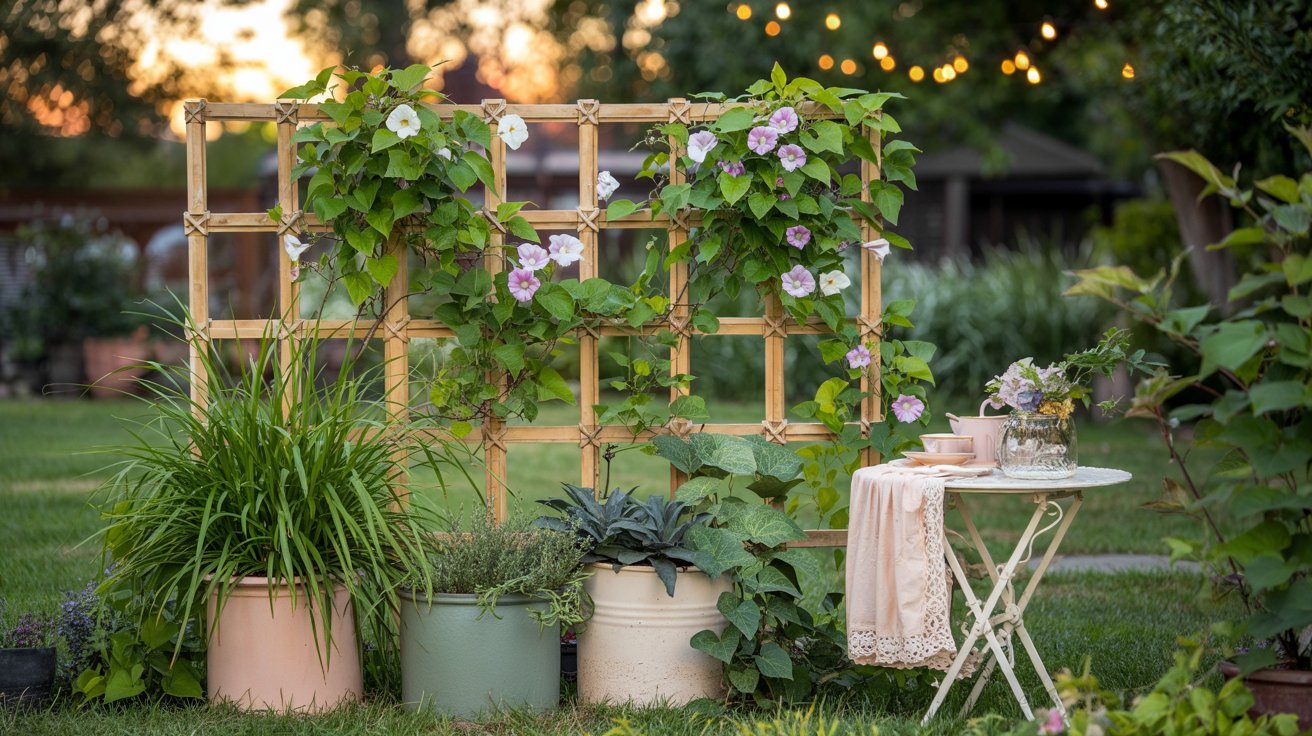
1. Bamboo Panel Trellis with Climbing Vines
Materials Needed:
- 4×4 wooden posts (6-8 feet tall)
- Bamboo fencing roll (6×8 feet)
- Post hole digger
- Quick-setting concrete
- Galvanized wire or zip ties
- Morning glory, black-eyed Susan vine, or clematis plants
- Potting soil and compost
Time Commitment:
4-6 hours (plus concrete setting time overnight)
Step-by-Step Instructions:
- Dig 2-foot deep holes for your posts, spacing them 6-8 feet apart.
- Set posts in holes with quick-setting concrete and ensure they’re level.
- Allow concrete to set overnight.
- Unroll bamboo fencing and attach to posts using galvanized wire or heavy-duty zip ties.
- Plant fast-growing vines at the base of the trellis, spacing them 12 inches apart.
- Mix compost into the soil around plants and water thoroughly.
- Gently guide vines to start climbing the bamboo.
Maintenance Tips:
Water vines deeply twice weekly during the first month. Morning glories can grow up to 10 feet in a single season, providing quick coverage. Train new growth weekly by weaving through the bamboo for fuller coverage.
2. Potted Plant Privacy Screen

Materials Needed:
- 5-7 large planters (minimum 16 inches diameter)
- Potting soil with slow-release fertilizer
- Selection of tall plants: ornamental grasses, dwarf bamboo, tall ferns
- Decorative rocks for drainage
- Plant dolly wheels (optional, for movability)
Time Commitment:
3-4 hours
Step-by-Step Instructions:
- Position empty planters where you want your privacy screen.
- Add a layer of decorative rocks at the bottom of each planter for drainage.
- Fill planters halfway with quality potting soil mixed with slow-release fertilizer.
- Remove plants from nursery containers, loosen root balls gently.
- Position plants in planters, alternating heights and textures.
- Fill remaining space with soil, leaving 1 inch below rim.
- Water thoroughly until water drains from bottom.
- Arrange planters in a staggered pattern for maximum coverage.
Plant Recommendations:
For instant impact, choose tall ornamental grasses like Miscanthus or Pennisetum, which can reach 4-6 feet. Dwarf bamboo varieties provide year-round screening without becoming invasive. For shady areas, try tree ferns or large hostas.
3. Living Willow Privacy Screen

Materials Needed:
- 25-30 living willow rods (8 feet long)
- Garden spade
- Compost
- Mulch
- Garden twine
- Pruning shears
- Watering can or hose
Time Commitment:
5-6 hours
Step-by-Step Instructions:
- Mark a line where you want your screen, spacing marks 12 inches apart.
- Dig 12-inch deep holes at each mark.
- Mix compost into the soil at the bottom of each hole.
- Insert willow rods into holes, burying at least 12 inches of each rod.
- Firm soil around each rod and water thoroughly.
- Weave horizontal willow rods between the vertical ones, starting 2 feet from the ground.
- Secure intersections with garden twine where needed.
- Add a layer of mulch around the base of the structure.
- Water deeply every other day for the first two weeks.
Growth Expectations:
Living willow is remarkably fast-growing. Within 2-3 weeks, you’ll see new leaf growth. By the end of the first growing season, your screen could add 3-4 feet in height. The woven structure will gradually fuse together as the willow grows, creating a solid living fence.
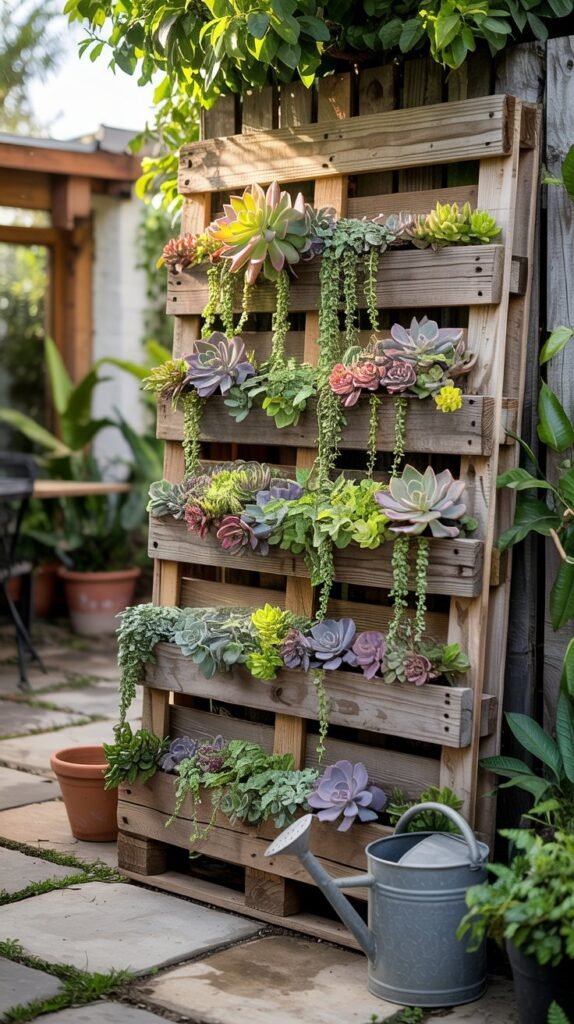
4. Pallet Vertical Garden Privacy Wall
Materials Needed:
- 2-3 wooden pallets (heat-treated, not chemically treated)
- Landscape fabric
- Heavy-duty staple gun and staples
- Potting soil
- Selection of small plants: herbs, succulents, trailing vines
- 2×4 lumber for base support
- Screws and drill
- Sandpaper
Time Commitment:
6-8 hours (spread over two days)
Step-by-Step Instructions:
- Sand pallets to remove any splinters.
- Create a sturdy base using 2×4 lumber, forming an L-shape for each pallet.
- Attach pallets to bases using screws.
- Line the back and bottom of each pallet with landscape fabric, leaving the front open.
- Staple fabric securely in place.
- Stand pallets upright and position where you want your screen.
- Fill pallets with potting soil through the slats.
- Plant through the openings, mixing trailing plants with upright varieties.
- Water thoroughly but gently to avoid soil washout.
Plant Selection Tips:
Choose a mix of plants with different growth habits. Trailing plants like creeping Jenny or sweet potato vine will cascade down, while upright plants like ferns or coleus will fill the middle spaces. For year-round interest in mild climates, include some evergreen plants like small conifers or winter-hardy herbs.
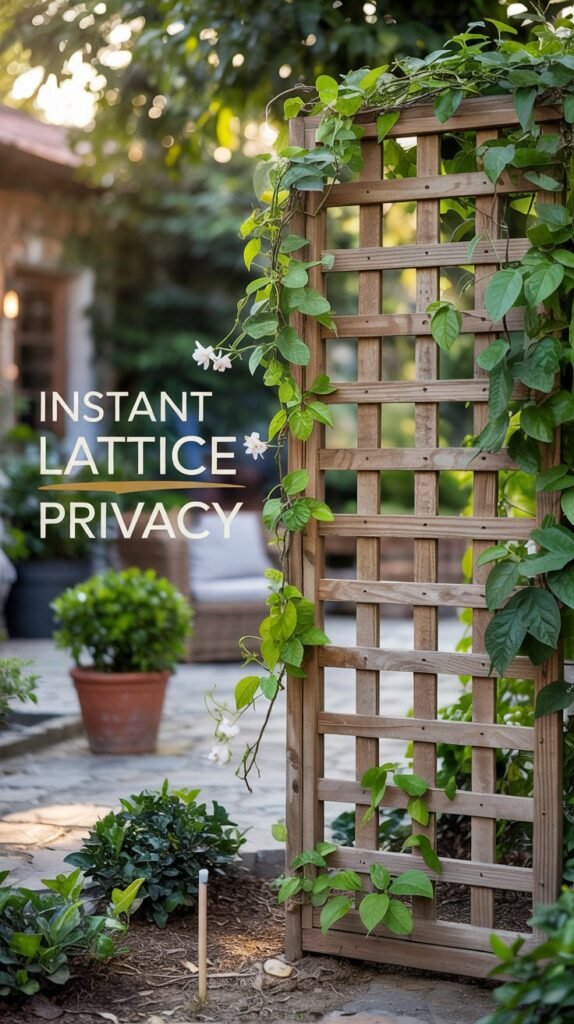
5. Lattice Panel Screen with Fast-Growing Vines
Materials Needed:
- Premade lattice panels (6×8 feet)
- 4×4 wooden posts
- Post hole digger
- Quick-setting concrete
- Screws and drill
- Fast-growing vines: jasmine, honeysuckle, or passion flower
- Compost and potting soil
Time Commitment:
5-7 hours (plus concrete setting time overnight)
Step-by-Step Instructions:
- Dig 2-foot deep holes for posts, spacing them according to lattice panel width.
- Set posts in concrete and allow to set overnight.
- Attach lattice panels to posts using screws.
- Prepare soil at the base of the lattice by mixing in compost.
- Plant vines 12-18 inches apart along the base of the lattice.
- Water thoroughly and apply a layer of mulch.
- Gently train vine tendrils to start climbing the lattice.
Growth Acceleration Tips:
To encourage faster growth, apply a liquid seaweed fertilizer every two weeks during the growing season. For immediate impact while vines establish, hang small potted plants on the lattice using S-hooks. Star jasmine can grow 3-6 feet in its first year, quickly filling in your privacy screen.
6. Hanging Garden Curtain
Materials Needed:
- Sturdy clothesline or coated wire
- Two 4×4 posts or existing structure to anchor wire
- 15-20 small hanging planters
- S-hooks or carabiners
- Potting soil
- Selection of trailing plants: ivy, pothos, string of pearls
- Eye hooks
- Wire cutters and pliers
Time Commitment:
3-4 hours
Step-by-Step Instructions:
- Install eye hooks into posts or existing structure.
- String wire between hooks, pulling tight and securing.
- Fill hanging planters with potting soil.
- Plant each container with selected plants.
- Attach S-hooks or carabiners to the wire.
- Hang planters from hooks, staggering heights for fuller coverage.
- Arrange plants so they overlap slightly for better privacy.
- Water thoroughly but carefully to avoid overflow.
Plant Arrangement Tips:
For maximum privacy, arrange plants in a zigzag pattern rather than a straight line. Place fuller plants at eye level where privacy is most needed. Mix in some herbs like trailing rosemary or thyme for a fragrant screen that’s also useful in the kitchen. In hot climates, position this screen where it will receive afternoon shade to prevent plants from drying out too quickly.
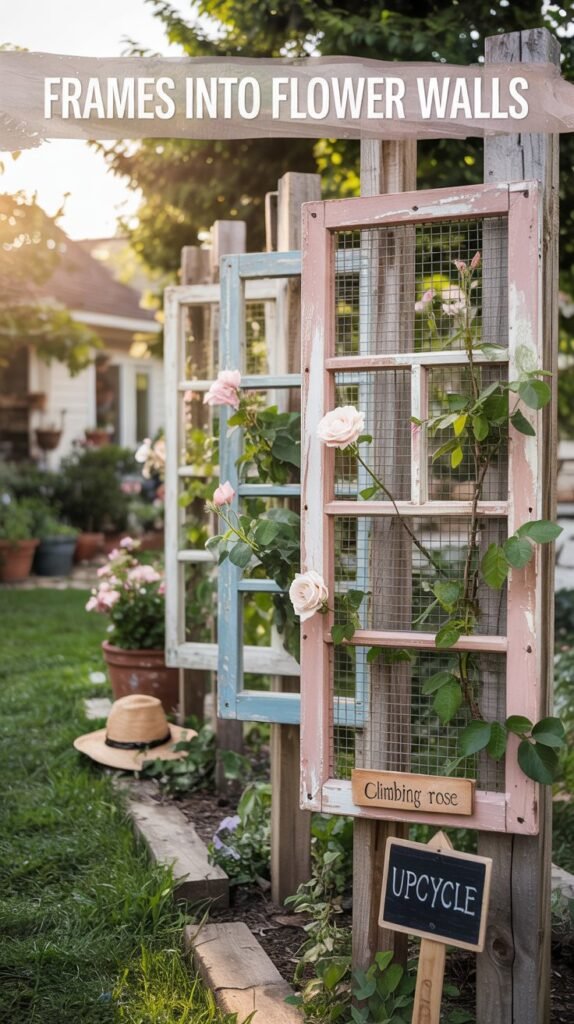
7. Repurposed Window Frame Trellis
Materials Needed:
- 3-5 old window frames (glass removed)
- 2×4 lumber for posts
- Screws and drill
- Post hole digger
- Quick-setting concrete
- Wire mesh or chicken wire
- Staple gun and staples
- Climbing roses or clematis plants
- Compost and potting soil
Time Commitment:
6-8 hours (plus concrete setting time overnight)
Step-by-Step Instructions:
- Remove any remaining glass from window frames.
- Attach wire mesh to the back of each frame using staples.
- Dig holes for 2×4 posts, spacing them to match your window frames.
- Set posts in concrete and allow to set overnight.
- Attach window frames to posts using screws.
- Prepare soil at the base of each frame by mixing in compost.
- Plant climbing plants at the base of each frame.
- Water thoroughly and apply mulch around plants.
Creative Variations:
For added character, paint window frames in complementary colors before installation. Consider hanging small potted plants from the frame crossbars while waiting for climbing plants to mature. For a more substantial privacy screen, install frames in a zigzag pattern rather than a straight line, creating a sense of depth while using fewer materials.
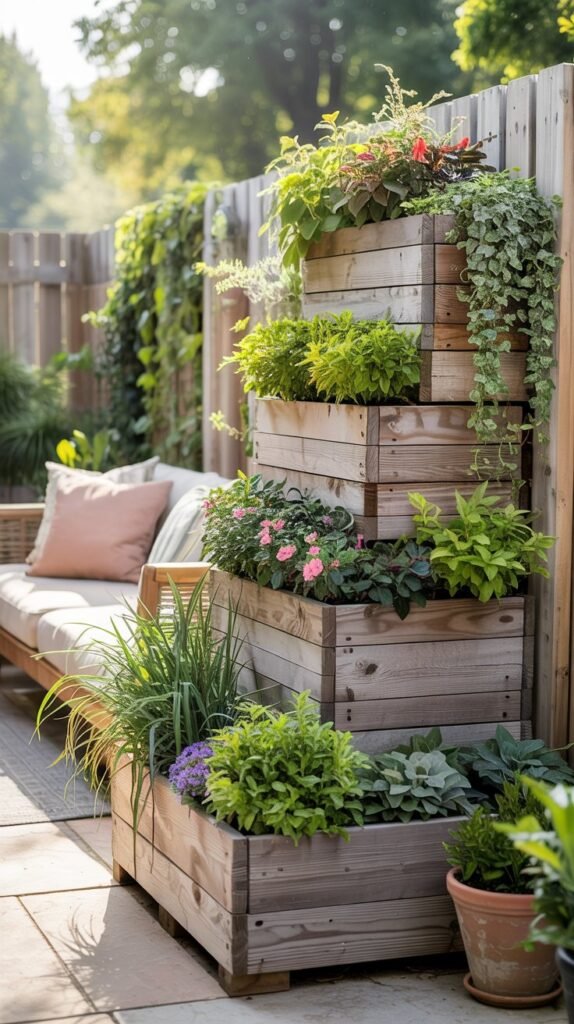
8. Tiered Planter Privacy Wall
Materials Needed:
- Pressure-treated lumber (2×10 and 2×4 boards)
- Screws and drill
- Landscape fabric
- Staple gun and staples
- Potting soil
- Selection of plants: tall grasses, shrubs, trailing flowers
- Level
- Saw
- Sandpaper
Time Commitment:
7-8 hours
Step-by-Step Instructions:
- Cut lumber to create three different-sized planter boxes (large for bottom, medium for middle, small for top).
- Assemble boxes using screws, creating drainage holes in bottoms.
- Sand all edges to prevent splinters.
- Line each box with landscape fabric, stapling in place.
- Position largest box where you want your privacy wall.
- Fill halfway with potting soil.
- Place medium box centered on top of soil in large box.
- Fill medium box halfway, then position small box on top.
- Fill all boxes completely with soil.
- Plant tallest plants in bottom box, medium in middle, and trailing plants on top.
- Water thoroughly.
Plant Arrangement Strategy:
Create maximum height quickly by planting tall ornamental grasses like Miscanthus or Calamagrostis in the bottom tier. These can reach 5-7 feet in a single season. In the middle tier, plant dense shrubs like dwarf butterfly bush or compact hydrangeas. For the top tier, use cascading plants like sweet potato vine, trailing verbena, or creeping Jenny to soften the structure’s edges.
9. Fabric Pocket Vertical Garden
Materials Needed:
- Heavy-duty landscape fabric or canvas
- Sewing machine or fabric glue
- Grommets and grommet tool
- Potting soil
- Selection of small plants: herbs, succulents, small flowers
- Hooks or screws for hanging
- Existing fence or wall structure
- Scissors
- Measuring tape
Time Commitment:
4-5 hours
Step-by-Step Instructions:
- Cut landscape fabric to desired size (typically 3×5 feet works well).
- Fold and sew or glue horizontal pockets across the fabric, leaving the top open.
- Install grommets along the top edge for hanging.
- Hang the fabric on your fence or wall using hooks or screws.
- Fill pockets halfway with potting soil.
- Plant selected plants in each pocket.
- Add remaining soil to secure plants.
- Water carefully, allowing excess to drain.
Plant Selection Tips:
Choose plants with shallow root systems that won’t outgrow the pockets quickly. Sedums, small ferns, and creeping thyme work well. For instant impact, select plants already in their mature form rather than seedlings. Position drought-tolerant plants in the top rows and those needing more moisture in the bottom rows, as water will naturally flow downward.
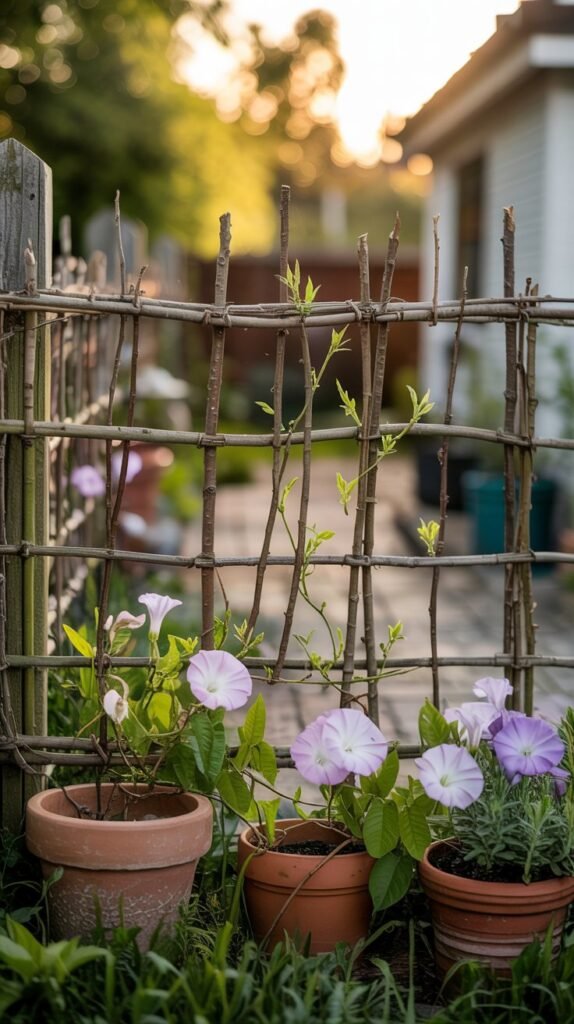
10. Expandable Willow Fence with Climbing Plants
Materials Needed:
- Expandable willow fence (available at garden centers)
- Wooden stakes
- Hammer
- Garden wire
- Fast-growing annual vines: morning glory, sweet pea, black-eyed Susan vine
- Potting soil and compost
- Wire cutters
Time Commitment:
2-3 hours
Step-by-Step Instructions:
- Position wooden stakes where you want your fence to stand.
- Hammer stakes at least 1 foot into the ground.
- Expand willow fence to desired length.
- Attach fence to stakes using garden wire.
- Prepare soil along the base of the fence by mixing in compost.
- Plant fast-growing annual vines every 12 inches along the fence.
- Water thoroughly and apply mulch.
- Gently train vine tendrils to start climbing the willow structure.
Seasonal Strategy:
This is an ideal project for quick summer privacy. Annual vines like morning glory can grow up to 10 feet in just 8-10 weeks. For year-round privacy in mild climates, add some evergreen clematis varieties alongside the annuals. The willow fence provides immediate partial screening, while the plants fill in to create a denser barrier over time.
Essential Maintenance Tips for Living Privacy Screens
Watering Schedule
Newly planted screens need consistent moisture to establish quickly. Water deeply 2-3 times weekly for the first month, then once weekly thereafter. During hot weather, increase watering frequency but avoid overhead watering, which can promote fungal issues.
Fertilizing for Fast Growth
Apply a balanced, slow-release fertilizer when planting. For fastest growth, supplement with liquid seaweed or fish emulsion every 2-3 weeks during the growing season. Climbing vines particularly benefit from this feeding schedule.
Training and Pruning
Check your living screens weekly during the growing season. Gently guide new growth in the desired direction, using soft plant ties if necessary. Prune selectively to encourage fullness rather than height alone. Remove any dead or damaged sections promptly.
Winter Protection
In colder climates, provide winter protection for your living screens. Apply a thick layer of mulch around the base of plants. Consider wrapping more delicate structures in burlap during the harshest months, especially for the first winter after planting.
Transform Your Backyard This Weekend
Creating a private backyard retreat doesn’t require extensive construction skills or months of waiting. With these 10 quick backyard privacy DIY projects, you can transform your outdoor space in just one weekend. The beauty of these living screens is that they continue to improve with time—growing fuller, taller, and more lush with each passing week.
Start with the project that best suits your space and skill level. Whether it’s the simple potted plant screen or the more involved tiered planter wall, you’ll be amazed at how quickly you can create a secluded outdoor sanctuary. Remember that the key to success is selecting the right fast-growing plants and providing them with proper care from the start.
Your private backyard oasis awaits—and it’s just one weekend away!