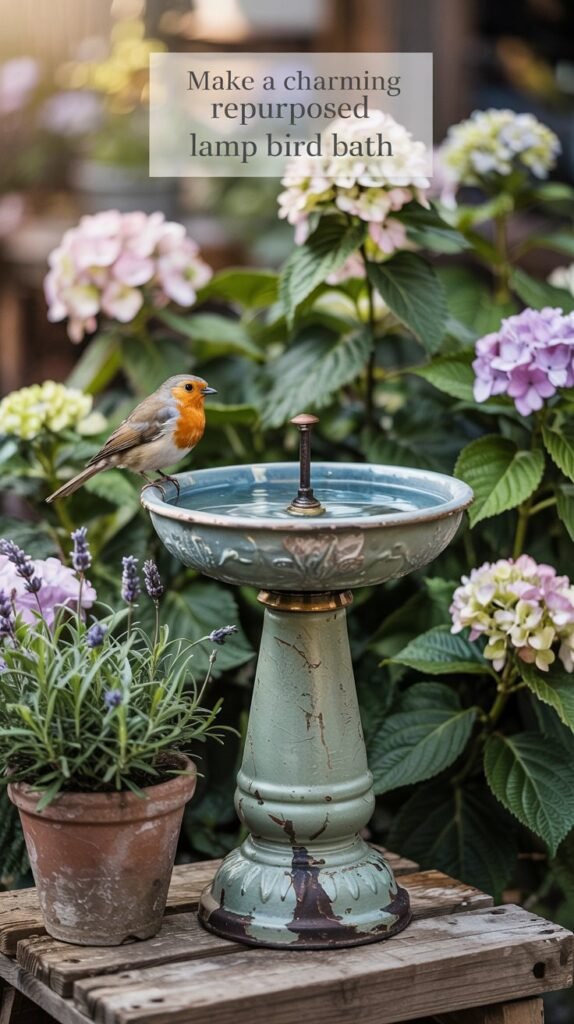
How to Make a Charming Repurposed Lamp Bird Bath
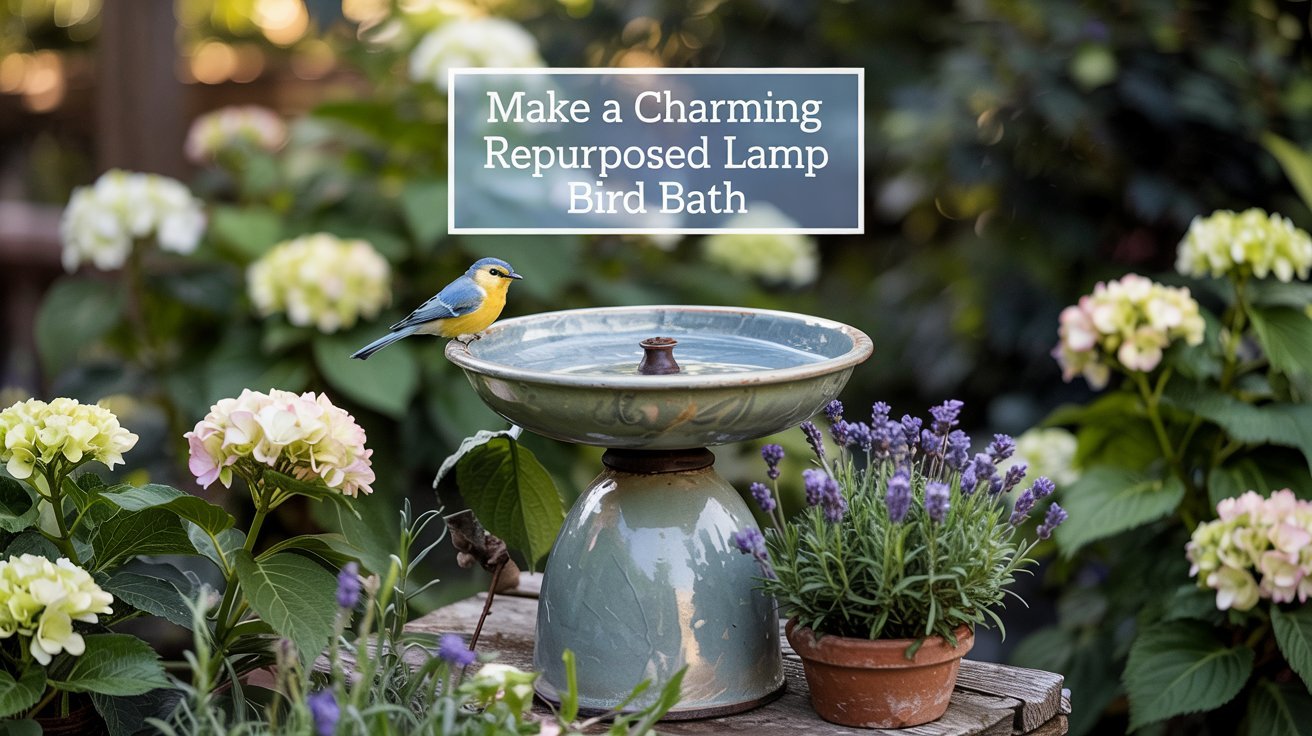
Feel the soft patter of rain on leaves as birds splash happily in your little upcycled basin, this fresh project gives an old lamp new purpose and lots of garden charm. There’s something magical about watching feathered visitors enjoy the simple gift of water, especially when it comes from something you’ve lovingly crafted with your own hands. This repurposed lamp bird bath project transforms forgotten household items into a delightful garden feature that brings nature closer to home.

Quick Overview & Benefits
This project transforms an old table or floor lamp into a stable, raised bird bath that adds character to your garden while providing a perfect perch for your feathered friends. The elevated design makes it easy for birds to spot from above and keeps them safer from ground predators.
Why You’ll Love This Project
- Creates a unique garden feature from items you might already have
- Provides essential water source for local birds
- Easy to clean and maintain
- Customizable to match your garden aesthetic
- Environmentally friendly upcycling
Materials & Tools You’ll Need
Essential Materials
- Old table or floor lamp (metal base works best)
- Shallow glass or ceramic bowl (about 8–10″ / 20–25 cm diameter)
- Waterproof adhesive (E6000 or marine epoxy)
- Outdoor spray paint (primer + topcoat)
- Outdoor clear sealant (spray)
- Metal rod or rebar (~60–90 cm / 24–36″) if needed
- Optional: rubber washer or silicone caulk for extra sealing
Tools Required
- Drill + appropriate drill bits (diamond bit for glass; 1/8″–1/4″ for metal)
- Sandpaper or wire brush
- Pliers and screwdriver (for lamp disassembly)
- Gloves and safety goggles
- Clean rags
Shopping Tip: Thrift stores, yard sales, and secondhand shops are perfect places to find old lamps and decorative glass dishes at bargain prices. Look for sturdy metal lamp bases that will withstand outdoor conditions.
Step-by-Step Instructions
SAFETY FIRST: Always unplug and completely remove all electrical components before starting this project. Wear gloves and safety goggles when sanding, drilling, or using adhesives. If drilling glass, use a diamond bit with steady water cooling or ask a professional for help.
Step 1: Disconnect and Remove Wiring
First, make sure your lamp is unplugged. Remove the socket, switch, and all wiring from the lamp base. This ensures there are no live electrical parts remaining. Use pliers and a screwdriver to carefully disassemble these components and set the wiring aside for safe disposal.
If your lamp has a hollow stem, you might want to keep it intact for threading a support rod through later. Otherwise, focus on creating a clean, flat surface at the top where your bowl will sit.
Step 2: Clean and Prep the Base
Use a wire brush or sandpaper to remove any rust, dust, or loose paint from the lamp base. This creates a clean surface for the new paint to adhere to. Wipe the entire lamp with a damp cloth to remove dust and debris, then allow it to dry completely.
If your lamp has a nipple (the threaded rod at the top), you may need to remove it to create a flat surface. This can be done carefully with a rotary tool like a Dremel, or you can incorporate it into your design if it works with your chosen bowl.
Step 3: Paint the Base (Optional)
Apply a coat of primer suitable for the lamp’s material (metal, ceramic, etc.). Once dry, follow with 1-2 thin coats of outdoor spray paint in your chosen color. Allow each coat to dry for 1-2 hours before applying the next, and give the final coat a full 24 hours to cure completely.
Choose colors that complement your garden or attract birds, blues, greens, and earth tones work beautifully. Matte finishes tend to look more natural in garden settings than glossy ones.
Step 4: Prepare the Bowl
If you’re attaching a bowl directly to the lamp top, choose one that sits relatively flat and stable. Clean it thoroughly with soap and water, then let it dry completely before attaching.
If you need to drill a hole in a glass bowl (for threading onto a rod), use a diamond or carbide drill bit designed for glass. Keep the area wet while drilling to prevent cracking, and work slowly with gentle pressure. The hole size should match your rod or hardware dimensions.
Step 5: Attach the Bowl
Apply a strong waterproof adhesive like E6000 or marine epoxy around the top edge of your lamp base. Follow the specific instructions on your adhesive product for best results. For extra protection against leaks, place a rubber washer or a bead of silicone between the bowl and lamp top.
Position your bowl carefully, making sure it’s centered and level. Hold it in place for the initial set time recommended on your adhesive package. Then allow it to cure fully (typically 24-72 hours) before adding water.
Step 6: Secure to a Rod (If Using)
If you’re using a metal rod for extra stability, slide your bowl-lamp assembly onto it, or slip the rod into the lamp’s hollow stem. Push the rod about 8-10 inches (20-25 cm) into the ground to anchor it securely. In soft soil or windy areas, drive it deeper for better stability.
This step is optional but recommended for taller bird baths or those placed in open, windy areas. The rod provides crucial support that prevents tipping, especially when birds land on the edge of the bath.
Step 7: Seal Seams
Apply a clear outdoor sealant to any painted areas and joints for extra weather protection. This helps prevent water damage and extends the life of your bird bath. Allow the sealant to cure completely (usually 24 hours) before exposing it to water.
Pay special attention to the seam between the bowl and lamp base, as this is where water is most likely to seep through and potentially damage your creation over time.
Step 8: Final Setup
Place your bird bath in a sheltered, visible spot near shrubs or small trees. This gives birds a safe place to perch before approaching the water. Fill with fresh water to a depth of about 1-2 inches (2.5-5 cm) at the deepest point.
Remember to change the water every 2-3 days (or sooner if it gets dirty) to prevent mosquito breeding and keep the water fresh for your feathered visitors. A regular cleaning routine ensures your bird bath remains an attractive, healthy spot for local birds.
Practical Tips & Best Practices
Bird-Friendly Design Tips
- Use a bowl 8-10″ (20-25 cm) across so small birds can easily use it
- Keep water depth shallow (1-2 inches maximum) at the deepest point
- Choose bowls with slightly textured surfaces to give birds better footing
- Add a few small stones or a branch across part of the bath to create perching spots
- Position near shrubs that offer quick escape routes for birds
Construction & Durability Tips
- Allow adhesive and paint to fully cure before filling with water (24-72 hours)
- Anchor deeper (12″ or 30 cm) in exposed or windy gardens
- For extra stability, set the base in a paving stone or bury a short length of postcrete around the rod
- Choose metal lamp bases for best outdoor durability
- Apply fresh sealant yearly to maintain weatherproofing
“The right vintage lamp is key: One that no longer functions but is still sturdy is ideal. And having a wide platform to perch your glass plate on top is beneficial, too.”
How do I keep my bird bath from tipping over?
For extra stability, you can add weight to the base with rocks or gravel, use a support rod driven deep into the ground, or place the bird bath in a sheltered location away from strong winds. Choosing a lamp with a wide, heavy base also helps prevent tipping.
How often should I clean my bird bath?
Change the water every 2-3 days and scrub the bowl with a brush monthly using a mild soap. Rinse thoroughly to remove any soap residue before refilling. Regular cleaning prevents algae growth and keeps the water fresh for birds.
Can I add a solar fountain to my repurposed lamp bird bath?
Yes! A small solar floating fountain pump can be added to create moving water, which birds find especially attractive. These are available for around $12-15 online and require no wiring or special installation—they simply float in the water and operate when in direct sunlight.
Enjoy Your Handcrafted Bird Bath
Your repurposed lamp bird bath isn’t just a beautiful addition to your garden,it’s a meaningful way to support local wildlife while giving new life to items that might otherwise be discarded. As you watch birds discover and enjoy your creation, you’ll feel that special connection that comes from creating something both beautiful and useful with your own hands.
Remember to keep the water fresh and clean, and your bird bath will become a beloved gathering spot for feathered visitors throughout the seasons. The simple joy of watching birds splash and play makes this easy DIY project well worth the effort.
If you like this article, you’ll love 25 DIY Garden Ornaments Ideas to Add Charm to Your Backyard