5 Beautiful Sand and Memory Layered Jar Ideas for Preserving Special Moments
There’s something magical about capturing memories in a tangible form. Sand and memory layered jars offer a creative way to preserve special moments, from beach vacations to milestone celebrations. These beautiful keepsakes combine layers of colored sand with meaningful mementos, creating a visual timeline of your cherished experiences. In this guide, we’ll explore five unique sand and memory layered jar ideas that you can create to commemorate life’s precious moments.
What Are Sand and Memory Layered Jars?
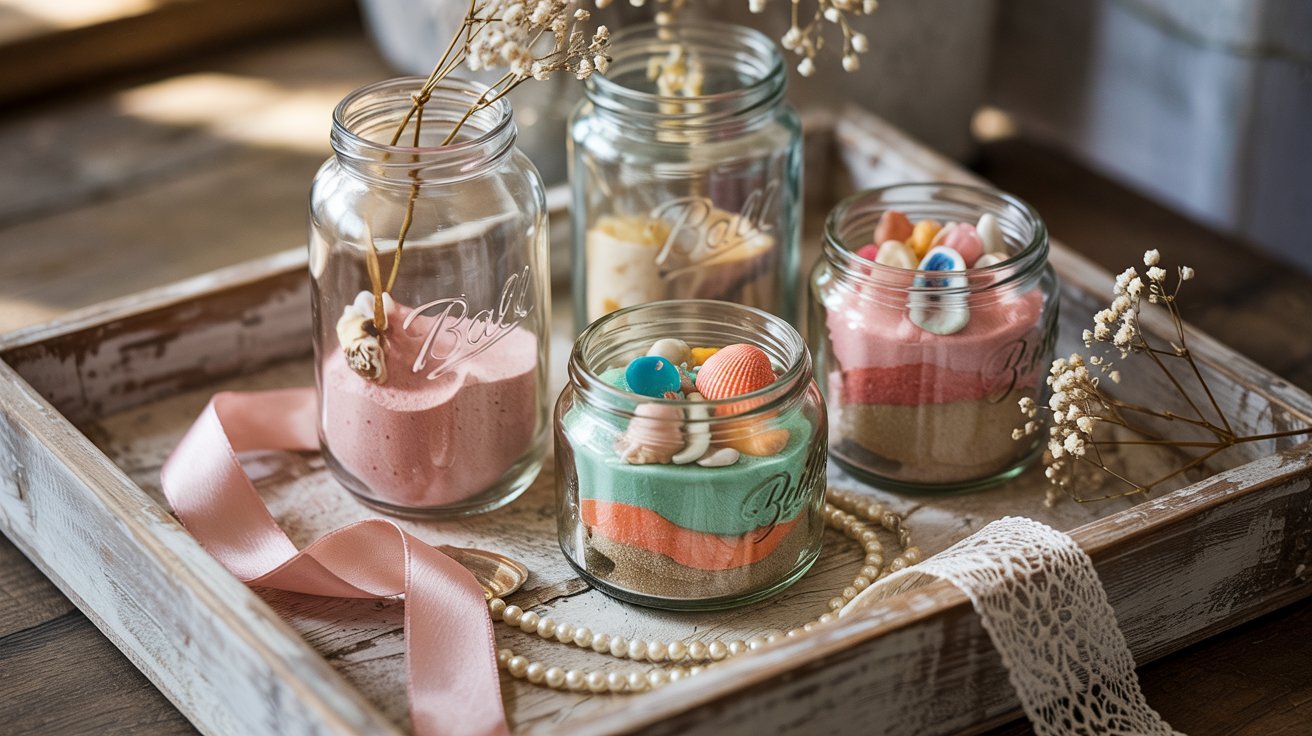
Memory jars are personalized time capsules that combine layers of sand, small mementos, and decorative elements to create a visual representation of special moments. Each layer tells a story, with colors and objects symbolizing different memories or experiences. These jars serve as both decorative pieces and meaningful keepsakes that can be displayed in your home for years to come.
The beauty of sand and memory layered jar ideas is their versatility. You can customize them to commemorate any occasion, from vacations and anniversaries to family heritage and seasonal celebrations. The layering technique creates a striking visual effect, while the enclosed mementos preserve your memories in a unique and artistic way.
Essential Materials for Creating Memory Jars
Before diving into our five sand and memory layered jar ideas, let’s gather the basic supplies you’ll need for any memory jar project:
- Clear glass jars with lids (Mason jars work perfectly)
- Colored sand (craft stores sell this, or you can color your own with food coloring)
- Small mementos related to your memory (tickets, photos, shells, etc.)
- Funnel or paper rolled into a funnel shape
- Wooden skewer or thin stick (for adjusting sand layers)
- Decorative elements (twine, ribbon, charms, labels)
- Hot glue gun and glue sticks
- Scissors and craft knife
- Clear plastic circles (optional, to separate layers)
Pro Tip: When working with sand, always place a large sheet of paper under your work area to catch spills. This makes cleanup much easier and allows you to funnel spilled sand back into its container.
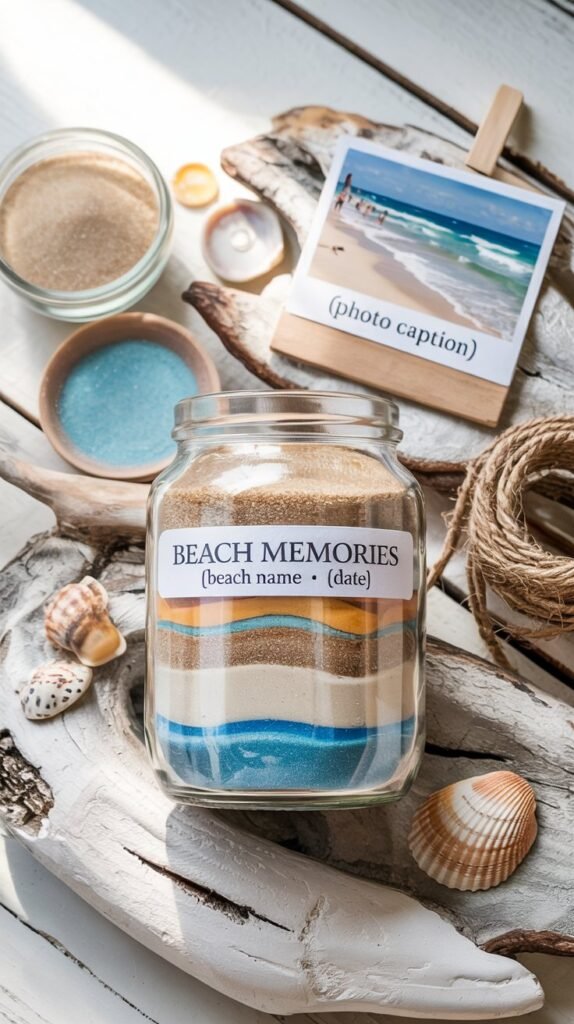
1. Beach Vacation Memory Jar
The Beach Vacation Memory Jar is perhaps the most popular of all sand and memory layered jar ideas. It’s a perfect way to preserve the essence of your seaside getaway, combining authentic beach sand with treasured souvenirs from your trip.
Materials Needed:
- Sand collected from your beach vacation (or craft sand in beach colors)
- Seashells, sea glass, or small pebbles collected from the beach
- Blue craft sand or regular sand dyed blue (representing ocean water)
- Small printed photo from your vacation
- Wooden craft stick for mounting the photo
- Twine for decorating the jar lid
- Beach-themed charm (optional)
- Small label with vacation location and date
Step-by-Step Instructions:
- Clean your jar thoroughly and ensure it’s completely dry.
- If using sand from different beaches, decide on your layering order. Consider alternating light and dark sand for visual contrast.
- Using a funnel, add your first layer of sand to the bottom of the jar (about 1 inch deep).
- Add a few small shells or pieces of sea glass on top of this layer, positioning them near the glass so they’re visible from outside.
- Continue adding alternating layers of sand and mementos, using the wooden skewer to position items against the glass.
- For a wave effect, add a layer of blue sand and use your skewer to create gentle curves.
- Attach your vacation photo to a wooden craft stick with glue and insert it into the sand, positioning it so it’s visible through the glass.
- Fill the jar to about ½ inch from the top, allowing room for the lid to close without disturbing your arrangement.
- Decorate the lid by wrapping twine around the edge and hot gluing a seashell or beach charm on top.
- Attach a small label with the beach name and date of your visit.
Personalization Tip: Write the name of the beach and date in the sand before adding the next layer, or include a tiny rolled-up note with a special memory from your trip.
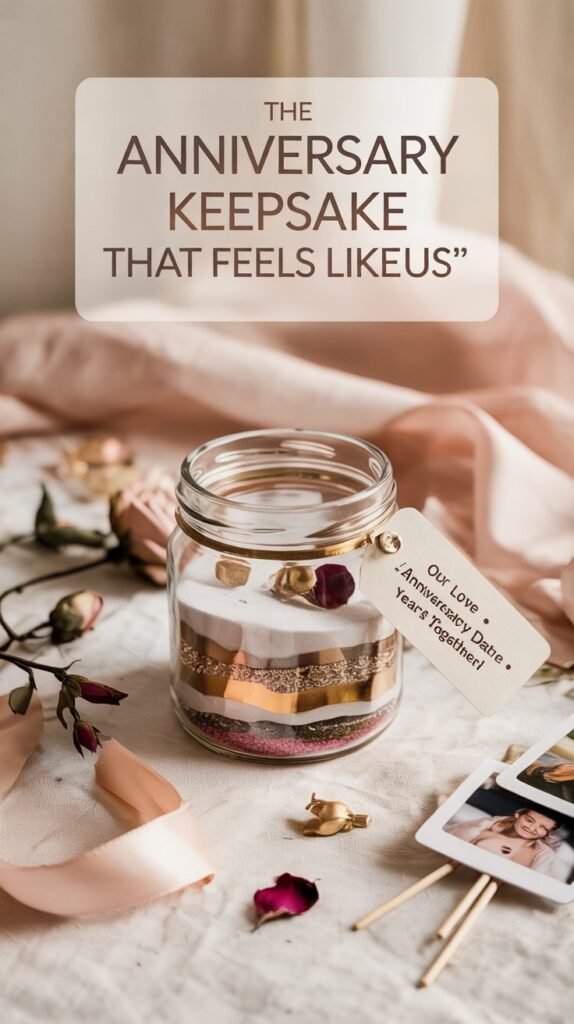
2. Anniversary Celebration Jar
Commemorate your relationship milestones with an Anniversary Celebration Jar. This sand and memory layered jar idea creates a beautiful keepsake that represents your journey together.
Materials Needed:
- Sand in colors that represent your relationship (wedding colors, favorite colors)
- Small mementos from significant moments in your relationship
- Tiny printed photos from your journey together
- Small pieces of paper with written memories or quotes
- Decorative ribbon in your wedding or anniversary colors
- Heart-shaped charm or other romantic embellishment
- Small tag with your anniversary date
Step-by-Step Instructions:
- Clean and dry your jar thoroughly.
- Plan your sand layers to represent significant years or milestones in your relationship.
- Begin adding sand layers, with each layer representing a year or special moment.
- Between layers, add small mementos that represent that period (movie ticket stubs, dried flowers from special occasions, etc.).
- Roll tiny notes with special memories into scrolls and place them between layers.
- Position small photos facing outward so they’re visible through the glass.
- Continue layering until the jar is nearly full.
- Secure the lid and decorate with ribbon in your wedding or anniversary colors.
- Attach a heart charm or other romantic embellishment to the ribbon.
- Add a tag with your anniversary date and years celebrated.
Creative Idea: For milestone anniversaries, use sand colors that correspond to traditional anniversary gifts (silver for 25th, gold for 50th).
3. Travel Souvenir Jar
For the avid traveler, a Travel Souvenir Jar is the perfect way to showcase adventures from around the world. This sand and memory layered jar idea combines sand or soil from different destinations with small souvenirs collected along the way.
Materials Needed:
- Small samples of sand, soil, or small pebbles from different travel destinations
- Tiny souvenirs from each location (coins, ticket stubs, small trinkets)
- Small printed photos from your travels
- Miniature flags or location markers
- Small labels for each destination
- Travel-themed charms (compass, airplane, globe)
- Map-patterned ribbon or twine
Step-by-Step Instructions:
- Clean and dry your jar thoroughly.
- Decide on the order of your destinations – chronological, geographical, or by color contrast.
- Add your first layer of sand or soil from your first destination.
- Place a small label against the glass indicating the location and date.
- Add a small souvenir or photo from that destination.
- Continue layering destinations, ensuring each layer is distinct and labeled.
- Use a skewer to position souvenirs and labels so they’re visible from outside.
- Fill to about ½ inch from the top.
- Secure the lid and decorate with travel-themed ribbon or twine.
- Attach a travel charm like a compass or globe to complete the theme.
Display Tip: Create a collection of travel jars, one for each continent or major trip, and display them together on a shelf with a world map backdrop.
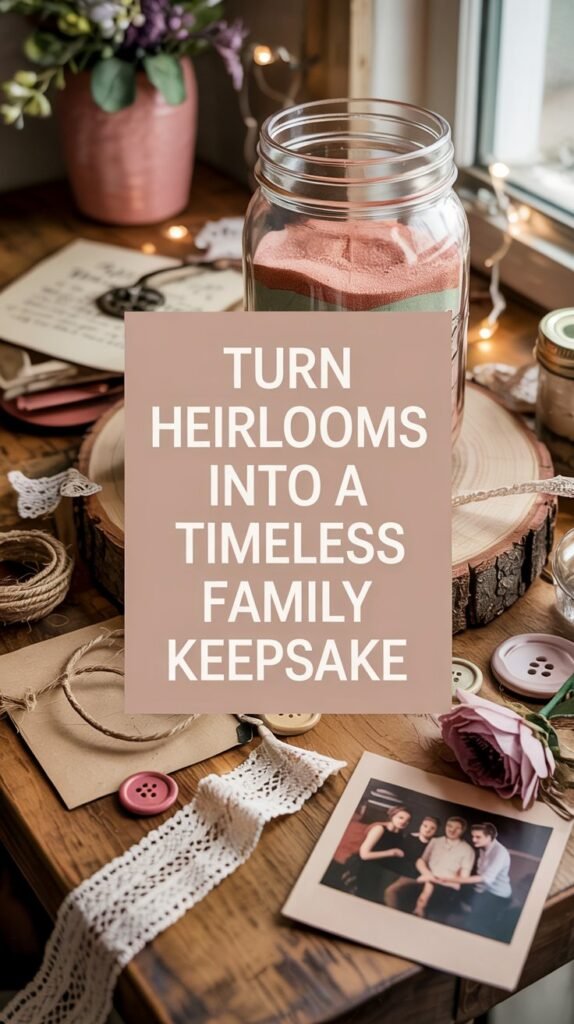
4. Family Heritage Jar
Honor your family’s roots with a Family Heritage Jar. This meaningful sand and memory layered jar idea represents your ancestry and family traditions through symbolic colors and mementos.
Materials Needed:
- Sand in colors representing your family’s heritage (national colors, regional colors)
- Small family heirlooms or representations (buttons from grandma’s sewing box, etc.)
- Tiny printed family photos
- Small fabric scraps from meaningful family textiles
- Pressed flowers or herbs that represent family traditions
- Handwritten family recipes or sayings (miniaturized)
- Ribbon, lace, or other decorative elements that reflect your heritage
- Family crest or symbol (if applicable)
Step-by-Step Instructions:
- Clean and dry your jar thoroughly.
- Plan your sand layers to represent different aspects of your family heritage.
- Begin with a base layer of sand representing your earliest known ancestors.
- Add small mementos that represent that generation or heritage.
- Continue adding layers that progress through your family history.
- Include miniature photos, fabric scraps, or other family items between layers.
- Position items so they’re visible through the glass.
- Add a final layer representing the current generation.
- Secure the lid and decorate with elements that reflect your heritage (tartan ribbon for Scottish heritage, etc.).
- Attach a family crest or create a custom label with your family name and significant dates.
Heritage Idea: If possible, include actual soil from ancestral homelands or places of family significance to create an authentic connection to your roots.
5. Seasonal Memory Jar
Capture the changing seasons with a Seasonal Memory Jar. This creative sand and memory layered jar idea represents the passage of time through seasonal colors and nature-inspired elements.
Materials Needed:
- Sand in seasonal colors (white for winter, green for spring, yellow for summer, orange/red for fall)
- Small seasonal items (tiny pinecones, dried flower petals, seeds, leaves)
- Photos representing activities from each season
- Small handwritten notes about favorite seasonal memories
- Seasonal charms or embellishments
- Ribbon in colors that transition through the seasons
- Small seasonal decorative elements for the jar lid
Step-by-Step Instructions:
- Clean and dry your jar thoroughly.
- Decide whether to arrange seasons chronologically or by visual appeal.
- Begin with your first seasonal layer (typically winter with white sand).
- Add small winter-themed items (tiny pinecones, silver glitter, etc.).
- Continue with spring (green sand, dried flower petals, seeds).
- Add summer elements (yellow sand, tiny seashells, bright colors).
- Finish with fall (orange/red sand, miniature leaves, cinnamon sticks).
- Position seasonal photos or notes between layers.
- Secure the lid and decorate with ribbon that transitions through seasonal colors.
- Add a seasonal charm or create a decorative top that represents all four seasons.
Year-Round Display: Create a seasonal jar each year and display them side by side to see how your experiences and memories evolve over time.
General Tips for Perfect Sand and Memory Layered Jars
Choosing the Right Sand
- Craft sand is available in various colors at most craft stores
- Natural sand can be colored using food coloring (mix food coloring with a small amount of water, add sand, mix well, and let dry completely)
- Ensure all sand is completely dry before using to prevent clumping
- Fine-grain sand creates smoother layers than coarse sand
- Consider using authentic sand from meaningful locations when possible
Creating Perfect Layers
- Use a funnel to pour sand precisely and avoid spills
- Pour sand slowly to maintain clean layer lines
- Use a wooden skewer to gently tap the jar sides to level each layer
- For distinct separation between similar colors, place clear plastic circles (cut to jar size) between layers
- Create patterns by pouring sand along the inside edge of the jar
Preserving Delicate Items
- Coat paper items (photos, notes) with clear mod podge before adding to prevent damage from sand
- Press flowers between wax paper in a heavy book before including
- Position delicate items against the glass using a wooden skewer
- Consider placing very fragile items in tiny clear containers before adding to the jar
- Use clear fishing line to suspend special items in the center of the jar
Sealing and Display
- Fill jars completely to prevent shifting during movement
- For permanent sealing, add a thin layer of clear craft glue under the lid
- Display jars away from direct sunlight to prevent fading
- Create custom labels with acid-free paper for longevity
- Group related jars together for a more impactful display
Preserve Your Special Moments with Sand and Memory Layered Jars
Sand and memory layered jar ideas offer a beautiful, tangible way to preserve life’s precious moments. Whether you’re commemorating a beach vacation, celebrating an anniversary, documenting your travels, honoring your heritage, or capturing the changing seasons, these personalized keepsakes tell your unique story through layers of color and meaningful mementos.
The beauty of these projects lies in their versatility and personal significance. Each jar becomes a one-of-a-kind creation that holds not just physical items, but the emotions and memories attached to them. As you create your own sand and memory layered jars, remember that there are no strict rules – let your creativity and personal connection to the memories guide your design.