12 Budget-Friendly DIY Thrifted Treasures To Transform Your Statement Wall
There’s something magical about transforming forgotten treasures into stunning focal points for your home. Upcycled wall art not only adds character and warmth to your space, it tells a story that mass-produced decor simply can’t match. Plus, there’s that wonderful feeling of creating something beautiful while being kind to both your wallet and the planet.
In this cozy corner of creativity, I’ll guide you through 12 delightful ways to turn thrift store finds into statement wall pieces that will have friends asking, “Where did you get that?” Get ready to see ordinary objects, from vintage frames to forgotten textiles, transform into extraordinary art that perfectly captures your unique style and spirit.
Essential Materials for Your Upcycling Journey
Basic Tools:
- Scissors and craft knife
- Measuring tape and ruler
- Sandpaper (various grits)
- Paintbrushes (assorted sizes)
- Hammer and nails
- Picture hanging kit
- Screwdriver set
Adhesives and Finishes:
- All-purpose craft glue
- Hot glue gun and sticks
- Mod Podge or similar sealer
- Acrylic paints
- Spray paint (primer and colors)
- Clear polyurethane spray
- Double-sided tape
Thrifty Tip: Keep a “creative possibilities” box where you collect interesting thrift finds, old buttons, unique hardware, pretty paper scraps, that might inspire future projects. You never know when that odd little trinket will become the perfect finishing touch!
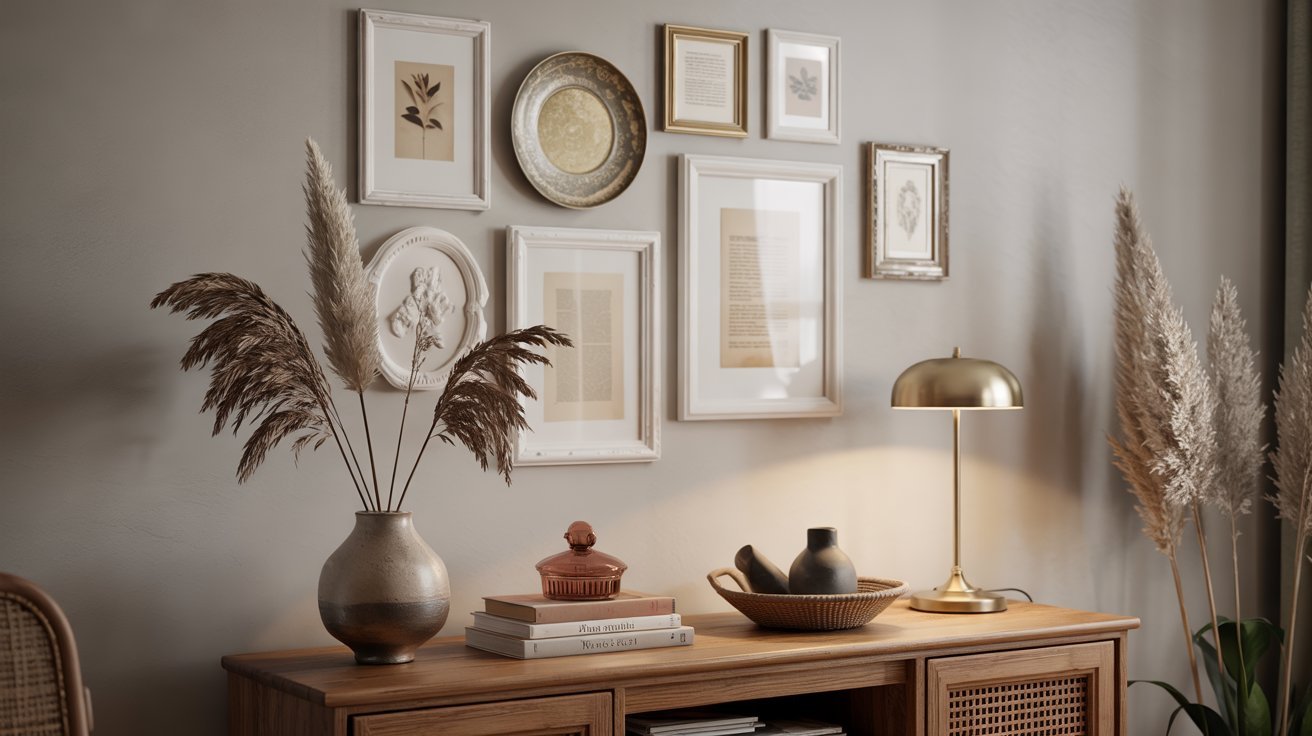
1. Vintage Frame Gallery Wall
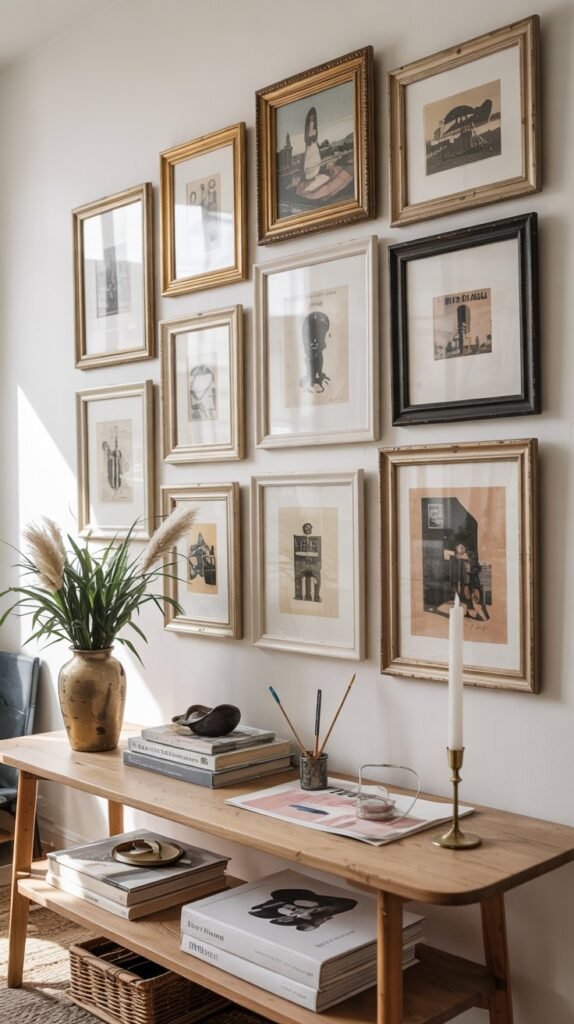
Old picture frames are thrift store gold. With a little imagination and some paint, you can transform a mismatched collection into a stunning coordinated gallery wall that looks like it came straight from a high-end home decor boutique.
What You’ll Need:
- Assorted thrifted frames (with or without glass)
- Sandpaper
- Primer
- Paint in your chosen color palette
- Paintbrushes
- Optional: decorative paper, fabric, or pressed botanicals
Step-by-Step:
- Clean your frames thoroughly and remove any hardware or backing.
- Lightly sand surfaces to help the paint adhere better.
- Apply primer to frames that have dark finishes or glossy surfaces.
- Paint frames in your chosen color palette—consider using 2-3 complementary colors for a cohesive look.
- For empty frames, you can leave them as is for an architectural look, or fill with decorative paper, fabric, or pressed botanicals.
- Once dry, reattach hardware and arrange on your wall in a pleasing composition.
Pro tip: The frames don’t need to match perfectly, it’s their collective presence that creates the impact. Think of them as a family: related but each with their own personality.
2. Textile Wall Hanging from Vintage Scarves
Those beautiful vintage scarves with their intricate patterns are too pretty to stay hidden in a drawer. This simple project turns them into a statement textile wall hanging that adds color, pattern, and movement to any room.
What You’ll Need:
- 2-4 vintage scarves or fabric pieces
- Wooden dowel or branch
- Twine or leather cord for hanging
- Scissors
- Needle and thread or fabric glue
Step-by-Step:
- Select scarves that complement each other in color or pattern.
- Iron scarves to remove any wrinkles.
- Fold over the top edge of each scarf to create a pocket for the dowel.
- Sew or glue the folded edge to create the pocket.
- Slide the scarves onto the dowel, arranging them in a pleasing order.
- Tie twine or cord to each end of the dowel for hanging.
Creative Variation: For added texture and visual interest, try knotting the bottom edges of the scarves or adding tassels, beads, or other embellishments.
3. Vintage Plate Wall Composition
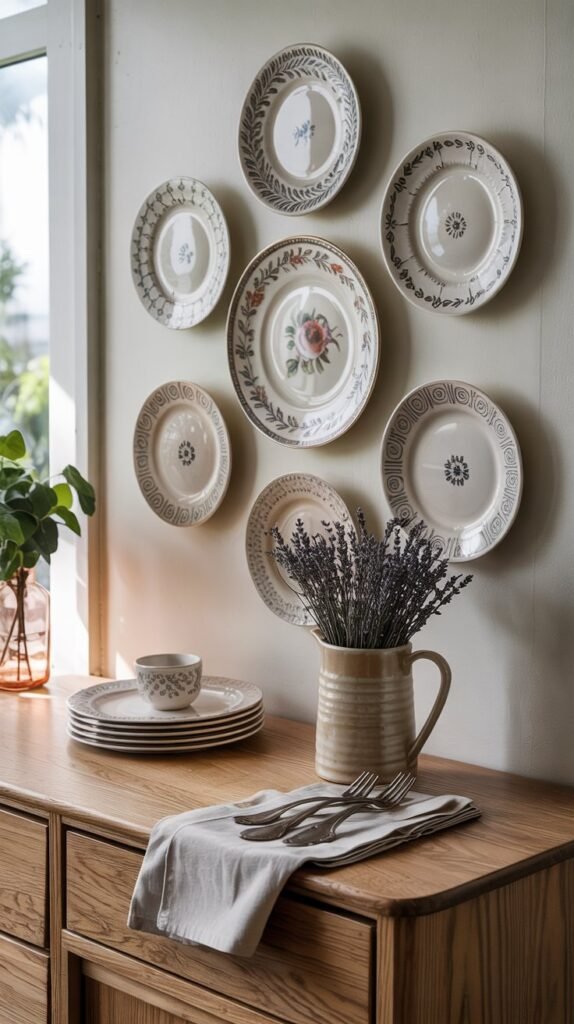
Thrift stores and estate sales are treasure troves of beautiful vintage plates just waiting for a second life. Creating a plate wall is a wonderful way to showcase these pieces as art rather than keeping them hidden away in a cabinet.
What You’ll Need:
- Assorted vintage plates (5-9 works well)
- Plate hangers in appropriate sizes
- Hammer and nails
- Level
- Measuring tape
- Paper templates of each plate (optional)
Step-by-Step:
- Clean your plates thoroughly and let dry completely.
- Attach plate hangers to the back of each plate according to manufacturer instructions.
- Plan your arrangement—try laying the plates out on the floor first to find a pleasing composition.
- For precise placement, trace each plate onto paper, cut out the templates, and tape to the wall to visualize the arrangement.
- Mark nail positions and check with a level.
- Hang plates, starting with the central or largest plate and working outward.
Pro tip: Look for plates with complementary colors but varied patterns. The contrast between delicate florals, bold geometrics, and simple borders creates visual interest while the color harmony ties everything together.
4. Architectural Salvage Art from Decorative Molding
Architectural salvage yards and renovation dumpsters often yield beautiful pieces of decorative molding. These ornate pieces can be repurposed into stunning wall art that adds architectural interest and dimension to your space.
What You’ll Need:
- Salvaged decorative molding pieces
- Plywood or MDF board for backing
- Sandpaper
- Wood glue
- Paint or stain
- Paintbrushes
- Picture hanging hardware
Step-by-Step:
- Clean and sand your molding pieces to remove any old paint or rough spots.
- Cut your backing board to desired size.
- Arrange molding pieces on the board in a pleasing pattern—try geometric shapes, a medallion design, or an abstract composition.
- Once you’re happy with the arrangement, glue pieces in place with wood glue.
- When dry, paint or stain the entire piece in your chosen finish.
- Attach picture hanging hardware to the back.
Design Tip: For a dramatic effect, paint the backing board a dark color and the moulding pieces white or cream to create strong contrast and highlight the architectural details.
5. Book Page Botanical Collage
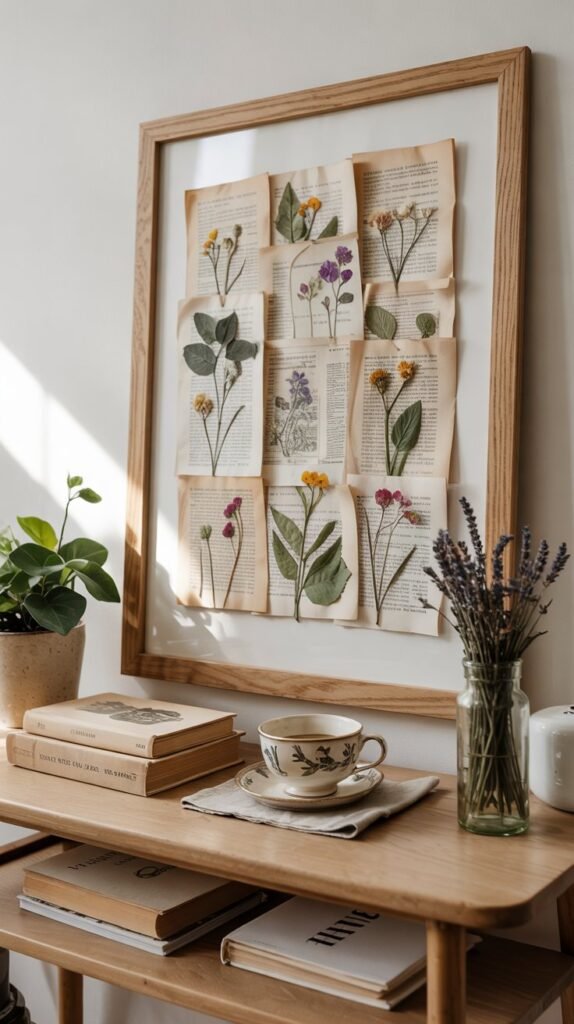
Old books with yellowed pages make the perfect backdrop for a botanical-inspired piece of wall art. This project combines the charm of vintage text with the natural beauty of pressed leaves and flowers.
What You’ll Need:
- Old book with interesting pages (dictionaries, novels, or poetry work well)
- Pressed leaves, flowers, or ferns
- Thrifted frame with glass
- Acid-free glue or Mod Podge
- Foam brush
- Cardstock or mat board for backing
Step-by-Step:
- Carefully remove selected pages from the book.
- Cut pages to fit your frame if needed.
- Arrange pages on your backing board, overlapping slightly if desired.
- Glue pages in place with a thin layer of Mod Podge.
- Once dry, arrange pressed botanicals on top in a pleasing composition.
- Carefully apply a small amount of glue to secure botanicals.
- Let dry completely before placing in frame.
Sourcing Tip: If you don’t have pressed botanicals, you can press your own using heavy books or purchase them from craft stores. You can also use high-quality color copies of botanical illustrations for a similar effect.
6. Window Frame Shadow Box
Old window frames with their divided panes make perfect ready-made shadow boxes. This project turns architectural salvage into a unique display for your small treasures and collections.
What You’ll Need:
- Old window frame (with or without glass)
- Sandpaper
- Paint or stain
- Thin plywood, cardboard, or foam board
- Fabric or decorative paper (optional)
- Small collectibles or memorabilia
- Hot glue gun
- Picture hanging hardware
Step-by-Step:
- Clean and sand the window frame.
- Paint or stain as desired.
- If the window has no glass, cut backing material to fit each pane.
- Cover backing with fabric or paper if desired.
- Attach backing to the rear of the window frame.
- Arrange and glue your small treasures in each pane section.
- Attach hanging hardware to the back.
Pro tips: Think of each pane as its own tiny gallery space. You might create a theme for the entire window, or let each section tell its own little story.
7. Vintage Map Wall Art
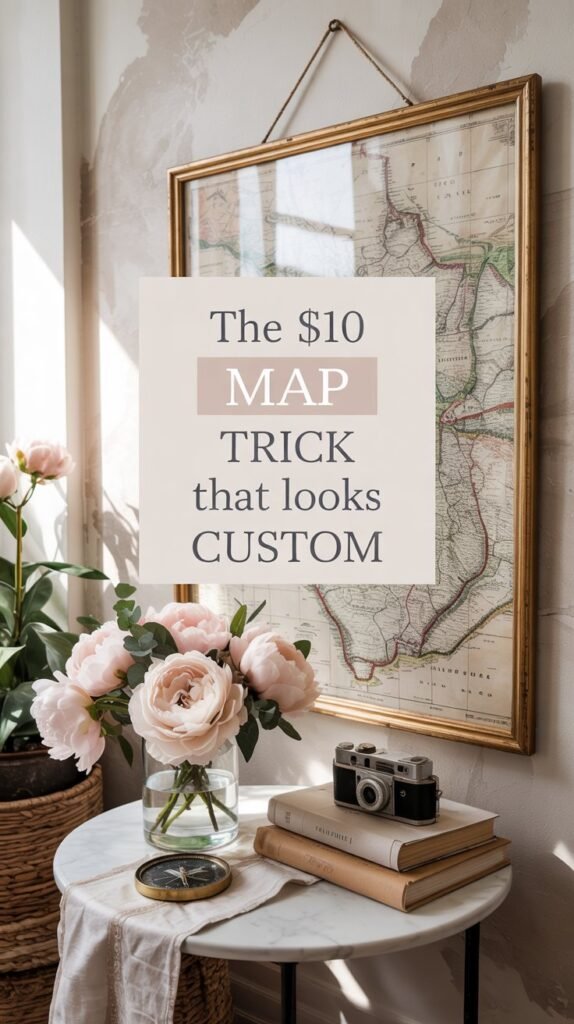
Vintage maps have a timeless appeal and can be found for a song at thrift stores and estate sales. Whether you choose a map of a place you love or simply appreciate the aesthetic, maps make wonderful wall art with built-in meaning.
What You’ll Need:
- Vintage map or atlas page
- Thrifted frame
- Mat board (optional)
- Acid-free adhesive
- Small embellishments like pins or stickers (optional)
- Glass cleaner
Step-by-Step:
- Clean your frame thoroughly and polish the glass.
- If needed, paint or refinish the frame.
- Measure and cut your map to fit the frame, allowing for the mat if using one.
- If desired, mark special locations with small pins, heart stickers, or hand-drawn circles.
- Mount the map to backing board using acid-free adhesive.
- Place in frame and secure backing according to frame type.
Personalization Idea: Create a custom travel story by using a map of places you’ve visited and adding small numbered pins with a corresponding key that tells the story of each location.
8. Vintage Drawer Shadow Box Display
Old drawers from dressers or sewing cabinets make perfect ready-made shadow boxes with built-in character. This project gives new life to a piece that might otherwise end up in a landfill.
What You’ll Need:
- Vintage wooden drawer
- Sandpaper
- Wood cleaner or mild soap
- Wood wax or polish
- Small collectibles for display
- Screw eyes or D-rings
- Picture hanging wire
- Optional: decorative paper or fabric for lining
Step-by-Step:
- Clean the drawer thoroughly inside and out.
- Lightly sand any rough areas, being careful not to remove the patina.
- Apply wood cleaner or polish to bring out the natural beauty of the wood.
- If desired, line the inside back of the drawer with decorative paper or fabric.
- Attach screw eyes or D-rings to the upper corners of the back.
- String picture hanging wire between the hardware.
- Arrange your collectibles inside the drawer, securing with museum wax if needed.
Display Tip: Create visual interest by varying the heights of objects. Use small wooden blocks or upturned teacups as risers to elevate some items above others.
9. Embroidery Hoop Textile Art
Embroidery hoops are inexpensive and versatile frames for displaying beautiful textiles. This project lets you showcase vintage linens, doilies, handkerchiefs, or fabric scraps in a simple yet striking way.
What You’ll Need:
- Wooden embroidery hoops in various sizes
- Vintage textiles (doilies, lace, handkerchiefs, etc.)
- Scissors
- Iron
- Optional: spray paint for the hoops
- Optional: ribbon for hanging
Step-by-Step:
- If desired, paint the wooden hoops in your chosen color.
- Iron your textile pieces to remove wrinkles.
- Loosen the screw on each hoop and separate the inner and outer rings.
- Place the textile over the inner ring, then place the outer ring over it and tighten.
- Trim excess fabric, leaving about 1 inch all around.
- Fold excess fabric to the back and secure with hot glue if needed.
- Arrange hoops on the wall in a pleasing composition.
The beauty of this project is in the layering of textures, the delicate openwork of a doily, the intricate pattern of lace, the soft weave of linen, all framed by the natural warmth of wooden hoops.
10. Vintage Tin Ceiling Tile Art
Vintage tin ceiling tiles with their intricate patterns make instant architectural wall art. Their dimensional quality adds texture and visual interest to any space, and their patina tells the story of their history.
What You’ll Need:
- Vintage tin ceiling tile
- Wire brush or soft cloth
- Clear polyurethane spray (optional)
- Simple frame or wooden backing (optional)
- Heavy-duty picture hanging hardware
Step-by-Step:
- Gently clean the tile with a soft cloth or wire brush, being careful not to remove the patina.
- If the tile has sharp edges, file them down or cover with trim.
- If desired, spray with clear polyurethane to protect the finish.
- For a more finished look, mount the tile on a wooden backing or frame it.
- Attach heavy-duty picture hanging hardware to the back, these tiles can be heavy!
Sourcing Tip: Look for tin ceiling tiles at architectural salvage yards, flea markets, or online marketplaces. Even damaged tiles can be beautiful, the dents and dings add to their character!
11. Vintage Sheet Music Wall Art
Old sheet music has a romantic, nostalgic quality that makes it perfect for wall art. Whether you’re a musician or simply appreciate the beautiful graphic quality of musical notation, this project creates art with built-in meaning.
What You’ll Need:
- Vintage sheet music (thrift stores often have old music books)
- Thrifted frame
- Mat board (optional)
- Tea or coffee for aging (optional)
- Mod Podge or similar sealer
- Small music-themed embellishments (optional)
Step-by-Step:
- Select sheet music pages, look for interesting titles or beautiful graphics.
- If desired, age the pages by lightly brushing with tea or coffee and allowing to dry.
- Arrange pages in your chosen composition, you might overlap them or create a grid.
- Mount pages to backing board using Mod Podge.
- Add embellishments if desired.
- Place in frame and secure backing.
Personalization Idea: Choose sheet music that has personal significance, perhaps the first song you learned to play, your wedding song, or music from your favorite composer.
12. Woven Magazine Strip Art
This project transforms old magazines, which we all have piling up, into a stunning piece of textural art. The weaving technique creates depth and visual interest while the colorful magazine pages provide endless pattern possibilities.
What You’ll Need:
- Old magazines with colorful pages
- Scissors or paper cutter
- Ruler
- Cardboard or foam board backing
- Glue stick or craft glue
- Thrifted frame
Step-by-Step:
- Select magazine pages with colors and patterns that appeal to you.
- Cut pages into strips of equal width (about 1/2 inch works well).
- Cut a piece of cardboard to fit your frame as the backing.
- Begin by gluing strips vertically across the cardboard, leaving equal space between them.
- Weave horizontal strips through the vertical ones, creating an over-under pattern.
- When the weaving is complete, glue down the ends of each strip to the back of the cardboard.
- Place in frame and secure backing.
Pro tip: The magic happens when you select pages with a theme, all blues and greens for a coastal feel, warm reds and oranges for a sunset vibe, or black and white text pages for a graphic look.
Styling Your Upcycled Wall Art
Once you’ve created your beautiful upcycled wall art pieces, the next step is styling them in your space. Here are some tips to help you display your creations in a way that enhances your home’s overall aesthetic.
For Eclectic Spaces:
- Mix different types of wall art for visual interest
- Vary the heights and sizes of pieces
- Connect disparate items through a common color thread
- Don’t be afraid to layer smaller pieces in front of larger ones
- Use the “rule of odd numbers” for groupings (3, 5, or 7 items)
For Minimalist Spaces:
- Choose one statement piece as a focal point
- Opt for pieces with clean lines and simple color palettes
- Allow for plenty of negative space around artwork
- Consider monochromatic pieces for a cohesive look
- Align pieces with architectural features
Gallery Wall Tips:
Creating a gallery wall with your upcycled pieces is a wonderful way to make a big impact. Here’s how to get it right:
- Lay out your arrangement on the floor first to experiment with placement.
- Start with the largest piece as an anchor, typically centered or slightly off-center.
- Keep spacing between pieces consistent (2-3 inches works well).
- Use paper templates taped to the wall to finalize placement before hammering any nails.
- Install the center piece first, then work your way outward.
Designer Secret: For a cohesive gallery wall, limit your color palette to 3-4 main colors that repeat throughout different pieces. This creates harmony even when the art styles vary.
Budget-Friendly Alternatives and Cost-Saving Tips
The beauty of upcycling is that it’s inherently budget-friendly. However, there are always ways to stretch your creative dollar even further. Here are some money-saving strategies to keep your upcycled wall art projects truly thrifty.
Sourcing Materials:
- Visit thrift stores on their discount days (many offer 50% off certain tags on specific days)
- Check free sections on neighborhood apps and online marketplaces
- Ask friends and family about items they’re planning to discard
- Explore construction dumpsters (with permission) for architectural salvage
- Attend estate sales, especially on the final day when prices are often slashed
Alternative Materials:
Don’t have exactly what you need? Try these creative substitutions:
| If You Need | Try This Instead |
| Expensive craft paint | Sample pots of wall paint (often $2-3) |
| New picture frames | Repurpose old cabinet doors or window frames |
| Decorative paper | Gift wrap, maps, or pages from old books |
| Embroidery hoops | Bend flexible branches into circles |
| Mat board | Cardboard covered with fabric or paper |
Money-Saving Tip: Create your own custom-colored paint by mixing leftover house paint with white paint to create pastels or with each other to create new shades. Store small amounts in baby food jars for future touch-ups.
Ready to Transform Your Walls?
There’s something deeply satisfying about creating beautiful art from items that might otherwise be discarded. Not only does upcycling give new life to forgotten treasures, but it also results in truly one-of-a-kind pieces that tell a story and add character to your home.
The projects we’ve explored are just the beginning. Once you start looking at thrift store finds with an artist’s eye, you’ll discover endless possibilities for creating unique wall art that reflects your personal style and creativity.
Remember, there are no strict rules in upcycling, just opportunities to experiment, play, and transform. Your next masterpiece might be hiding in a thrift store bin or tucked away in your grandmother’s attic, just waiting for you to see its potential.