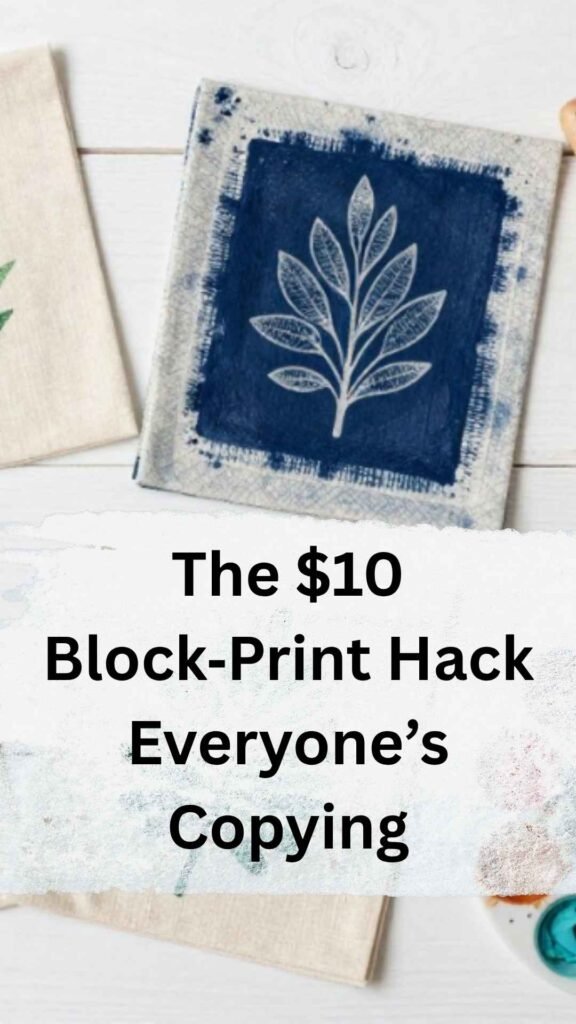
Easy Block Print Projects on Everyday Items That Will Make You Feel Like a Proper Artist
Block printing found me on a random Tuesday and I have not been the same since. Ink-stained hands, a kitchen full of stamped fabric, napkins that looked like a forty-dollar artisan market find, all from a craft that costs under twenty dollars to start and takes about an hour to learn.
Easy block print projects are one of those rare things that look incredibly impressive and are genuinely, properly beginner-friendly. Press ink onto a raised surface, stamp it onto your material, lift, repeat. That is the whole secret.
Let me show you how to transform everyday items into custom-designed pieces that make you feel like a proper artist.
What Is Block Printing and Why Is It Perfect for Beginners
Before we dive into the projects, let me give you a quick enthusiastic overview for anyone who is completely new to this. Block printing is a form of relief printing, you create a raised design on a block surface, apply ink or paint to the raised areas, and press it onto your material to transfer the design.
The recessed areas do not pick up the ink, which is what creates the design. This relief technique has been used for centuries in traditional printmaking and remains one of the most accessible craft processes for beginners.
Types of Blocks You Can Use
There are a few different types of blocks you can use, and they vary in cost, difficulty and the kind of results they give. Choosing the right block material depends on your budget and how detailed you want your prints to be.
Foam Blocks
Foam blocks are the most beginner-friendly option, you literally draw or trace your design onto craft foam and cut it out with scissors. No carving tools required.
Incredibly cheap at one to two dollars per foam sheet and great for bold, simple designs. Perfect for absolute beginners who want to start stamping today.
Rubber Carving Blocks
Rubber carving blocks are slightly more involved, you draw your design onto the surface and carve away the areas you do not want to print using inexpensive carving tools.
The results are more detailed and professional-looking. A starter carving block costs three to six dollars and a basic set of carving tools eight to fifteen dollars.
Found Objects
Found objects are the most budget-friendly option of all and genuinely brilliant for easy block print projects. Cut a potato in half and carve a simple shape into it.
Cut a wine cork to create a tiny circular stamp. Use bubble wrap for a textured pattern. Use a leaf pressed into paint for a botanical print. Found object printing costs literally nothing.
Linoleum Blocks
Linoleum blocks are the traditional option used in proper printmaking, they give the crispest, most detailed results but require more effort to carve.
Worth trying once you have got the basics down. Traditional linoleum block printing demands patience but delivers professional-quality prints.
What You Will Need to Get Started
Here is the honest, minimal starter list for easy block print projects. You do not need expensive materials to create beautiful results that look genuinely professional.
For Printing
- Block material of your choice, foam sheets at one to two dollars, a soft-cut rubber block at three to six dollars, or a potato and cork for free
- Carving tools if using rubber block, a basic set from a craft store at eight to fifteen dollars
- Fabric paint or block printing ink, fabric paint from a craft store works perfectly for fabric projects at four to eight dollars per color, and you only need a tiny amount per project
- A foam roller or flat brush for applying ink at three to eight dollars
- A palette or old plate to roll your ink on
- Paper for practice prints
- An iron for heat-setting fabric paint to make it permanent and washable
For Your Projects
- Whatever everyday items you want to print on, fabric ones work best for beginners
- Low-tack masking tape for keeping fabric in place while printing
- Cardboard inserts to prevent bleed-through on double-layer items
- Pencil and tracing paper for planning your design
- A brayer or clean rolling pin for applying even pressure when pressing the block
Total beginner starter kit cost is approximately fifteen to thirty dollars depending on what you already have at home. Most of these supplies last for dozens of projects, your cost per item printed is genuinely just a few cents once you have your basic kit.
Easy Block Print Projects On Everyday Items
These six beginner projects transform ordinary household items into custom-designed pieces. Start with whichever project excites you most
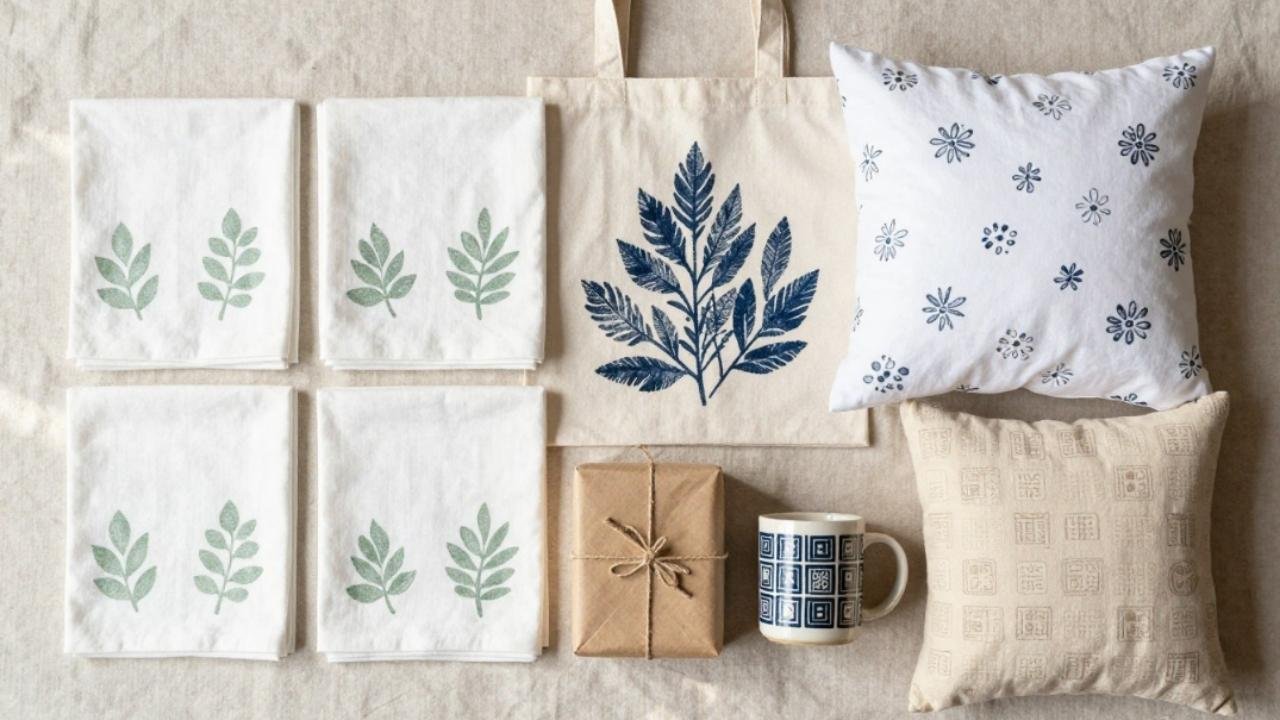
Linen Napkins
This is where I started and I will never stop recommending it as a first easy block print project. Plain white or natural linen napkins are inexpensive at two to four dollars each from discount homewares stores or thrift shops.
The result looks genuinely beautiful on a table. Completely forgiving of beginner imperfections, and every slight variation in your hand stamping adds to the organic charm.
Best Designs for Napkins
- Simple botanicals – a single leaf, a sprig of herbs, a small flower that you can repeat in a corner pattern
- A geometric corner stamp – a simple triangle or diamond repeated in each corner creates an elegant border
- A single word stamped along one edge – something like “gather” or “enjoy” in simple block letters
- Abstract shapes that you love – organic circles, flowing lines, or nature-inspired forms
How to Do It
Lay your napkin flat on a firm surface and slide a piece of cardboard inside if it is double-layered to prevent bleed-through. Apply fabric paint to your block with a foam roller or flat brush, a thin, even layer is what you want, not a thick goopy one.
Press the block firmly onto the fabric, apply even pressure across the whole surface, and lift straight up without sliding. That is your first print. Practice on paper first to get a feel for the right amount of ink.
Heat set with an iron once completely dry to make it washable. The whole process takes about twenty minutes for a set of four napkins.
Budget tip: Plain tea towels from discount stores at two to three dollars each and natural calico fabric cut into napkin sizes at three to five dollars per meter are the most budget-friendly options. Thrift store napkins and tea towels are also perfect, they are usually good quality cotton or linen at a fraction of new price.
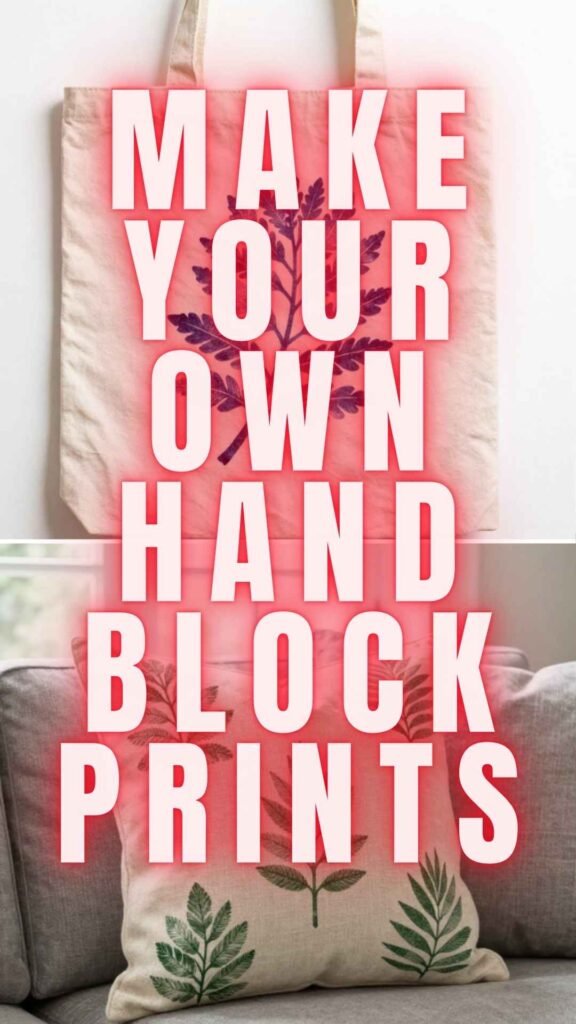
Tote Bags
A plain canvas tote bag is one of the most satisfying easy block print canvases because you use it constantly and everyone sees it. A hand-printed tote looks like something from a boutique craft market and it cost you maybe three dollars and an hour to make.
The gap between what it looks like and what it cost is one of my favorite things about this craft. Canvas tote bags provide the perfect firm surface for clear, crisp block printing.

Best Designs for Tote Bags
- A larger botanical or floral design for the front panel that becomes a statement piece
- A repeating pattern across the whole bag for an all-over design that looks complex but is just one stamp repeated
- A simple word or phrase that expresses something meaningful to you
- A single bold geometric shape positioned center-front for modern minimalist style
- A nature-inspired design,a leaf, a branch, a simple animal silhouette that connects to your personal aesthetic
How to Do It
Slide a piece of cardboard inside the tote bag before you start to create a firm surface and prevent bleed-through to the back. Tape the bag flat with low-tack masking tape if it keeps shifting around while you work.
Apply ink to your block evenly, position it on the bag where you want it, and press firmly with even pressure. A clean rolling pin pressed over the back of the block gives beautifully even pressure and prevents patchy prints.
Lift straight up. Let dry completely before removing the cardboard. Heat set with an iron to make it permanent and washable through multiple uses.
Budget tip: Plain canvas tote bags are available in bulk online for as little as one-fifty to three dollars each,buy a pack and make a batch. They make the most lovely handmade gifts, and making five at once is barely more effort than making one.
Plain Pillowcases
This one genuinely sounds more impressive than it is to make. a Block-printed pillowcase looks so beautiful on a bed and people will absolutely assume you bought it somewhere expensive.
A simple repeating botanical across the corner of a plain white pillowcase, or a single large leaf print in the center, or a scattered all-over floral, all of these look stunning and take less than twenty minutes.
How to Do It
Iron your pillowcase flat first, paint does not adhere well to wrinkled fabric and you want a smooth printing surface. Slide cardboard inside to create a firm surface and lay it on a flat, hard table or floor.
Apply ink and print your design, working from one corner or edge and building your pattern outward. For a repeating pattern, use a ruler and light pencil marks to guide your spacing if you want it to look intentional.
Or embrace the organic irregularity of hand printing and go freehand, which honestly often looks better and more authentic. Heat set when completely dry by ironing on the reverse side for two minutes.
Budget tip: Plain white pillowcases from discount stores or thrift shops are two to five dollars each ,buy a matching pair and print them identically for a proper bedroom set that looks genuinely beautiful and coordinated.

Wrapping Paper and Gift Tags
This is one of the most beginner-friendly easy block print projects because paper is incredibly forgiving, mistakes do not matter since you can just flip it over or cut around them, and the results are so impressively beautiful.
Hand-printed wrapping paper and gift tags make gifts feel like a whole experience where the wrapping is part of the gift itself. People genuinely treasure these as much as what is inside.
What to Print On
- Brown kraft paper bought in a roll from a craft or post office store at five to ten dollars for a big roll that makes lots of wrapping paper
- Tissue paper in white or a plain color that creates delicate layered wrapping
- Watercolor paper cut into tag shapes with a hole punched for ribbon attachment
- Plain newsprint for a more casual look that still feels intentional and artistic
Design Ideas
A repeating pattern all over the sheet works beautifully, stars, leaves, geometric shapes, tiny flowers, or dots create consistent visual interest. A simple motif stamped sparsely for a more minimal look gives elegant restraint.
A border design around the edges frames the gift perfectly. Seasonal designs like leaves for autumn, snowflakes for winter, or florals for spring make your gift wrapping timely and thoughtful.
Budget tip: This is the perfect project for found-object printing, a cut potato stamped in gold metallic fabric paint onto brown kraft paper looks absolutely stunning and costs practically nothing. A cork dipped in ink creates perfect little circular polka dots.

Plain White Ceramics
Wait, you can block print on ceramics? You absolutely can, and the results are gorgeous. You need to use a slightly different paint, specifically ceramic paint or air-dry clay paint rather than fabric paint, but the printing technique remains identical.
A plain white mug, a set of ceramic plates, a simple vase,all can be block printed with beautiful results that look like they came from an upscale home goods boutique.
Important Note About Food Safety
Block-printed ceramics decorated with air-dry ceramic paint are decorative rather than food-safe unless you use a food-safe ceramic paint and cure it properly in the oven according to manufacturer instructions.
Always check your paint instructions carefully. For mugs and plates you will use for food and drink, use a paint specifically labeled food-safe and follow the curing instructions exactly.
For purely decorative pieces like a vase, a pot, or a display piece, any ceramic paint works beautifully without concerns.
How to Do It
Clean your ceramic surface with rubbing alcohol first to remove any oils that might prevent paint adhesion. Apply ceramic paint to your block and press firmly onto the curved surface.
You will need to rock the block slightly to get even contact on a curved mug or vase rather than pressing straight down. Work in sections if needed for larger pieces.
Let dry completely and cure according to your paint instructions, which usually involves baking in a regular oven at a specified temperature.
Budget tip: Plain white ceramics from thrift stores are perfect for this project. a Plain white mug or ceramic pot for one to two dollars becomes a completely unique handmade piece with a little block printing. Buying new is fine too as plain white ceramics are inexpensive at discount homewares stores.
Plain Fabric Cushion Covers
A block-printed cushion cover is one of those projects where the result looks so impressive relative to the effort that it almost feels like cheating. A simple botanical repeat across a natural linen cushion cover looks like a boutique homeware purchase.
A bold geometric design on a white cotton one creates modern style. Either way, it takes about thirty minutes to make and transforms your living space.
How to Do It
Iron your cushion cover flat and slide cardboard inside to create your firm printing surface. Plan your design roughly before you start, for a repeating pattern, use light pencil dots as guides for placement.
Or simply eyeball it and embrace the organic nature of hand printing, which really does look beautiful and authentic. Apply ink and print your design, reappling ink to your block after every one to two prints for consistent coverage.
Let dry completely, which usually takes two to four hours for fabric paint, then heat set with an iron before washing. The cushion cover is now permanent and machine washable.
Budget tip: Plain calico or cotton fabric from a fabric store at three to six dollars per meter sewn into a simple envelope-back cushion cover is the most budget-friendly option. Plain ready-made cushion covers from discount stores at three to six dollars each are even faster. Either way, your total cost for a beautiful hand-printed cushion cover is well under ten dollars.

Dos: What Makes Easy Block Print Projects Turn Out Beautifully
- Do practice on paper first. Always. Every time you load your block with fresh ink, do a test print on paper before committing to your fabric or final surface.
- Do apply ink in a thin, even layer. This is the most important technique tip for block printing. Too much ink creates blobby prints with filled-in details. Too little gives patchy, incomplete prints.
- Do press firmly and evenly. When you press your block onto your surface, apply even pressure across the whole block, a Rolling pin or brayer rolled over the back works brilliantly.
- Do lift straight up. Once you have pressed your block, lift it straight up vertically without sliding sideways. Sliding creates ghost prints and smudging.
- Do embrace the imperfection. Block printing is a hand craft and hand crafts are not perfectly uniform and that is exactly what makes them beautiful.
- Do heat set fabric prints. Once your fabric paint is completely dry, iron over the printed area using a pressing cloth between the iron and your print to permanently set the paint.
Donts: What to Avoid in Block Printing
- Do not use too much ink. Thin layer, thin layer, thin layer. If your block looks wet and gloopy, you have too much ink. Roll off the excess on your palette before printing.
- Do not press and slide. Pressing and then sliding your block across the fabric will smear and ruin your print. Press straight down, apply even pressure, lift straight up.
- Do not skip the cardboard insert. When printing on anything with two layers like a tote bag or pillowcase, always put cardboard inside to prevent bleed-through.
- Do not use regular acrylic paint straight from the tube on fabric. Regular acrylic paint dries stiff and cracks on fabric after washing. Use paint specifically formulated for fabric.
- Do not throw away failed prints. A print that did not go quite right on fabric can often be saved by overprinting once the first layer is dry.
- Do not spend a lot to get started. A potato cut in half and some fabric paint from the discount craft store is genuinely all you need for your first easy block print project.
Budget Starter Kit for Easy Block Print Projects
Here is what I would buy to start block printing from scratch for under twenty dollars. This minimal kit gives you everything needed for at least ten to fifteen beautiful projects.
Basic Supplies
- One pack of craft foam sheets for foam stamps at two to three dollars
- One bottle each of two fabric paint colors, a neutral and an accent at four to eight dollars total
- A small foam roller or flat brush at three to five dollars
- An old ceramic plate or piece of glass for a palette, free if you already have it
Estimated cost: $9-16
First Project Materials
- A pack of plain canvas tote bags at four to eight dollars
- Or a couple of plain tea towels at four to six dollars
- Cardboard from packaging boxes, free
- Practice paper from your printer, free
Estimated cost: $4-8
Total Investment
That is your entire starter kit with enough supplies for at least ten to fifteen projects. Everything beyond that is optional and can be added gradually as you discover which aspects of easy block printing you love most.
Your cost per finished item once you have your basic kit is genuinely just a few cents in materials.
Total spend: $13-24
Start Creating Your First Easy Block Print Project Today
Block printing is one of those rare crafts that gives you so much back from the very first attempt, beautiful results, a genuinely meditative process, and that particular joy of using something every day that you made yourself.
Your printed napkins, your tote bag, your cushion cover — these everyday items carry a little piece of your creativity into the world. There is something so quietly wonderful about that daily reminder of what your hands can create.
Start simple, start cheap, embrace the imperfection, and I promise you will be absolutely hooked from the very first print. The technique is forgiving, the materials are accessible, and the satisfaction of lifting that block to reveal your first successful print is genuinely magical.