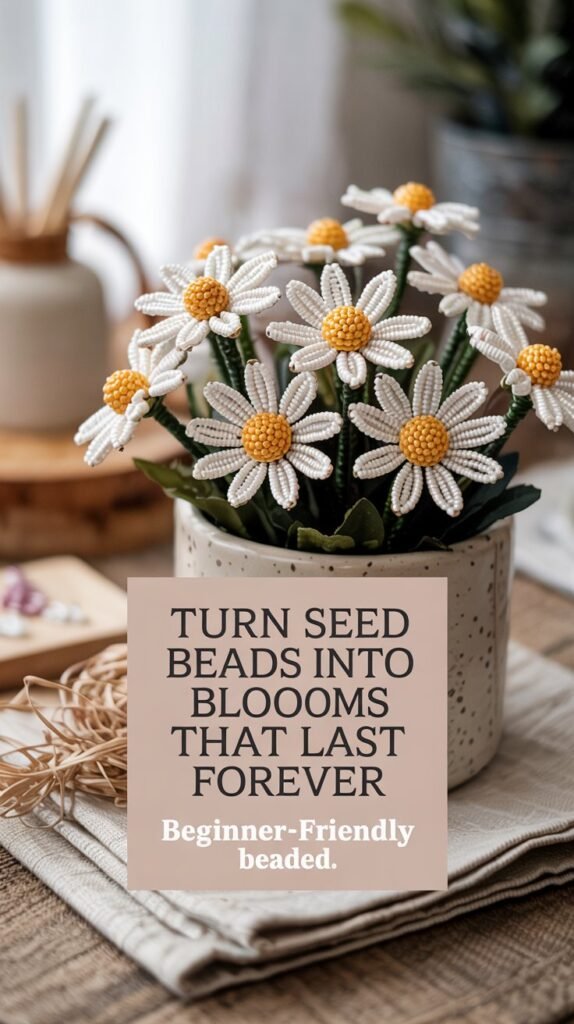
How to Make a Beaded Daisy Flower Plant (DIY Guide for Beginners)
In This Post:
- Why Make a Beaded Daisy Flower Plant – No watering, no wilting, no stress — just lasting color you made yourself
- Materials You’ll Need – Everything to gather before you start (and where to find it for less)
- Step 1: Make the Beaded Daisy Flowers – The loop petal method that feels awkward once and magical forever after
- Step 2: Add Flower Centers – The two-second detail that turns a craft project into botanical art
- Step 3: Create Textured Greenery – Why two shades of green make all the difference
- Step 4: Assemble the Arrangement – How to build your beaded plant so it looks like it came from a boutique
- Step 5: Finish the Pot – The final touch that takes it from homemade to polished
- Design Tips for a High-End Look – Small choices that separate amateur crafts from pieces people want to buy
- Variations to Try – Monochrome, sunset tones, cottagecore pastels and more
- Can You Sell Beaded Flower Plants – What to charge and where to find your best buyers
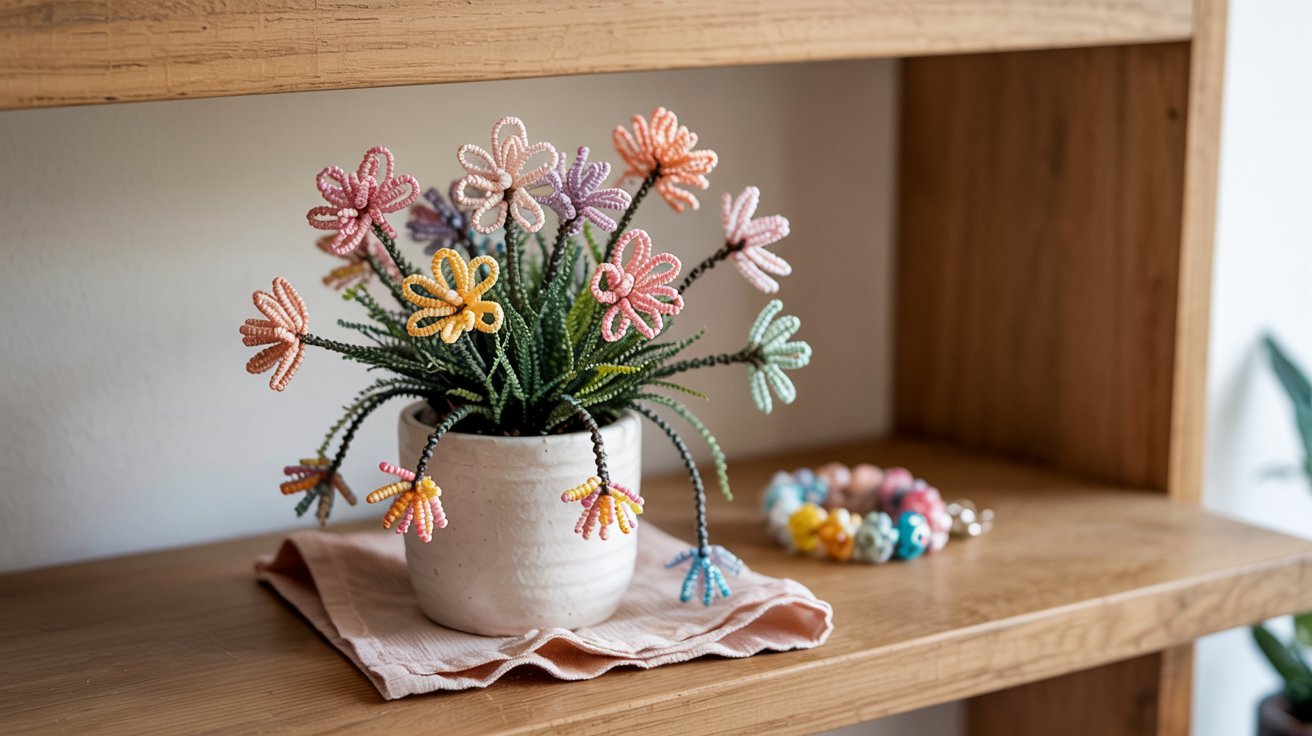
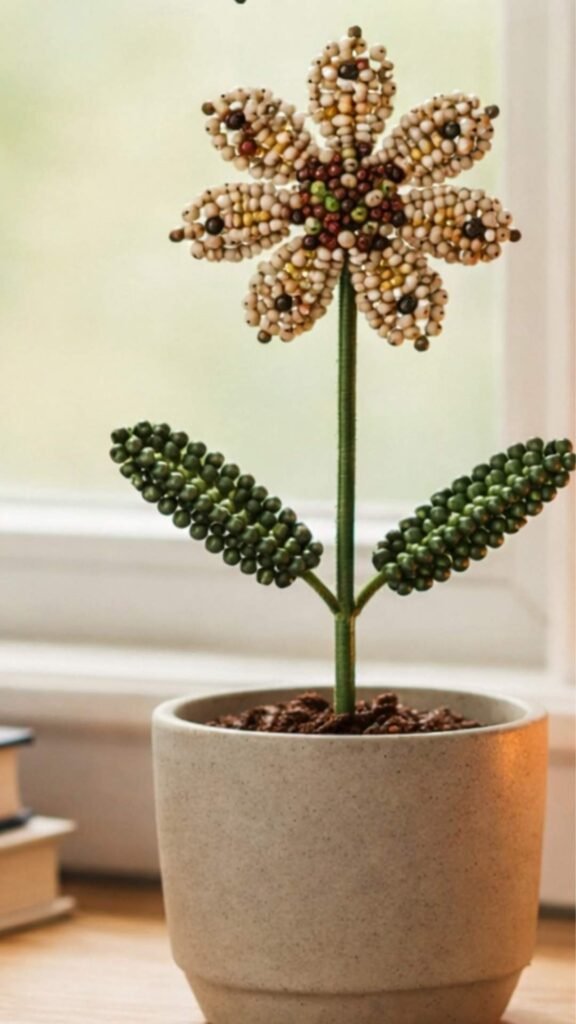
If you love flowers but hate watering them, this beaded daisy flower plant DIY is about to become your new favorite craft project.
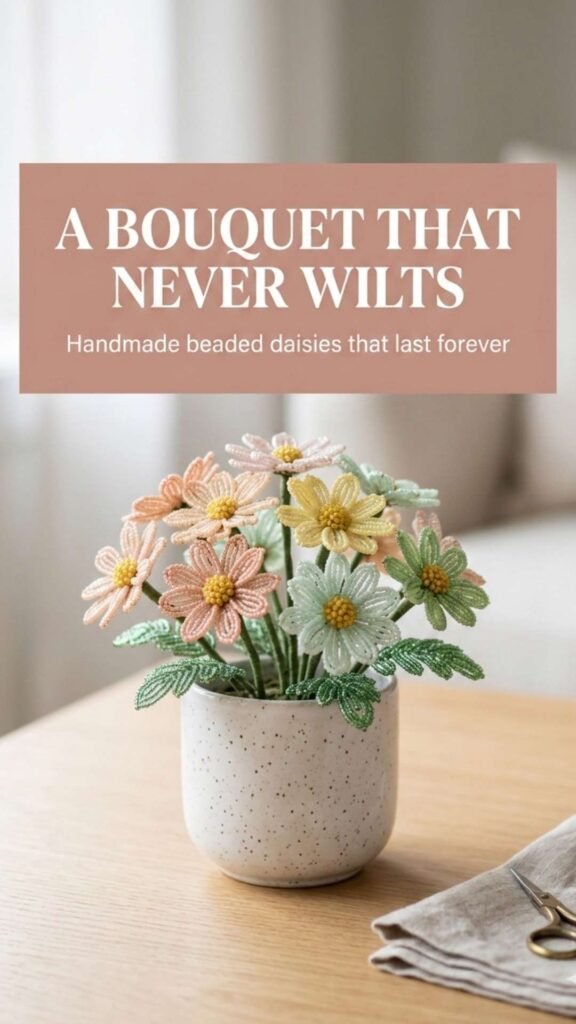
These handmade beaded plants look like a miniature wildflower garden. They never wilt, never fade, and last forever.
Whether you’re decorating a shelf, styling a desk, or creating handmade gifts, this tutorial walks you through exactly how to make your own beaded flower arrangement in a pot. Let’s create something beautiful together.
Why Make a Beaded Daisy Flower Plant
Beaded plants are trending for a reason. They bring color and life to your space without any of the usual plant parent stress.
Here’s what makes this craft so special:
- No maintenance required ever
- Perfect year-round decor for any season
- Thoughtful handmade gifts that show you care
- Great idea for Etsy product shops
- Pinterest-worthy craft project for all skill levels
Plus, they’re beginner-friendly once you understand the basic looping technique. Even if you’ve never worked with jewelry wire or seed beads before, you’ll catch on quickly.
Materials You’ll Need
Gathering your supplies is half the fun. Here’s everything you need to make your beaded plant come to life.

Beads
Seed beads are the heart of this project. Size ten or eleven seed beads work best for creating delicate petals and leaves.
For flowers, choose colors that make you happy. Pink, peach, coral, yellow, mint, and blue all create that soft wildflower look.
For greenery, grab both light and dark green beads. Using two shades adds depth and makes your beaded plant look more realistic.
Wire
You’ll need two types of wire for this. Twenty-six to twenty-eight gauge brown wire works perfectly for flower stems. It’s sturdy enough to hold shape but flexible enough to twist easily.
Twenty-eight to thirty gauge green wire is ideal for leaf wiring. The slightly finer gauge makes delicate leaves easier to shape.
Tools
Wire cutters are essential for cutting your jewelry wire to the right length. Round nose pliers help you create neat loops and twists, though you can manage with just your fingers if needed.
Assembly Supplies
A small ceramic planter becomes home for your beaded flowers. Choose neutral colors like white, beige, or speckled clay for a high-end look.
Floral foam fits inside your pot to hold wire stems in place. Cut it with a knife to fit snugly.
Moss or decorative filler covers the foam at the end. This finishing touch makes your project look professionally crafted.
Shopping Tip: You can find all these materials at craft stores or online. Buying seed beads in bulk saves money if you plan to make several plants or other jewelry projects.
Step 1: Make the Beaded Daisy Flowers
This is the core technique for your beaded flower plant. Once you master this loop petal method, you’ll be able to create endless flower varieties.
Loop Petal Method for Beginners
Start by cutting twenty centimeters of wire. This length gives you enough to work with while keeping things manageable.
Thread twelve to fifteen seed beads onto your wire. Don’t count obsessively. A bit of variety in petal size makes your flowers look more natural.
Slide the beads to the center of your wire. Now bend the wire into a loop, bringing both ends together at the base.
Twist the wire base two or three times. This secures your first petal loop.
Here’s where the magic happens. Repeat this looping process to create eight to twelve loops in a circle around your starting point. Each loop becomes one petal.
When you’ve made enough petals, twist all the wire stems together tightly. You now have one complete flower head.
Beginner Tip: Your first flower might feel awkward. That’s completely normal. By your third or fourth flower, your hands will know exactly what to do. The process becomes meditative and soothing.
Vary your petal count and bead colors for a natural wildflower look. Some flowers can have eight petals, others twelve. Mix pink with coral, or try soft yellow with peach.
Step 2: Add Flower Centers
This small detail makes a huge visual difference. A contrasting center brings your beaded flowers to life.
For pink or coral petals, add a yellow center bead. For blue flowers, try white or cream. The contrast mimics how real flowers draw the eye to their centers.
You can thread one larger bead in the very middle. Or cluster three to four small beads tightly together for a fuller look.
This step only takes a few seconds per flower, but it elevates your entire beaded plant from craft project to botanical art.
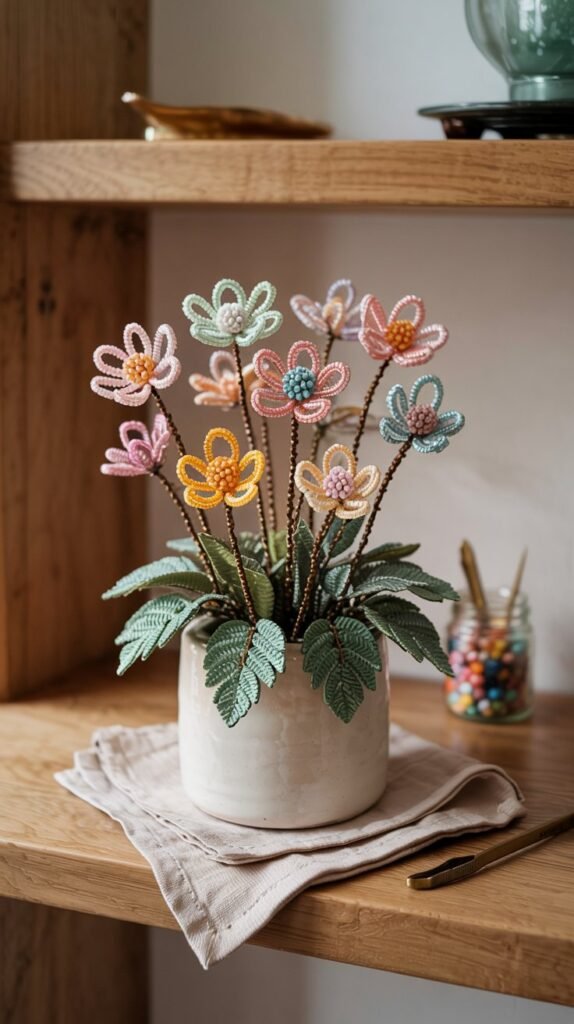
Step 3: Create Textured Greenery
The fullness of your arrangement depends on the greenery. These beaded leaves fill space and make your flowers pop.
Leaf Technique
Thread twenty to thirty green beads onto your green wire. Leaves need more beads than petals because they’re longer and narrower.
Create a long, narrow loop. Unlike flower petals, leaves should be oval rather than round.
Twist tightly at the base. Then slightly bend the leaf outward so it curves naturally, the way real leaves do.
Make fifteen to twenty-five leaf stems in mixed greens. Using both light and dark green beads adds depth that makes your beaded plant look professional.
Don’t worry about making them all identical. In nature, no two leaves match perfectly.
Get Weekly DIY Inspiration
Join our cozy community of makers for simple craft tutorials delivered to your inbox every week. No spam, just creativity and warmth. Your Email AddressSend Me Craft Ideas
We respect your inbox. Unsubscribe anytime.
Step 4: Assemble the Arrangement
Now we build your beaded flower plant into something that looks like it came from a boutique shop.
Insert your floral foam into your pot. Cut it so it fits snugly and sits about half an inch below the rim.
Start with greenery around the outer edge. This creates a base that frames your flowers beautifully.
Add mid-height leaves next, working your way toward the center. Think of building layers, like you’re creating a little garden.
Insert your tallest flower stems in the center. These become focal points that draw the eye.
Add shorter flowers around them, filling in gaps and creating that lush, abundant look.
Design Tips for Natural Placement
Vary heights for a natural meadow effect. In real gardens, flowers grow at different levels.
Avoid symmetry deliberately. Slightly imperfect placement looks more realistic and charming than rigid patterns.
Step back frequently to check your arrangement from different angles. What looks good from above might need adjustment from the side.
If a stem feels loose in the foam, add a bit of hot glue at the base. This isn’t always necessary, but it helps if you plan to move your plant around.
Step 5: Finish the Pot
This final step transforms your beaded plant from homemade craft to polished decor piece.
Cover the floral foam completely. Exposed foam looks unfinished and distracts from your beautiful beaded work.
Moss
Natural moss gives your pot an earthy, rustic feel. It works beautifully with cottage-style and farmhouse decor.
Faux Soil
Acrylic paint in brown tones can create a soil effect. Mix in some texture for added realism if you want.
Decorative Pebbles
Small stones in neutral colors add weight and elegance. This works well for modern or minimalist spaces.
Press your chosen filler gently around the base of your wire stems. Make sure everything feels secure but not forced.

Your beaded flower plant is now complete. Place it where sunlight can catch the beads and make them sparkle.
Design Tips for a High-End Look
These small choices separate amateur crafts from pieces that look professionally made.
Color Strategy
Mix five to seven pastel flower colors maximum. Too many colors create visual chaos. A curated palette looks intentional and sophisticated.
Use two shades of green for depth. Light green adds brightness while dark green provides richness and dimension.
Movement and Shape
Curve stems slightly for movement. Perfectly straight stems look stiff and artificial. Gentle curves add life.
Keep the pot neutral. White, beige, or speckled ceramic lets your beaded flowers be the stars of the show.
Avoid overcrowding the center of your arrangement. Negative space lets each flower breathe and be appreciated individually.
Design Secret: Layering equals luxury. Build your arrangement in distinct layers—low greenery, medium flowers, tall focal points. This three-dimensional approach creates visual interest from every angle.
Variations to Try
Once you’ve mastered the basic beaded flower plant, a whole world of possibilities opens up.

Monochrome Elegance
Create an all-white beaded flower arrangement for weddings or minimalist decor. The single color makes a sophisticated statement.
Sunset Tones
Combine peach, coral, and mustard beads for warm, glowing arrangements. These colors feel cozy and inviting, perfect for autumn or boho spaces.
Cottagecore Pastels
Soft pink, lavender, mint, and butter yellow create dreamy, romantic arrangements. This style works beautifully for shabby chic or vintage-inspired decor.
Mini Desk Version
Scale everything down for tiny pots just a few inches tall. These make perfect office gifts or shelf accents.
Larger Bouquet Style
Go big with twenty to thirty flowers in a wider pot. This creates a statement piece for mantels or dining tables.
The technique stays the same regardless of size or color. Your creative ideas bring unique personality to each beaded plant you make.
Can You Sell Beaded Flower Plants
Absolutely. These beaded plants have strong selling potential for creative entrepreneurs.
Mother’s Day Gifts
Market these as “flowers that last forever” for Mother’s Day. Many people search for meaningful, lasting gifts during this season.
Wedding Decor
Brides love unique table centerpieces that double as guest favors. Your beaded plants can be customized to match wedding colors perfectly.
They work beautifully for office desk decor too. Corporate clients often buy small decorative pieces in bulk for employee gifts or office styling.
Housewarming gifts are another strong market. Unlike real plants that might not survive the move, beaded flower plants travel well and need zero care from stressed-out new homeowners.
Because they last forever, they’re a strong alternative to faux plants. While silk flowers fade and collect dust, beaded plants maintain their beauty for years. The wire and beads don’t degrade or discolor over time.
Pricing Tip: Factor in your time and materials. Small arrangements with five to eight flowers typically sell for twenty-five to forty dollars. Larger statement pieces can command seventy-five to one hundred twenty dollars depending on complexity and bead quality.
Final Thoughts
This beaded flower plant DIY is more than just a craft. It’s handmade botanical art that brings lasting beauty to any space.
Once you master the loop technique, you can create endless variations. Think beaded succulents, trailing beaded ivy, delicate beaded roses, or sprawling wildflower arrangements that fill entire bowls.
The best part? No watering required. Ever.
Your beaded plant will sit exactly where you place it, catching light and adding color, asking nothing in return except maybe an occasional dusting.
This is the kind of craft that becomes part of your home’s story. Years from now, you’ll glance at your beaded flower plant and remember the quiet afternoon you spent twisting wire and threading beads, creating something beautiful with your own hands.
That’s the real magic of handmade things. They carry your time, your choices, your care woven right into them.