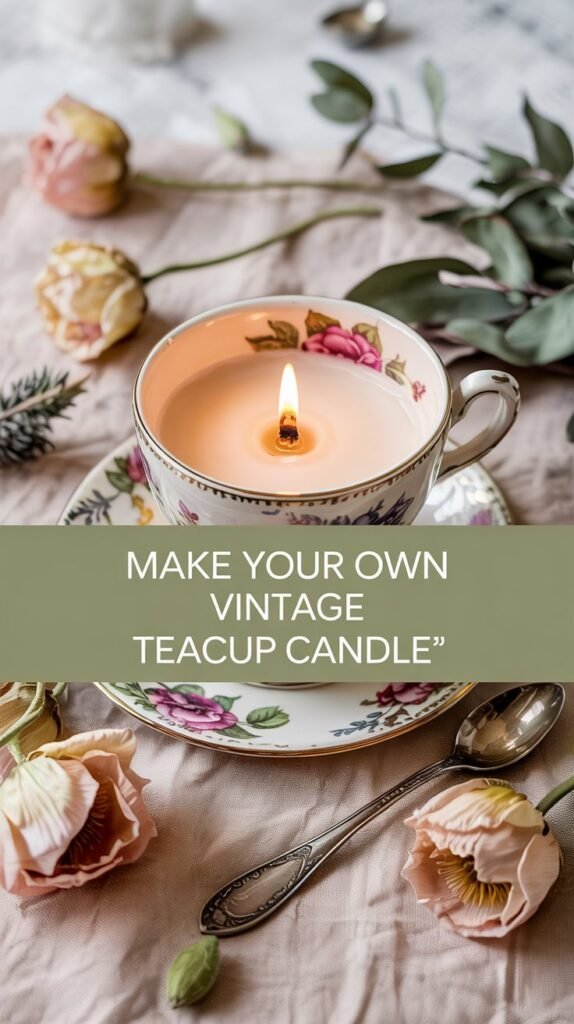
How to Make a Vintage Teacup Candle
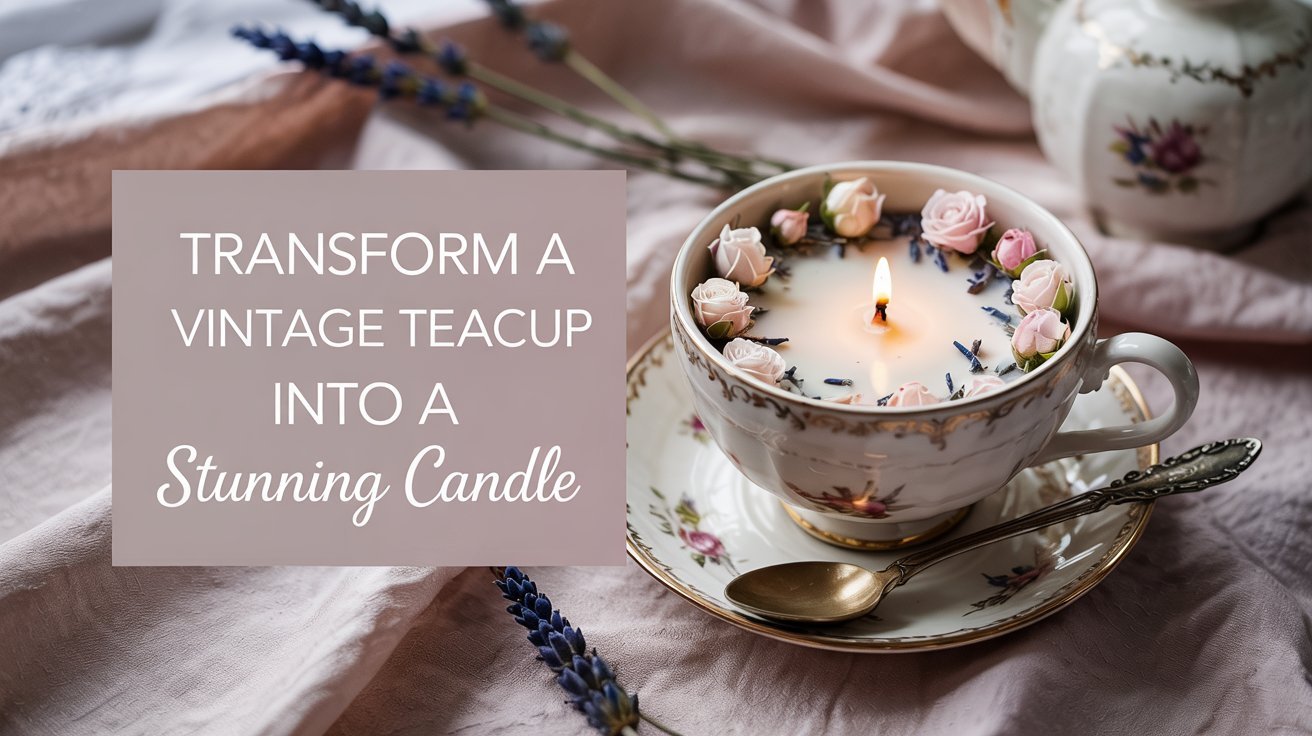
There is something timeless about a delicate floral teacup. When you turn it into a candle, it becomes pure magic. This vintage teacup candle DIY is romantic, giftable, and surprisingly easy to make.
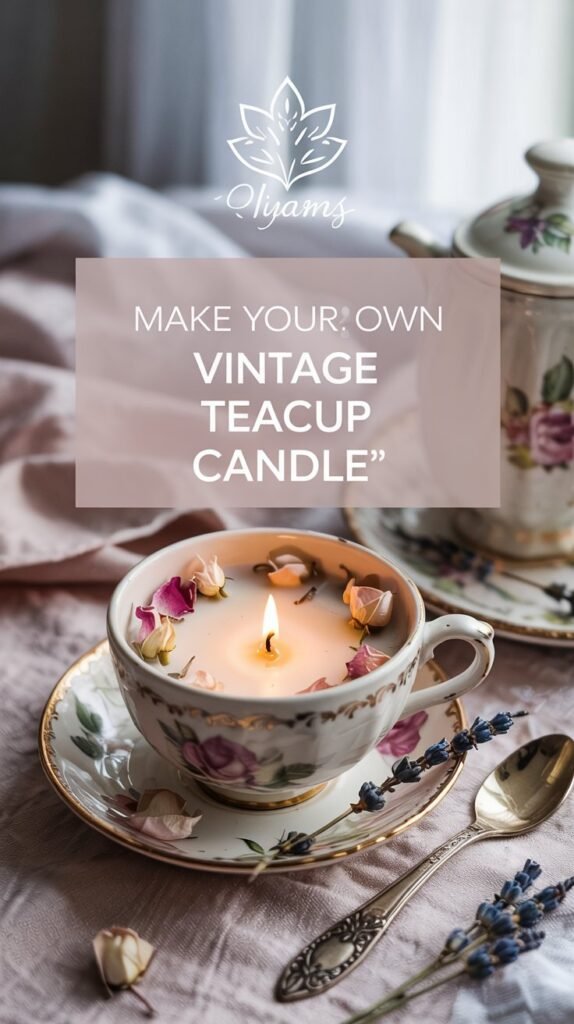
Whether you are creating a cozy moment for yourself, styling a cottagecore shelf, or making handmade gifts, this project blends charm with functionality. The best part? You can find beautiful vintage teacups at thrift stores for just a few dollars.
Let me walk you through exactly how to make your own vintage teacup candles from start to finish.
Why Teacup Candles Are So Popular
Vintage teacup candles have captured hearts across Pinterest, Instagram, and craft fairs. They combine nostalgia with modern self-care trends in one beautiful package.
Perfect Home Decor
These candles create instant Pinterest-worthy displays. They fit beautifully on bookshelves, vanities, and coffee tables.
- Adds romantic cottage aesthetic instantly
- Works with shabby chic and vintage styles
- Creates warm, inviting ambiance
- Doubles as decorative art when not lit
Budget-Friendly Gifts
Making teacup candles costs a fraction of buying similar items retail. They make thoughtful, personalized presents.
- Ideal for Mother’s Day and birthdays
- Perfect bridal shower favors
- Beautiful Christmas handmade presents
- Great for tea party decor and gifts
Upcycling Magic
This project gives new life to thrifted teacups. You rescue beautiful vintage pieces from dusty shelves.
- Sustainable crafting approach
- Preserves vintage china patterns
- Reduces waste creatively
- Each piece tells a unique story
Easy for Beginners
You do not need special skills to make these candles. The process is straightforward and forgiving.
- Simple step-by-step instructions
- Minimal supplies required
- Quick project from start to finish
- Hard to mess up with basic care
This project is especially trending in cottagecore decor, romantic home styling, and handmade gift niches. The vintage aesthetic connects with people seeking slower, more intentional living.
Supplies You Need to Make Vintage Teacup Candles
Gathering your supplies before you start makes the process smooth and enjoyable. Most of these items are available at craft stores or online. Here is what you will need for your first vintage teacup candle project.
Essential Materials
- Vintage teacup plus matching saucer
- Soy wax flakes or beeswax
- Cotton wick or wood wick
- Wick sticker or hot glue
- Small pouring pot or heat-safe container
- Candle thermometer (recommended)
Optional Decorative Additions
- Essential oils for scent
- Dried flower petals
- Lavender buds
- Chamomile flowers
- Natural dried botanicals
Choosing the Right Wax
Soy wax is ideal for beginners. It melts evenly, burns cleanly, and holds fragrance beautifully. Soy wax flakes are easier to measure and melt than blocks.
Beeswax creates a natural honey scent and burns longer. However, it costs more and requires slightly higher heat to melt properly.
For your first project, start with soy wax. You can experiment with beeswax later once you master the basic technique.
Step-by-Step Guide: Making Your Vintage Teacup Candle
Follow these detailed steps to create beautiful teacup candles. Take your time with each stage. The process is relaxing and meditative.
Step 1: Choose the Perfect Teacup
Not every teacup works well for candle making. The right cup ensures safety and beautiful results. Visit thrift stores, antique shops, or check your grandmother’s china cabinet.
What to Look For:
- Thick ceramic construction prevents cracking from heat
- No visible hairline cracks or chips
- Flat interior bottom for stable wick placement
- Floral patterns add romantic vintage charm
- Matching saucer makes the finished candle look gift-ready
Thrift stores are goldmines for finding vintage teacups. You can often find beautiful pieces for two to five dollars. Look for cups with delicate floral designs, gold trim, or classic patterns.
Pro tip: Matching saucers elevate the finished candle. They catch wax drips and create a complete, polished presentation.

Step 2: Secure the Wick
Proper wick placement is crucial for an even burn. The wick must stay centered throughout the wax pouring and setting process.
- Attach a wick sticker to the metal base of your wick
- Press firmly into the center of the teacup bottom
- If using hot glue, apply a small dot and hold for ten seconds
- Place a wick holder, two chopsticks, or a pencil across the top
- Ensure the wick stands perfectly upright and centered
Make sure the wick is truly centered. This ensures your candle burns evenly without tunneling or leaving wax on the sides. Take an extra moment to check from multiple angles.
Important: A crooked wick cannot be fixed after wax is poured. Double-check alignment before moving to the next step.
Step 3: Melt the Wax
The double boiler method provides gentle, controlled heat. This prevents scorching and ensures your wax melts evenly.
Fill a large pot with a few inches of water. Place a smaller heat-safe container or pouring pot inside. Add your soy wax flakes to the smaller container.
- Heat water to a gentle simmer on medium heat
- Stir wax gently as it melts
- Monitor temperature with your thermometer
- Heat soy wax to about one hundred seventy to one hundred eighty degrees Fahrenheit
- Remove from heat once fully melted
If you want to add fragrance, let the wax cool slightly first. Wait until temperature drops to around one hundred sixty degrees. Add twenty to thirty drops of essential oils per cup of wax.
Cozy Scent Combinations
- Lavender plus vanilla creates warmth
- Rose with sandalwood feels romantic
- Chamomile and honey smells peaceful
- Eucalyptus with mint refreshes
Seasonal Fragrance Ideas
- Cinnamon and vanilla for autumn
- Pine and orange for winter
- Jasmine and bergamot for spring
- Lemon and basil for summer
Step 4: Pour the Wax
This step requires a steady hand and patience. Slow, careful pouring prevents air bubbles and creates a smooth finish.
- Hold your teacup steady on a flat, protected surface
- Pour melted wax slowly in a thin stream
- Fill to about half an inch from the top rim
- Leave space to prevent overflow when lit
- Avoid moving the cup during this process
Let your candle cool undisturbed for four to six hours. Some crafters prefer overnight cooling. Avoid the temptation to move it while the wax sets. Movement can create cracks or sinkholes in the surface.
Place your teacup in a spot where it will not be bumped. Room temperature works perfectly. Do not put it in the refrigerator, as rapid cooling can cause cracking.
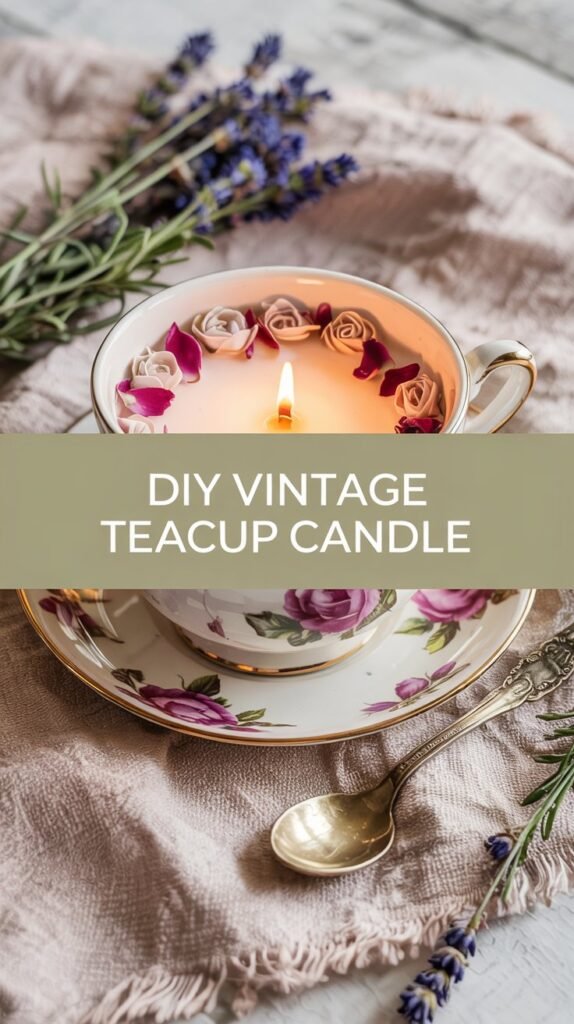
Step 5: Add Decorative Touches
Once your wax has partially set but remains slightly soft, you can add beautiful botanical decorations. This step transforms your candle from simple to stunning.

Before the wax fully hardens, gently place your chosen decorations on the surface. Use tweezers for precise placement.
Beautiful Decoration Options
- Dried rose petals in pink or red
- Lavender buds for texture
- Chamomile flowers for delicate beauty
- Dried baby’s breath for romance
- Small rosebuds for elegance
Safety First: Keep all decorations at least one inch away from the wick. Botanicals near the flame can catch fire. Less is more when it comes to dried flowers on candles.
Once your candle has completely hardened, trim the wick to about one quarter inch. This length ensures a clean, steady flame without excessive smoke.
Your vintage teacup candle is now complete and ready to enjoy or gift.
Styling Ideas for a Pinterest-Worthy Display
How you display your vintage teacup candles matters almost as much as making them. The right styling creates an enchanting atmosphere and makes gorgeous photos.
Create a Romantic Vignette
Layer textures and complementary elements around your candle. This approach works beautifully for home decor and gift photography.
- Place candles on soft linen fabric for gentle texture
- Add a small bowl of dried botanicals nearby
- Include wrapped gift boxes with satin ribbon
- Position essential oil bottles for spa aesthetic
- Use books or wooden boards as elevated platforms
- Scatter loose flower petals for organic feel
Lighting Tips
Natural window light creates the most beautiful candle photos. Position your display near a window during golden hour. Avoid harsh overhead lights.
Soft, diffused light enhances the romantic quality. The warm glow makes vintage teacups look even more charming.
Color Palette Ideas
Stick to cohesive color schemes. Pastels work beautifully with vintage teacups. Try soft pinks, creams, lavender, and mint green together.
For autumn displays, use warm neutrals, terracotta, and golden tones. Winter calls for whites, silvers, and deep burgundy.
This styling approach instantly transforms your candle into a romantic flat-lay photo perfect for Instagram or Pinterest. The key is creating visual harmony through thoughtful element placement.
Important Safety Tips for Teacup Candles
While vintage teacup candles are generally safe, following proper precautions ensures worry-free enjoyment. Ceramic can crack if mishandled, and any candle requires responsible use.
Essential Safety Guidelines
- Always use thick, heat-safe ceramic teacups only
- Never leave any burning candle unattended
- Keep botanical decorations minimal and away from flame
- Trim wick to one quarter inch before each burn
- Always place teacup on its saucer to catch drips
- Keep candles away from drafts and flammable items
- Burn on stable, heat-resistant surfaces only
- Do not burn candles for more than four hours at a time

Recognizing When to Stop Using a Teacup Candle
Even well-made candles have a safe burning limit. Stop using your teacup candle when wax reaches the bottom half inch. Burning beyond this point risks overheating the ceramic.
Watch for these signs:
- Teacup feels excessively hot to touch
- Wax level drops below half an inch
- Wick becomes difficult to light
- Any cracking sounds from ceramic
You can always melt out remaining wax and make a fresh candle in the same cup. This extends the life of your beautiful vintage teacup.
How to Package Teacup Candles as Gifts
Thoughtful packaging elevates your handmade vintage teacup candle from craft project to cherished gift. The presentation shows care and attention to detail.
Simple Yet Elegant Wrapping
- Start with the teacup placed on its matching saucer
- Wrap both pieces together in kraft paper or tissue
- Secure with natural twine or satin ribbon
- Attach a small scent label describing the fragrance
- Include a handwritten care card with burning instructions
- Tuck a sprig of dried lavender or baby’s breath into the ribbon
Perfect Gift Occasions
- Bridal shower favors for guests
- Mother’s Day heartfelt presents
- Christmas handmade gifts
- Birthday surprises for tea lovers
- Thank you gifts for hosts
- Wedding table decorations
Care Card Information
Include these details on your care card:
- Burn time estimate
- Fragrance description
- Wick trimming reminder
- Safety instructions
- Your name or business info
For tea party favors, group several candles together in a vintage wooden crate lined with tissue paper. Add a decorative sign describing your handmade creation.
Budget Breakdown: How Much Do Teacup Candles Cost?
One major appeal of this DIY project is the incredible value. You create luxury-looking candles for a fraction of retail prices.
| Supply Item | Thrifted/DIY Cost | Retail Comparison |
| Vintage Teacup | $2 – $5 | $15 – $30 |
| Soy Wax & Wick | $2 – $3 | Included in retail |
| Essential Oils | $0.50 – $1 | Included in retail |
| Dried Flowers | $0.50 – $1 | Included in retail |
| Total Cost Per Candle | $5 – $8 | $25 – $40 |
Your savings are substantial. A handmade vintage teacup candle that costs you eight dollars would sell for twenty-five to forty dollars at boutiques or craft fairs.
Perfect for Etsy Sellers
Many crafters successfully sell vintage teacup candles online and at local markets. With proper branding and photography, these candles command premium prices.
Profit margins of three hundred to four hundred percent are common. This makes teacup candles an excellent small business idea for creative entrepreneurs.
Buying supplies in bulk reduces per-candle costs even further. A large bag of soy wax flakes and a pack of fifty wicks costs less than thirty dollars but makes dozens of candles.
Beautiful Variations to Try
Once you master the basic vintage teacup candle, explore these creative variations. Each style creates a different mood and aesthetic.
Cottage Garden Candle
This romantic variation embraces soft florals and pastel colors. It perfectly captures cottagecore aesthetics.
- Use pink or ivory soy wax
- Add rose essential oil mixed with lavender
- Top with dried rose petals and lavender buds
- Choose teacups with delicate floral patterns
- Consider adding a drop of pink candle dye
This style works beautifully for spring and summer gifts. The gentle scent and pretty presentation feel garden-fresh and feminine.
Cozy Autumn Version
Warm spices and rich colors create the perfect fall candle. This variation brings hygge vibes to any space.
- Blend cinnamon and vanilla essential oils
- Add small dried orange slices on top
- Include whole star anise or cinnamon sticks
- Use amber or cream-colored wax
- Choose teacups in warm autumn tones
The spicy scent fills your home with cozy warmth. These candles make perfect Thanksgiving hostess gifts or October birthday presents.
Minimalist Neutral Style
Sometimes simple elegance speaks loudest. This clean approach suits modern and Scandinavian decor.
- Use plain natural soy wax without dye
- Choose a wood wick for crackling sound
- Skip floral decorations entirely
- Select white or cream-colored teacups
- Add subtle scents like linen or sea salt
The minimalist approach lets the vintage teacup shine. Wood wicks add sensory appeal through their gentle crackling as they burn.
Luxury Spa Aesthetic
Transform your candle into a spa-worthy indulgence. This variation focuses on relaxation and self-care.
- Use pure white soy wax
- Add eucalyptus essential oil
- Include dried eucalyptus leaves on top
- Add a hint of peppermint or tea tree oil
- Attach a matte finish label with ingredients
This style creates an upscale, boutique feel. The crisp eucalyptus scent refreshes and energizes. Perfect for bathroom displays or meditation spaces.
Frequently Asked Questions About Vintage Teacup Candles
Can I use any teacup for making candles?
No, you should use thick ceramic teacups only. Avoid thin porcelain or bone china, as these can crack from heat. Never use cracked cups, as they may break when heated. The teacup must be thick enough to withstand temperature changes safely.
Test by tapping the cup gently. A solid, thick cup produces a dull thud. Thin porcelain makes a high-pitched ring. Choose the former for candle making.
How long do vintage teacup candles burn?
Burn time depends on the size of your teacup and amount of wax. Most standard teacups hold enough wax for twenty to thirty-five hours of burning. Larger breakfast cups may burn even longer.
Soy wax typically burns slower than paraffin, extending your candle’s life. Proper wick trimming also increases burn time by preventing wax waste.
Can I use paraffin wax instead of soy wax?
Yes, paraffin wax works for teacup candles. However, soy wax is more popular for handmade candles because it burns cleaner and is made from renewable resources. Soy wax also holds fragrance better and creates less soot.
If you choose paraffin, use container-grade paraffin specifically designed for vessel candles. Regular paraffin may not adhere properly to ceramic surfaces.
Where can I find vintage teacups for candle making?
Thrift stores like Goodwill and Salvation Army are excellent sources. Check estate sales and antique malls for unique finds. Online marketplaces like eBay and Etsy offer vintage teacups, though shipping costs can add up.
Garage sales often have teacups for under two dollars. Ask older relatives if they have unused china collecting dust. Many people happily donate teacups to crafters.
Is it safe to add dried flowers to candles?
Yes, but with important precautions. Keep all dried botanicals at least one inch away from the wick. Use minimal decorations and ensure they are fully embedded in wax, not loose on the surface.
Never add highly flammable materials like dried grasses or paper-thin petals near the flame. Stick to small amounts of roses, lavender, and chamomile placed safely away from the burning area.
Can I reuse the teacup after the candle burns down?
Absolutely! This is one of the best features of teacup candles. Once wax burns down, place the cup in the freezer for one hour. The remaining wax will shrink and pop out easily.
Wash the cup with hot soapy water to remove residue. You can then make a new candle or use the vintage teacup for its original purpose – enjoying tea.
Final Thoughts on Making Vintage Teacup Candles
A vintage teacup candle is not just a DIY project. It is a mood, an experience, and a way to slow down in our busy world. This craft feels thoughtful. Each candle you create carries intention and care. The process itself becomes a meditative practice, melting wax and choosing scents mindfully.
These candles look high-end. Guests will assume you spent significant money on boutique finds. The vintage teacup elevates simple soy wax into something special and heirloom-worthy. They turn everyday objects into treasured decor. A forgotten teacup from a thrift store becomes a conversation piece and functional art. You rescue beautiful things and give them new purpose.
Whether you make one candle for yourself or dozens as gifts, this project delivers satisfaction and beauty. The romantic glow of candlelight in a delicate floral cup creates magic in any space.
Start with your first teacup candle this week. You will quickly understand why this craft has captured hearts across the DIY community.