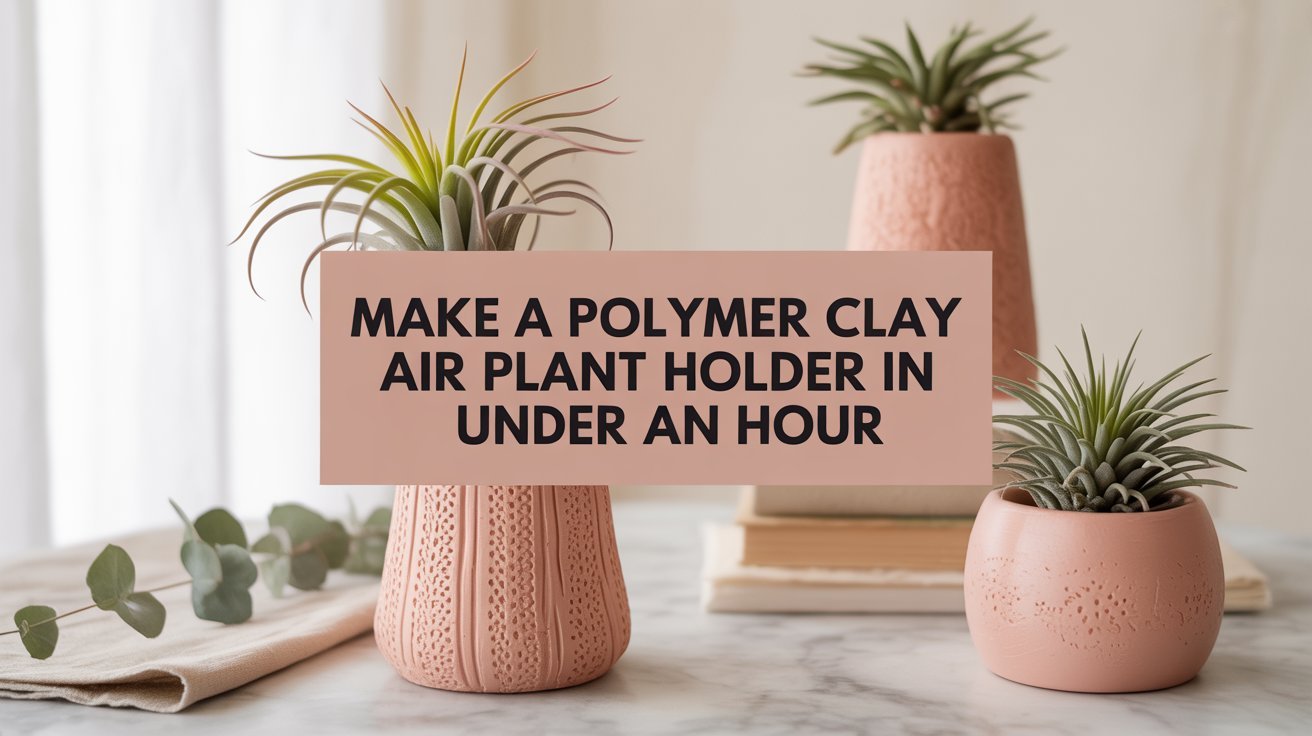
How to Make a DIY Polymer Clay Air Plant Holder
So I need to tell you about the day I discovered polymer clay. I was looking for a cute holder for my little air plants, you know the ones, those magical soil-free little aliens that just sit there looking sculptural and asking for almost nothing. Everything I found online was either really expensive or really boring. Then I fell down a polymer clay rabbit hole and friends, I have not come back up. It has been weeks.
Here’s the thing about making your own polymer clay air plant holder. It looks like something you’d pay forty dollars for in a boutique homewares store. It takes less than an hour to make. The materials cost somewhere between eight and fifteen dollars. I have made approximately eleven of them since discovering this craft and I regret absolutely nothing.
They make incredible gifts. They look gorgeous on a shelf or windowsill. The process of making them is genuinely one of the most satisfying crafty afternoons you can have. Whether you’ve never touched polymer clay in your life or you’ve dabbled a little and want a simple achievable project, this guide is for you. Let’s make something beautiful. ✨
What Is Polymer Clay and Why Is It Perfect for This Project?
Before we get into the making, let me give you a quick enthusiastic overview for anyone new to this magical material. Polymer clay is a soft mouldable clay that you bake in a regular home oven to harden permanently. Unlike air-dry clay it doesn’t crack as it dries. Unlike ceramic clay it doesn’t need a kiln. Unlike pretty much every other craft material it is incredibly forgiving of beginner mistakes.
Until you bake it you can squish it back up and start again as many times as you need to. It’s available at craft stores, art supply shops and online. Usually three to six dollars per block. One block is enough for several small air plant holders.
Air plants, tillandsia is their proper name, are the perfect companion for a handmade clay holder. They need no soil and no drainage. They just sit in whatever you put them in and absorb moisture from the air. This means your clay holder doesn’t need to be watertight or have drainage holes. That makes it about a thousand times easier to make. They were basically designed for this craft. 🌿
What You’ll Need
The beautiful thing about this project is how short the supply list is. You probably have half these things already.
Essential Supplies
- Polymer clay – one block in your chosen color. Brands like Sculpey, Fimo and Premo are all widely available and beginner-friendly. Original Sculpey is perfect for this project.
- Rolling pin or smooth glass – to roll the clay flat. A wine bottle works perfectly well.
- Sharp knife or clay cutter – for trimming edges
- Baking tray lined with parchment paper or wax paper – for baking
- Your oven – most polymer clay bakes at around one hundred ten to one hundred thirty degrees Celsius for fifteen to thirty minutes
- A small air plant – available at garden centres, plant shops and online for three to eight dollars each
Optional Extras
- Sandpaper – fine grit four hundred to six hundred for smoothing edges after baking
- Acrylic paint for details or color washing
- A matte or gloss varnish for sealing
- Textured surfaces to press into the clay – lace, leaves, bubble wrap, a fork, anything with texture
Total spend for a complete beginner kit is approximately fifteen to twenty-five dollars. You’ll have enough clay and supplies to make multiple holders. Cost per holder after that is just a few dollars. 🙌
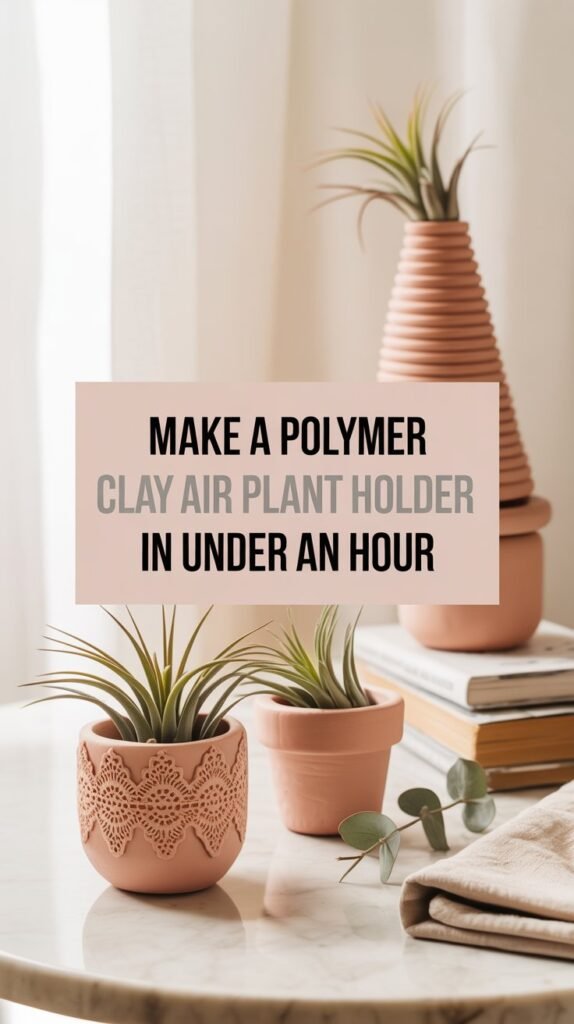
Polymer Clay Air Plant Holder Styles to Try
Before you start rolling clay it helps to decide what style of holder you want to make. Here are the most beginner-friendly options. Pick whichever one speaks to you.
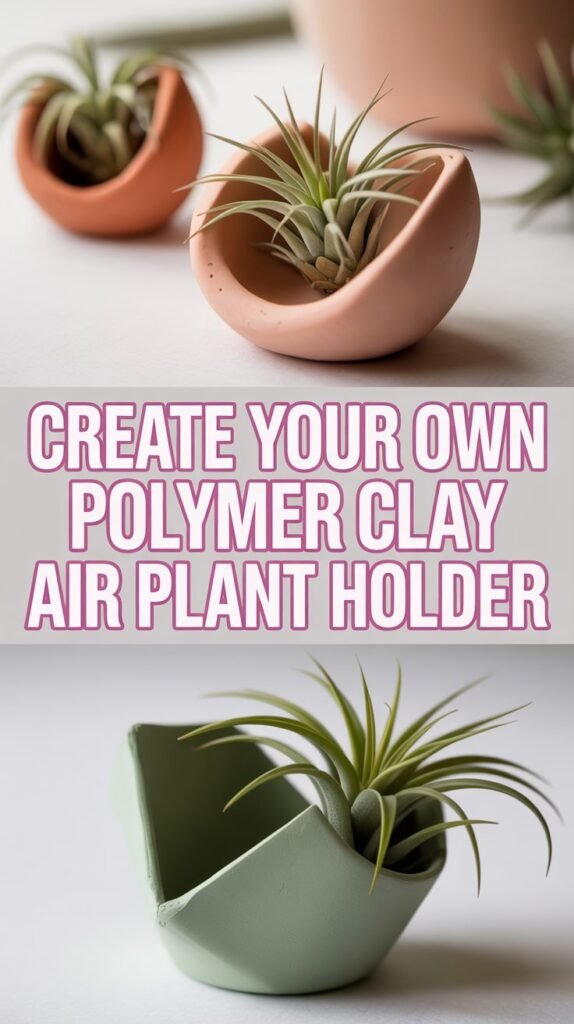
The Simple Pinch Pot
Roll your clay into a ball, press your thumb into the centre, and pinch the walls up into a little bowl shape. Rustic, organic, totally gorgeous.
- Easiest starting point for beginners
- Takes about ten minutes to shape
- Beautiful with textured finish from lace or leaf
- Perfect for small to medium air plants
The Rolled Cone
Roll your clay into a flat circle, cut it in half, and roll one half into a cone shape. Creates a sleek modern holder that shows off the air plant beautifully.
- Add flat base so it stands upright
- Or leave pointed to lean against wall
- Contemporary minimalist aesthetic
- Great for trailing air plant varieties
The Flat Dish with Raised Edges
Roll clay flat, cut a circle or oval, then roll thin coils of clay to create raised walls around the edge. Low, wide and elegant.
- Perfect for larger air plants
- Can hold little cluster of small plants
- Stable base sits nicely on any surface
- Easy to add decorative details
The Organic Blob
Honestly just my favourite name for a clay technique. Take a ball of clay and flatten it slightly, then use your fingers to push up an irregular well in the centre.
- No two are ever the same
- Looks completely intentional
- Takes about four minutes to make
- My most-gifted design by a mile
The Textured Slab Holder
Roll clay flat and press a textured surface into it. a Piece of lace, a real leaf, a fork dragged across the surface, to create a beautiful impression. Cut into a circle or organic shape, then gently curve the edges upward while soft to create a shallow dish. The texture catches the light and makes it look incredibly artisan.
Step-by-Step: How to Make Your Polymer Clay Air Plant Holder
Let’s walk through making the simple pinch pot style. This is the most beginner-friendly version and a great first project. Once you’ve made one of these you’ll have the confidence to try all the other styles too.

Step 1 Condition Your Clay
Take your block of polymer clay and knead it in your hands for two to three minutes until it feels soft, warm and pliable. This is called conditioning and it’s important. Cold unconditioned clay can crack during baking. It’ll feel stiff at first and then suddenly loosen up. That’s your sign it’s ready. 🙌
Step 2 Roll into a Ball
Take roughly half your block of clay and roll it between your palms into a smooth ball. About the size of a golf ball for a small holder. Larger if you want a bigger piece. Make sure there are no cracks on the surface. This smooth base is your foundation for a beautiful finished piece.
Step 3 Create the Well
Press both thumbs into the centre of the ball and begin pinching the walls upward and outward. Rotate the ball as you go. You’re aiming for walls that are roughly five to seven millimetres thick. Thick enough to be sturdy but not so thick they look clunky. Take your time with this. It’s very meditative. ✨
Step 4 Refine the Shape
Once you have your basic bowl shape, smooth the walls with your fingertips using small circular motions. Work around the entire pot. If you want a textured finish, now is the time. Press your lace, leaf or other texture tool gently into the outside of the bowl. The texture will stay beautifully crisp after baking.
You’re doing great – this is the fun part! This is where your holder starts to look like something special. Take a moment to appreciate how the shape is coming together in your hands. The slightly irregular walls and gentle curves are what make handmade pieces so beautiful.
Step 5 Create a Flat Base
Gently press the bottom of your holder onto a flat surface to create a small flat base. This helps it sit steadily. Check it sits level by placing it on your work surface and looking at it from eye level. Make tiny adjustments by pressing gently on the high side until it sits evenly.
Step 6 Bake
Place your holder on a parchment-lined baking tray. Bake according to your clay brand’s instructions. Usually around one hundred ten to one hundred thirty degrees Celsius for fifteen to thirty minutes. Most polymer clay packages recommend oven two hundred seventy-five degrees Fahrenheit. Set a timer. Don’t overbake as it can scorch. Don’t underbake as it will be brittle and break.
Step 7 Cool Completely
This is genuinely important. Polymer clay continues to harden as it cools. It will be slightly flexible straight out of the oven. Leave it to cool completely on the tray before handling. Usually twenty to thirty minutes is enough. Use this time to pick out which air plant you’ll put in your new holder. 🌱
Step 8 Sand and Finish
If your edges are rough, gently sand them with fine grit sandpaper using circular motions. Wipe away any dust with a damp cloth. Add any paint details, a color wash, or a coat of matte varnish if you’d like. Then pop your air plant in and admire your work. You just made something beautiful.
Do’s: What Will Make Your Holder Turn Out Beautifully
These are the little things that make the difference between a good holder and a stunning one. Pay attention to these and you’ll get professional-looking results every single time.
- Do condition your clay properly. Skipping this step is the most common beginner mistake. Warm well-conditioned clay is smooth, crack-free and much easier to work with. Give it a proper knead before you start shaping. Your hands will warm the clay naturally.
- Do keep your walls even. Uneven walls mean your holder might warp slightly during baking. Take your time during the pinching stage and check the thickness as you go by pinching between your fingers. Consistent thickness throughout ensures even baking.
- Do use parchment paper on your baking tray. Direct contact between clay and a metal tray can create shiny patches on the surface of your finished piece. Parchment paper or wax paper prevents this and your holder will have a uniform matte finish. This is a small detail that makes a big difference.
- Do make a few at once. Once you have your clay out and conditioned you’re in a rhythm. Make three or four holders in one sitting. They make the most lovely gifts and it’s satisfying to have a little collection. Each one will be slightly different and that’s the beauty. 🥰
- Do experiment with texture. This is where the real fun is. A piece of lace pressed into soft clay creates the most beautiful delicate impression. A real leaf pressed in and peeled off leaves a perfect botanical print. A fork dragged across the surface looks incredibly artisan. Texture is free and the results are stunning.
Don’ts: What to Avoid
Learn from my mistakes so you don’t have to make them yourself. These are the things I wish someone had told me before my first attempt.
- Don’t skip the conditioning step. I know I said this in the do’s but it genuinely bears repeating. Unconditioned clay cracks. Five minutes of kneading saves you from a disappointing result. Cold clay straight from the package is not ready to work with. Period.
- Don’t make the walls too thin. It’s tempting to go delicate and fine but very thin walls are fragile and prone to cracking during baking. Aim for at least five millimetres thickness throughout. This gives you a sturdy piece that will last for years. You can always make a more delicate version once you have more experience.
- Don’t overbake. Follow your clay brand’s instructions carefully. Overbaked polymer clay can scorch and darken, especially lighter colors. When in doubt bake at the lower end of the recommended temperature for a little longer rather than higher and faster. Set a timer on your phone and don’t walk away from the oven.
- Don’t use your food dishes or utensils for clay. Once a rolling pin, knife or baking tray has been used for polymer clay, keep it dedicated to craft use only. Get cheap versions from a dollar store to use just for clay. This is a one-time five to eight dollar investment. Keep your clay tools separate from kitchen tools.
- Don’t stress about perfection. The organic handmade quality of a polymer clay air plant holder is exactly what makes it beautiful. Slight irregularities, small fingerprints, gentle asymmetry,these are not flaws. They are the whole charm of handmade. A perfect machine-made holder is four dollars at a chain store. Yours is one of a kind. 🌿✨
- Don’t spend a lot to get started. A single block of Sculpey clay from a craft store is all you really need to begin. You can make three or four holders from one block. Resist the urge to buy every color and every tool in the shop on your first visit. Start simple, see if you love it, you will and then expand your collection over time.
Budget Breakdown: What This Project Actually Costs
For anyone who loves a number, here’s exactly what you’ll spend to make your first polymer clay air plant holder. And then what each additional holder costs after that.
First Project Investment
- One block of polymer clay – three to six dollars depending on brand and where you shop
- Air plant – three to eight dollars from garden centre or online
- Parchment paper – already in most kitchens, or one dollar for a roll
- Rolling pin or wine bottle – already own it, or three dollars at dollar store
- Sharp knife – already own it
- Your oven – definitely already own it
First project total: approximately six to fourteen dollars. For something that looks like a boutique homewares purchase, that is genuinely extraordinary value. You’re paying less than the cost of two fancy coffees to make something you’ll keep for years.
Each Additional Holder
After your initial tool investment, each new holder costs:
- Polymer clay portion – approximately one to two dollars per holder since one block makes three to four pieces
- New air plant if gifting – three to eight dollars
- Total per additional holder – four to ten dollars maximum
Compare this to buying a similar handmade holder online which typically runs thirty to fifty dollars. You’re saving enormous amounts while creating something uniquely yours. Plus you get the satisfaction and creative joy of making it with your own hands.
Ways to Display Your Finished Holders
Once you’ve made your polymer clay air plant holder, the fun of styling and displaying it begins. Here are my favorite ways to show off these little handmade beauties.
Windowsill Garden
Arrange three to five holders of varying size along a bright windowsill. Air plants love indirect light. The collection creates a mini garden that changes as your plants grow and bloom. Mix colors and shapes for visual interest.
Floating Shelf Display
Place individual holders on floating shelves at different heights throughout a room. This creates vertical interest and draws the eye upward. Pair with small books or candles for a curated look that feels effortless.
Desk or Workspace Touch
A single small holder makes the perfect desk companion. It brings a piece of nature to your workspace without taking up much room. The organic shape and living plant provide a calming focal point during work time.
Bathroom Styling
Air plants thrive in humid environments. A holder on the bathroom counter or shelf benefits from shower steam. Choose holders in colors that complement your bathroom palette for a spa-like aesthetic.
Hanging Display Options
For cone or wall-hanging designs, arrange several at varying heights on a wall. This creates a living art installation. Use small nails or adhesive hooks. The asymmetrical arrangement looks intentional and dynamic.
Grouped Centerpiece
Cluster three holders of different size together on a side table or dining table. Vary the plant types for textural contrast. This creates a low sculptural centerpiece that won’t block conversation across the table.
You Made Something Beautiful, Now Make Three More 🌿
Making your own polymer clay air plant holder is one of those crafts that gives you so much back for such a small investment of time and money. Once you’ve made your first one and placed your little air plant inside it and put it on your shelf, you will completely understand why I have made eleven of them.
Start with the simple pinch pot. Get a feel for the clay. Then try adding texture and experimenting with different shapes. Before you know it you’ll have a beautiful little collection of handmade pieces that look like they cost a fortune and cost almost nothing at all.
The best part is that each piece you make will be completely unique. No two will ever be exactly the same. Your fingerprints, your creative choices, your slightly different pinching technique. These all combine to make something that exists nowhere else in the world. That’s the magic of making things by hand.
And when someone asks where you got that gorgeous air plant holder and you get to say “I made it” that feeling never gets old. Trust me on this one. You are going to love this craft. ✨