How to Make a Ridiculously Colorful Fabric Garland That Will Transform Your Space
Look at this garland and try not to smile. I dare you. It’s impossible.
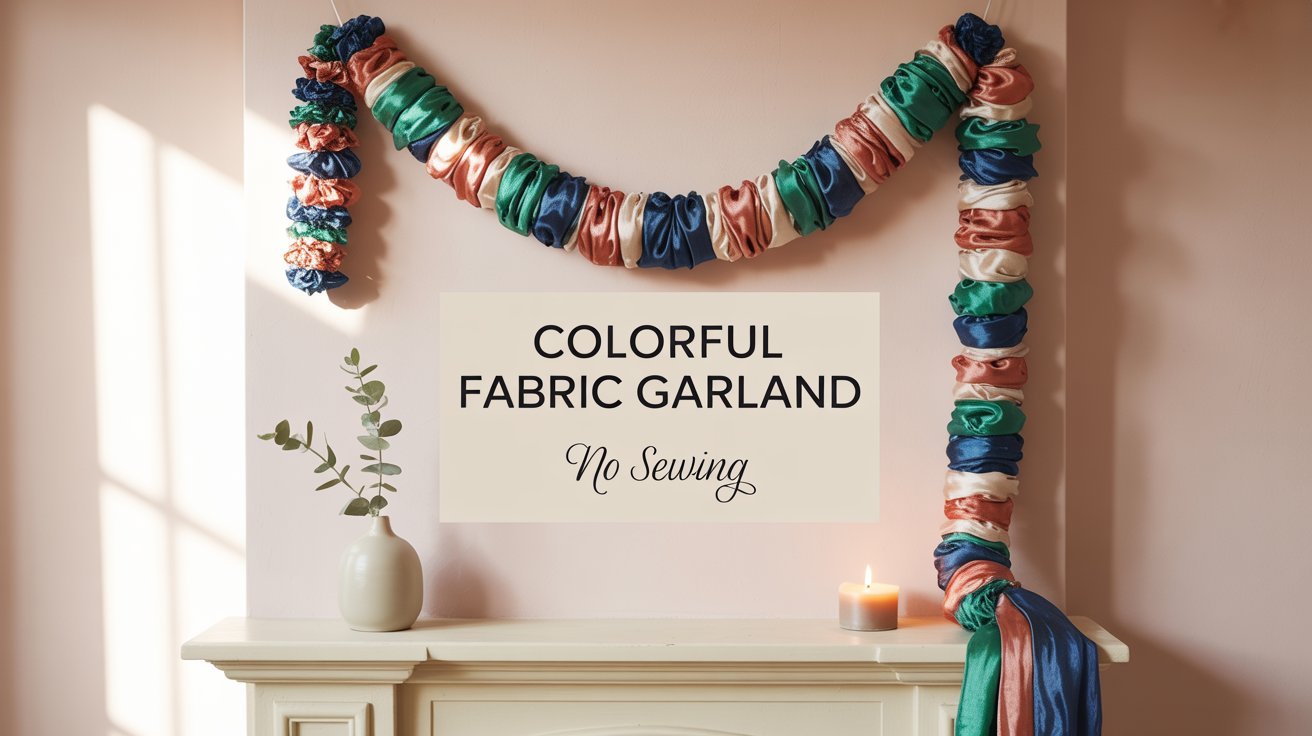
This ridiculous creation transformed my living room from plain to absolutely joyful. Every person who walks through my door asks where I bought it. When I tell them I made it from fabric scraps and polyfill, they genuinely don’t believe me.
That’s the energy we’re working with today. Pure crafting magic that costs almost nothing and makes everyone happy.
Here’s the best part. You don’t need a sewing machine. You don’t even need a needle and thread. Just fabric, stuffing, string, and about two hours while you binge your favorite show.
Let me show you exactly how to make this DIY fabric garland that will have everyone convinced you’re some kind of décor genius.
What You Need to Make Your Fabric Garland
The supply list for this project is beautifully simple. You probably have most of these materials sitting in your craft stash right now.
Essential Materials List
- Fabric scraps in any colors and patterns you love
- Polyfill stuffing or cotton wool balls for the puffs
- Twine, rope, or thick string as your garland base
- Sharp scissors or a rotary cutter for cutting fabric
That’s genuinely it. No special tools, no fancy equipment. Just these four simple things standing between you and the most cheerful garland you’ve ever seen.
Pro tip: If you’re buying new fabric instead of using scraps, grab fat quarters from the quilting section at your local fabric store. They’re the perfect size and come in amazing color combinations.
Choosing Your Fabric
This is where you get to have fun. Raid your scrap bin without mercy. Old dress fabric, leftover quilting cotton, vintage prints you’ve been hoarding. All of it works.
The more chaotic your fabric choices, the better your garland will look. Mixing different patterns and textures creates visual interest. Cotton works beautifully. Satin adds shimmer. Even lightweight home décor fabric pieces work perfectly.
Aim for squares roughly six to eight inches. But honestly, don’t stress about being precise. Slightly different sizes add charm and make the finished garland look more handmade in the best possible way.
Step by Step: Making Your DIY Fabric Garland
Ready to make some magic happen? This tutorial breaks down into five simple steps. Each one builds on the last. Before you know it, you’ll have a gorgeous fabric garland ready to hang.
Step One: Cut Your Fabric Squares
Start by cutting your fabric scraps into rough squares. Target six to eight inches on each side. These don’t need to be perfect. This is a forgiving project that celebrates imperfection.
Stack them up as you cut. Make a big pile of colorful fabric pieces. Take a moment to admire how pretty they look together. This step matters for your creative soul.
If you’re using a rotary cutter and cutting mat, the process goes faster. But regular scissors work just fine. Put on a podcast or your favorite comfort show and get into a rhythm.
Step Two: Create Your Fabric Puffs
Now comes the satisfying part. Place a small handful of polyfill in the center of one fabric square. Gather the fabric up around the stuffing like you’re making a little bundle.
Twist the excess fabric at the neck to create that classic puff shape. Then tie it tightly with a small piece of twine. You can also just knot the fabric itself if you prefer.
Your first puff is done. See how easy that was? Now you just need to make a bunch more.
Important: Tie those necks tight. A loose twist will come undone and you’ll lose your beautiful puff shape. Give it a good firm knot that won’t slip.
Step Three: Keep Making Puffs
This is where you settle in and make magic happen. For a mantle garland like the one in these photos, you need around thirty to forty puffs. The exact number depends on your desired length.
Put on something good to watch or listen to. Get into your creative flow. The process becomes genuinely meditative once you find your rhythm.
Make generous puffs with plenty of stuffing. They look so much more full and luxurious than flat ones. Don’t skimp on the polyfill.

Step Four: String Your Puffs Together
Cut a long piece of twine. Make it longer than you think you need. You can always trim excess, but you can’t add length mid-project without starting over.
Thread your fabric puffs onto the string by pushing the twine through the twisted neck of each puff. Don’t overthink the color order. Just grab randomly and trust the chaos.
Alternate your patterns and colors as you go. The randomness creates the most beautiful effect. This isn’t the time for careful planning. Embrace the joyful disorder.
Space your puffs close together. You want a full, lush look. Push them together along the string so there aren’t big gaps between each puff.
Step Five: Hang and Style Your Garland
Now for the best part. Hang your finished fabric garland wherever your heart desires. Drape it over your fireplace mantle. Loop it around a mirror frame. Hang it across a doorway.
Scrunch and arrange until it looks full and gorgeous. Step back. Admire your work. Take approximately forty-seven photos because it’s that pretty.
The fabric puffs will shift and settle. Play with the arrangement until you’re happy. There’s no wrong way to style this garland.
Expert Tips for the Perfect Rag Garland
After making several of these beauties, I’ve learned what makes the difference between good and absolutely stunning. These tips will save you time and give you better results.
Stuffing and Structure
The more stuffing the better. Generous puffs look luxurious and full. Flat puffs look sad and deflated. Be generous with that polyfill.
Tie the necks tight. Really tight. A loose twist unravels and ruins your puff shape. You want those knots secure.
Leave long tails of fabric at the neck for extra frill. Those little fabric ends fill out the garland beautifully and add dimension.
Color and Texture
Vary your fabric textures along with colors. Mix cotton with satin or velvet. The different textures catch light differently and create gorgeous depth.
Different patterns in similar colors work beautifully together. Don’t be afraid to mix florals with stripes and polka dots.
Make more puffs than you think you need. You can always trim the garland length. You can’t easily add more pieces mid-hang.
Creative Ways to Display Your Fabric Garland
The beauty of this DIY project is its versatility. This garland works in so many spaces and for so many occasions. Let your creativity run wild with placement options.
Top Display Locations
- Draped over a fireplace mantle for classic charm
- Looped around a large mirror frame
- Hung across a doorway for instant party décor
- Cascading down a staircase banister
- Across a headboard for whimsical bedroom vibes
- Around a window frame for colorful accents
- As festive Christmas tree garland when made with holiday colors
Each location changes the vibe. A mantle feels traditional and cozy. A doorway feels celebratory. A headboard feels romantic and playful.
Try different spots in your home. This garland is lightweight and easy to move. Experiment until you find the perfect placement.
Seasonal Color Palette Ideas
Once you make your first garland, you’ll want to make a dozen more. Different color combinations create completely different moods. Here are my favorite seasonal palettes to inspire your next project.
Spring Garden
Blush pink, cream, and sage green create the softest spring vibe. Add touches of lavender for extra romance.
- Soft pastel florals
- Light cotton fabrics
- Delicate vintage prints
- Perfect for Easter décor
Autumn Harvest
Sunflower yellow, burnt orange, and warm red capture cozy fall feelings perfectly. Mix in touches of deep burgundy.
- Rich warm tones
- Textured fabrics
- Plaid and check patterns
- Thanksgiving ready
Winter Wonderland
White, silver, and ice blue create magical winter elegance. Add touches of sparkly fabric for extra festive cheer.
- Cool icy tones
- Metallic accents
- Satin and velvet textures
- Christmas perfection
Rainbow Joy
Every color at once because life is short and joy matters. This is the palette that started it all for me.
- Maximum color chaos
- All the patterns
- Pure happiness energy
- Works year round
Fun Variations on the Classic Fabric Garland
Once you master the basic technique, the possibilities expand infinitely. Try these fun twists on the classic design to make each garland unique.
Size Variations
Make mini puffs with four-inch fabric squares for delicate garland perfect for wrapping gifts or decorating smaller spaces. Or go giant with ten to twelve-inch squares for dramatic statement pieces.
Mix different puff sizes on the same string for an organic, playful look. Alternate large and small puffs for rhythm and visual interest.
Adding Special Elements
String wooden beads between puffs for a bohemian vibe. Add small bells for a jingly Christmas garland. Weave in fairy lights for magical evening glow.
Tie small fabric bows between every few puffs. Mix in fabric strips alongside the puffs for extra texture. The possibilities are genuinely endless.
Alternative Stuffing Options
Try cotton wool balls instead of polyfill for a more eco-friendly option. Use fabric scraps rolled into balls to make the project completely zero-waste.
Dried lavender mixed with stuffing creates a lightly scented garland. Just make sure any plant materials are completely dry to prevent mold.
Caring for Your Fabric Garland
With proper care, your handmade fabric garland lasts for years. These simple maintenance tips keep it looking fresh and beautiful.
Cleaning: Hand wash gently if needed. Fill a basin with cool water and mild detergent. Swish the garland gently. Rinse thoroughly. Hang to air dry completely before storing.
Dust regularly with a soft cloth or use your vacuum’s brush attachment on low suction. This prevents buildup that dulls the colors over time.
Storage Tips
Store your garland in a large plastic bin or fabric storage bag. Avoid crushing the puffs. Layer tissue paper between coils if you’re stacking multiple garlands.
Keep stored garlands away from moisture and direct sunlight. A cool, dry closet or under-bed storage works perfectly.
Before rehanging after storage, fluff each puff gently to restore the full shape. They bounce back beautifully with just a little attention.
Safety reminder: Polyfill is not suitable for young children. Keep your fabric garland away from open flames. Hand wash gently if cleaning is needed.
The Budget-Friendly Beauty of DIY Fabric Garland
Let’s talk about the economics of this project. This might be the best value craft you ever make.
If you’re using fabric scraps you already own, the cost is genuinely zero dollars. Just the twine from your junk drawer and stuffing you might already have on hand.
Even buying everything new keeps costs incredibly low. A bag of polyfill costs around five dollars and makes multiple garlands. Twine runs about three dollars. Fabric scraps or fat quarters cost a few dollars each.
Total investment for a gorgeous garland that would cost fifty to eighty dollars in stores? About fifteen to twenty dollars maximum if you buy everything brand new.
That’s the DIY dream right there. Maximum impact, minimum investment. Pure win.
Your Joyful Garland Awaits
You now have everything you need to create a stunning fabric garland that transforms your space. No sewing machine required. No complicated techniques. Just simple supplies and a couple hours of meditative crafting.
This project cost me zero dollars because I used scraps I already had. It became one of the most complimented pieces in my entire home. That’s the magic of DIY. Maximum joy, minimal cost, completely unique results.
Start gathering those fabric scraps. Put on your favorite show. Get ready to make something ridiculously colorful that makes you smile every single time you see it.
Your living room will never be the same. And I mean that in the absolute best way possible.
Happy crafting! Drop a rainbow emoji in the comments if you’re saving this project. I can’t wait to see what you create. ✨