DIY Block Printing With Blocks and Rope
I did not expect rope to change my crafting life. And yet here we are.
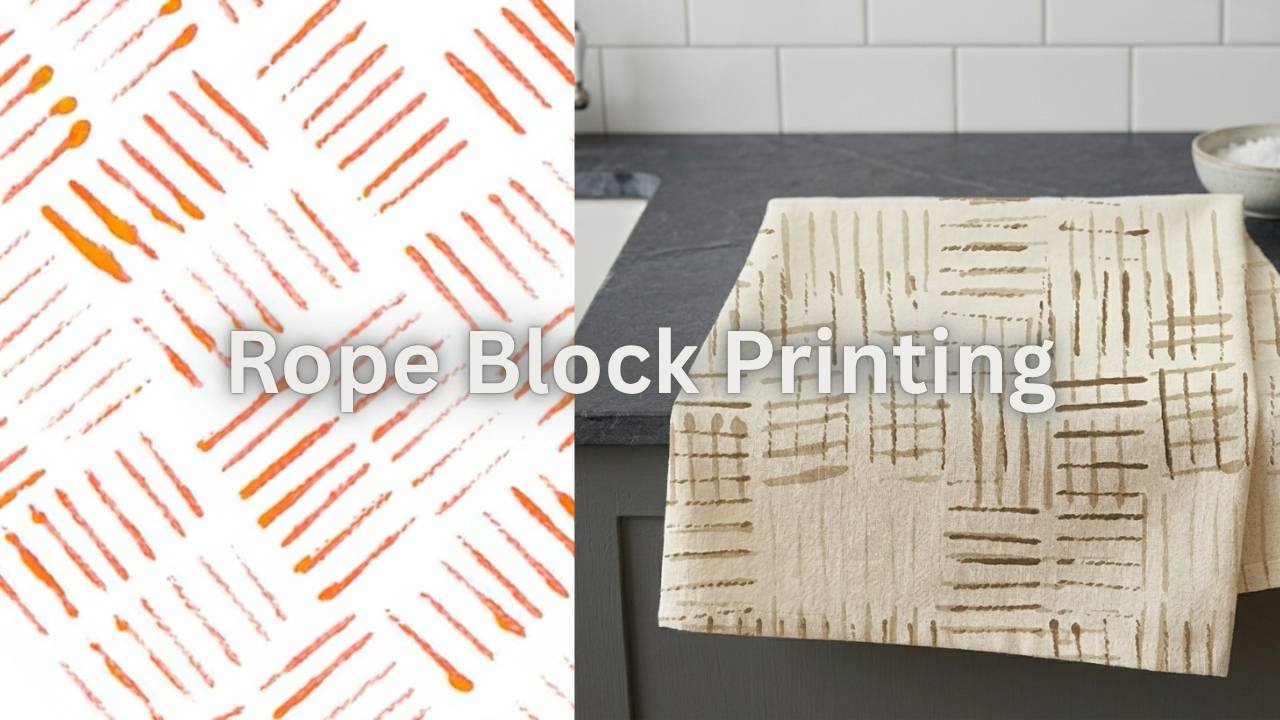
I was already deep into my block printing phase when I stumbled across the technique of wrapping rope or twine around a wooden block to create a stamp. The prints it makes are so incredibly beautiful and so completely unique that I immediately wrapped approximately seven blocks and printed everything in my house that wasn’t nailed down.
The textured, woven quality of a rope-wrapped block print looks artisan and intentional in a way that is genuinely hard to achieve with other methods. And the whole setup costs about five dollars.
This is your complete beginner’s guide to easy block printing with wooden blocks and rope. What to use, how to make your stamps, what to print on, and everything I wish someone had told me before I started.
What You Need: The Full Materials List
Getting started with rope block printing requires just a handful of simple materials. Most things you might already have at home, and the rest cost very little.
For Making Your Rope Blocks
Wooden Blocks
The base for your stamps. You want something solid, flat on at least one side, and easy to hold. Options include scrap timber cut into rectangles or squares, wooden craft blocks from a craft store, children’s wooden building blocks from thrift stores, or wooden coasters.
Building blocks from thrift stores are perfect. You can often find a whole set for two to five dollars, giving you multiple blocks to experiment with different patterns.
Rope and Twine Options
This is your stamp material, and different ropes give completely different results. Jute twine is the most popular choice, widely available, cheap, and creates a beautiful rough organic texture.
Cotton rope is smoother than jute and gives a cleaner print with more defined lines. Hemp cord is similar to jute but slightly finer with beautiful results. Macramé cord creates a beautiful bold print, great for larger blocks.
For Printing Your Designs
- Fabric paint for fabric projects – gives permanent, washable colour on tea towels, cushion covers, and tote bags
- Acrylic paint for paper projects – works beautifully on cardstock, kraft paper, and watercolour paper
- A foam roller or flat brush for loading your block with ink – foam rollers give the most even coverage
- A palette or old plate for rolling out your paint
- Scrap paper for test prints before committing to your final project
- An iron for heat setting fabric prints to make them permanent and washable
- Cardboard sheets to insert inside bags and pillowcases to prevent bleed-through
Total starter cost: Approximately fifteen to thirty dollars depending on what you already have. A wooden building block set from a thrift store, a roll of jute twine from the hardware store, a hot glue gun and a bottle of fabric paint is genuinely all you need to start.
How to Make Your Rope Block Stamps Step by Step
Making your stamps is the most creative and satisfying part of this whole process, and it is so much simpler than it sounds.
Step One Choose Your Block and Rope
Pick your wooden block size based on what you want to print. Smaller blocks around five by five centimetres work perfectly for detailed repeating patterns. Larger blocks around ten by fifteen centimetres are ideal for statement prints.
Choose your rope weight based on the level of detail you want. Thinner cord for finer patterns, thicker rope for bold textural prints.
Step Two Plan Your Wrapping Pattern
Before you glue anything, have a play with wrapping your rope around the block in different ways to see what patterns you can create.
Parallel Horizontal Lines
Wrap straight across the block from top to bottom with lines running parallel. This creates classic stripe prints.
- Easiest pattern for beginners
- Creates beautiful all-over stripe designs
- Works with any rope thickness
- Perfect for tea towels and tote bags
Diagonal Lines
Wrap at a forty-five degree angle for a dynamic stripe that creates chevron effects when repeated.
- More visually interesting than straight lines
- Creates modern geometric patterns
- Beautiful on cushion covers
- Pairs well with straight-line blocks
Grid Pattern
Wrap horizontally first, then vertically on top to create a woven grid that looks like plaid or check fabric.
- Sophisticated layered texture
- Best with thinner rope or string
- Requires more glue and patience
- Stunning results worth the effort
Concentric Rectangle
Start at the outer edge and wrap inward in a rectangle, working toward the centre like a square spiral.
- Creates frame-within-frame effect
- Beautiful as single statement stamp
- Works best on square blocks
- Impressive artisan aesthetic
Step Three Glue as You Wrap
Once you are happy with your pattern, start with a dot of hot glue at the starting point of your rope to anchor it. Then wrap your rope in your chosen pattern, adding a dot of glue every few centimetres to keep it in place and prevent it shifting during printing.
Keep your wrapping tight and even. Loose rope will move and create blurry prints. The tighter and more controlled your wrapping, the crisper your final prints will be.
Step Four Secure the End
When you reach the end of your design, cut the rope and glue the end firmly to the block. Hold it in place for thirty seconds while the glue sets. Make sure the end is pressed flat so it does not create an unwanted mark in your prints.
Step Five Let It Dry Completely
Hot glue sets quickly but give it at least fifteen to twenty minutes before using your stamp to make sure everything is fully secure. Test the rope by gently tugging on it – nothing should move or lift.
Pro tip: Make several blocks while you have your glue gun out. Having three or four different blocks with different rope widths and wrapping patterns gives you so many more design possibilities when you start printing.
Easy Block Print Design Ideas With Rope Blocks
Here are the wrapping patterns that give the most beautiful results. Start with these and then experiment from there.
The Classic Stripe Block
Wrap jute twine in tight parallel lines across the entire face of a rectangular block with lines running in the same direction and no gaps between them. Creates a beautiful bold stripe print.
Use it in a repeating pattern for a gorgeous all-over stripe on fabric, or as a border detail. Endlessly versatile and beginner-friendly.
The Grid Block
Wrap horizontal lines across the block first, securing as you go. Then wrap vertical lines on top of the horizontal ones, creating a woven grid.
Creates a beautiful plaid or check-like print that looks incredibly sophisticated. Vary the spacing between lines for different effects. Tight grid for a fine check, wider spacing for a bolder pattern.
The Diagonal Block
Wrap your rope diagonally across the block at a forty-five degree angle. Creates a dynamic, modern chevron-like print when repeated. Beautiful on cushion covers and tote bags.
The Mixed Texture Block
Use two different rope weights on the same block. Thin cord for some sections, thick rope for others. The contrast in texture creates a beautiful layered print effect that looks very designed and intentional.
The Concentric Rectangle
Starting at the outer edge of a square block, wrap rope in a continuous rectangle that spirals inward toward the centre, like a square snail shell. Creates a beautiful frame-within-frame print that looks gorgeous as a single statement stamp.
The Half-and-Half Block
Cover the left half of your block with tightly wrapped horizontal lines and the right half with diagonal lines. Creates a split print with two different textures side by side, very modern and very striking.
What to Print On: Easy Block Print Projects for Rope Blocks
Rope blocks look absolutely stunning on both fabric and paper. Here are the best projects to start with, from easiest to more ambitious.
Fabric Tea Towels and Kitchen Linens
Rope blocks look absolutely stunning on natural linen and cotton tea towels. The texture of the rope print and the texture of the linen fabric work together beautifully.

A simple stripe block or grid block repeated across a plain linen tea towel in a deep navy, sage green or terracotta creates something that looks genuinely artisan and handmade in the best possible way.
Lay your tea towel flat on a firm surface with cardboard underneath if it is double-layered. Apply a thin, even layer of fabric paint to your rope block using a foam roller. Press firmly onto the fabric, apply even pressure across the whole block, lift straight up.
Reposition and repeat in your chosen layout – all-over repeat, border pattern, scattered placement. Heat set with an iron when completely dry.
Budget tip: Plain linen tea towels from discount stores or thrift shops are two to four dollars each. A set of four printed with matching rope block designs makes a genuinely beautiful housewarming gift that looks far more expensive than it cost.
Cushion Covers
A rope block-printed cushion cover is one of the most satisfying projects in this whole craft. The result looks like a boutique textile purchase and it takes about thirty minutes to make.
A grid block printed in a repeating pattern across a natural linen cushion cover, or a diagonal stripe block used in alternating directions for a herringbone effect, looks incredible on a sofa.
Iron your cushion cover flat and slide cardboard inside. Plan your layout before you start – a diagonal all-over repeat, a centred single large print, a border pattern around the edges. Apply ink evenly to your rope block with a foam roller, press firmly, lift cleanly, reposition and repeat. Heat set when fully dry.
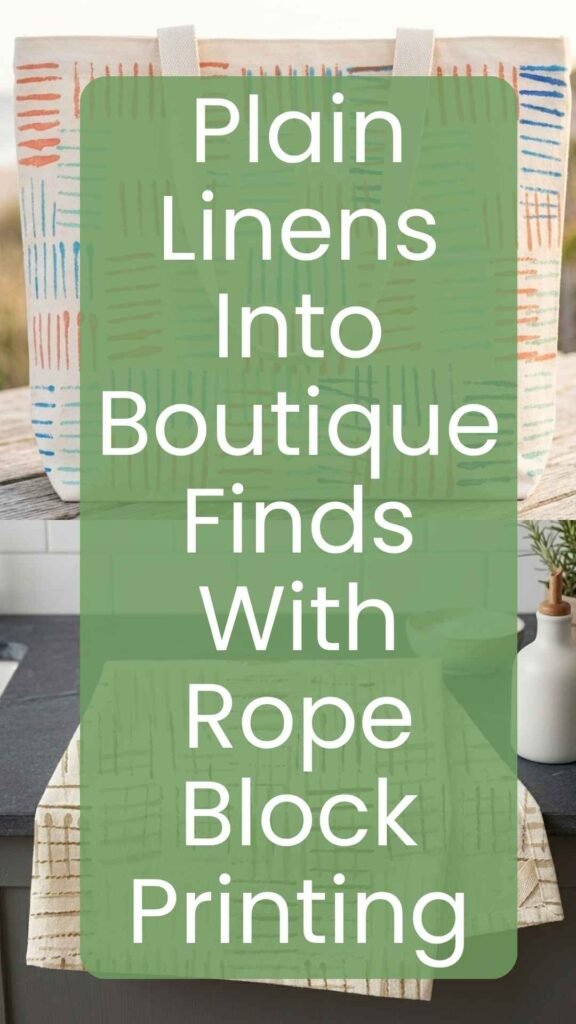
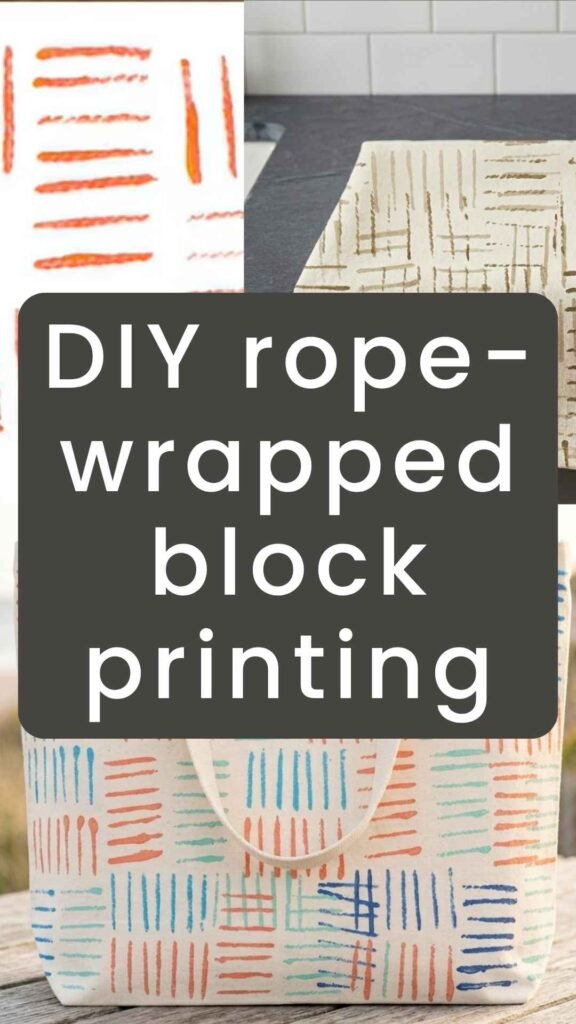
Tote Bags
A rope block-printed tote bag is one of the best easy block print beginner projects because the large flat canvas surface is so forgiving and the results are genuinely impressive.
A concentric rectangle block printed in the centre of a canvas tote in a deep inky blue. A mixed texture block stamped in a scattered all-over pattern. A classic stripe block used as a border around the bottom edge. All beautiful, all achievable in under an hour.
Budget tip: Plain canvas tote bags in bulk online are one dollar fifty to three dollars each. Make a batch of five or six while your paint and supplies are out – they make wonderful gifts and the incremental effort is minimal.
Wrapping Paper and Cards
Rope blocks work brilliantly on paper too. Use acrylic paint instead of fabric paint for paper projects.
A grid block stamped in a repeating pattern across brown kraft paper makes the most beautiful, completely unique wrapping paper. A stripe block used as a border on a plain white card creates elegant handmade stationery.
A concentric rectangle block stamped once in the centre of a card with a simple message inside – done, beautiful, impressive, free to make beyond the cost of the paint.
Wall Art
This is the project that genuinely surprises people. Rope block prints on good paper, framed, look like proper artwork.
Use a large rope block, fifteen by twenty centimetres or bigger, with an interesting wrapping pattern. Apply paint in one or two complementary colours. Print on watercolour paper or heavyweight cartridge paper.
Overlap prints, leave intentional gaps, build up layers of texture. Frame it in a simple white or black frame from a discount store. Put it on your wall and accept all compliments.

Getting the Best Results From Rope Block Printing
A few simple techniques make the difference between okay prints and stunning professional-looking results.
Do These Things
- Wrap your rope tightly and glue as you go – loose rope shifts during printing and creates blurry unclear prints
- Use a foam roller to load your block – it gives the most even paint coverage without overloading any one area
- Apply even pressure when printing – use a rolling pin pressed over the back to ensure all the rope makes contact
- Make several blocks before you start printing – having three or four blocks with different patterns gives you ability to combine them
- Test your block on paper before printing on fabric – every time you reload with fresh paint do a quick test print first
- Experiment with paint colours – try two complementary colours applied to different sections of the same block for multicolour print
- Let the block dry between colour changes – clean thoroughly with damp cloth and dry completely before applying new colour
Avoid These Mistakes
- Using too much paint – excess paint fills in the gaps between rope strands and turns your textured print into a blurry blob
- Using rope that is too thick for detailed designs – thick rope cannot create fine detail, use thin twine or cord instead
- Rushing the gluing – add enough glue dots every three to four centimetres to keep everything exactly where you want it
- Pressing and dragging your block – any sideways movement while the block is in contact with your surface will smear the print
- Skipping the cardboard insert – always slip cardboard inside double-layered fabric items to prevent bleed-through
- Throwing away blocks that did not print perfectly – simply peel off the rope and re-wrap in a different pattern
Complete Starter Kit Budget Breakdown
Here is exactly what I would spend to set up a complete rope block printing kit from scratch, with real-world pricing.
| Item | Where to Buy | Price Range | Notes |
| Wooden building blocks | Thrift store | $2 – $5 for a set | Gives you multiple blocks to experiment with |
| Jute twine roll | Hardware store | $3 – $5 | One roll lasts for dozens of blocks |
| Cotton or macramé cord | Craft store | $4 – $8 | Optional but gives different texture |
| Hot glue gun and glue sticks | Dollar store or hardware | $10 – $15 | One-time purchase, use for all future projects |
| Fabric paint in two colours | Craft store | $8 – $16 | Start with navy and terracotta or sage green |
| Foam roller | Craft or hardware store | $3 – $5 | Essential for even paint application |
| Plain tea towels or tote bags | Discount store | $4 – $10 | To print your first projects |
Total at full price: approximately thirty-four to sixty-four dollars. Thrift the building blocks and buy paint on sale and you will get the whole kit closer to twenty to thirty dollars.
Cost per project after that: just a few dollars in paint. The blocks themselves are reusable indefinitely, and one roll of twine makes enough blocks for months of printing activity.
Start Your Rope Block Printing Journey Today
Rope block printing is one of those crafts that gives you so much more than you put in. A few dollars of materials, an afternoon of creative work, and results that look genuinely beautiful and completely handmade in the very best way.
The combination of the simple wooden block and the organic texture of rope or twine creates prints that no machine can replicate, which is exactly why they look so special. Each print carries the mark of your hands, the slight variations in pressure, the unique pattern you chose to wrap.
Children love this activity too. The wrapping and stamping process is tactile and satisfying, and they can create beautiful things to give as gifts or keep for themselves. A rope block printing session makes a wonderful rainy afternoon activity or birthday party craft station.
Make your first block today. Wrap it, glue it, load it with paint, press it onto something you love, and lift. I promise what you see when you lift that block will make you immediately reach for more rope and start planning your next pattern.