Discover 7 Easy Fabric Crafts for Beginners
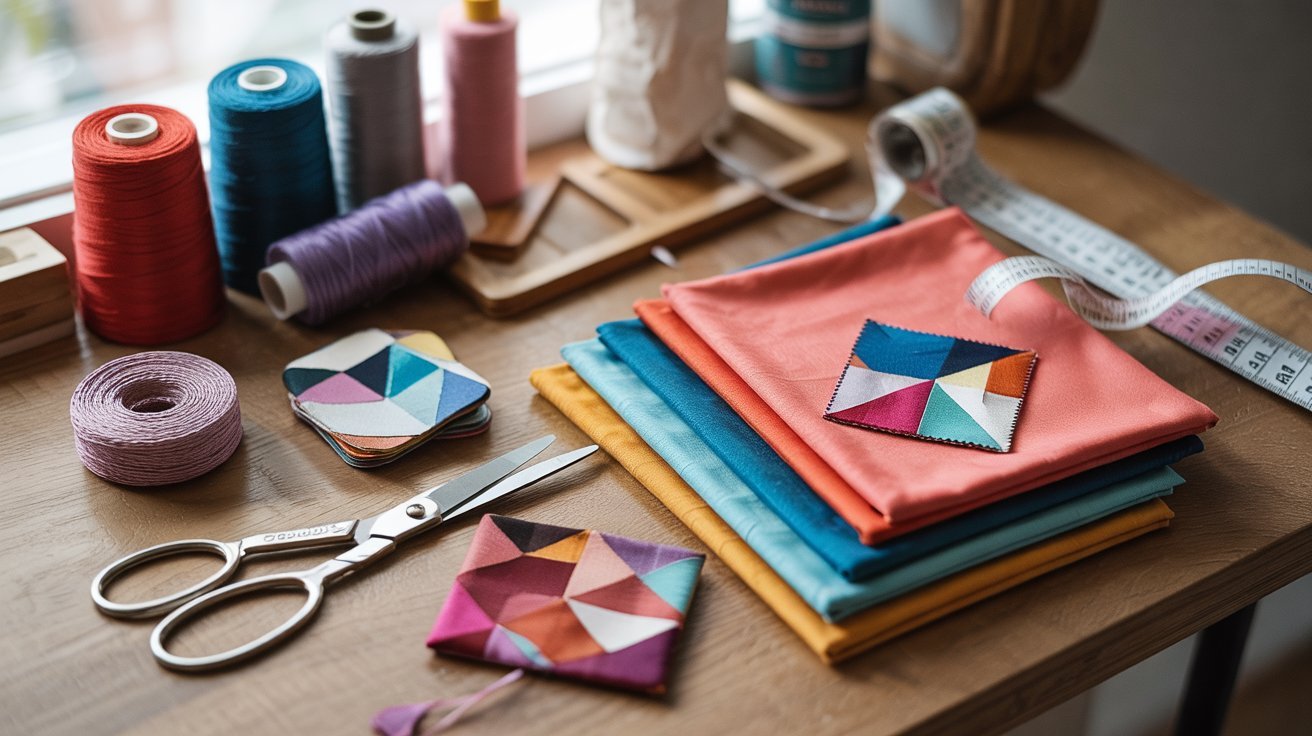
Fabric crafts offer a wonderful entry point into the creative world of DIY projects. If you’ve been admiring handmade items but feel intimidated about where to start, you’re in the right place! These beginner-friendly fabric crafts require minimal supplies, are forgiving of mistakes, and provide that satisfying feeling of creating something beautiful with your own hands.
In This Post:
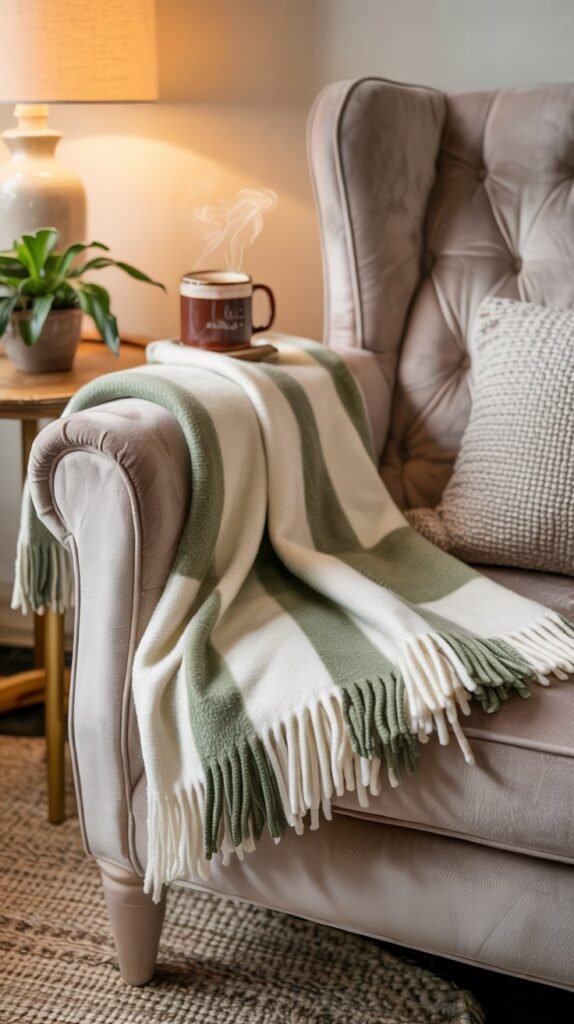
- No-Sew Fleece Blanket – The beginner project that looks store-bought and takes just an hour or two to finish
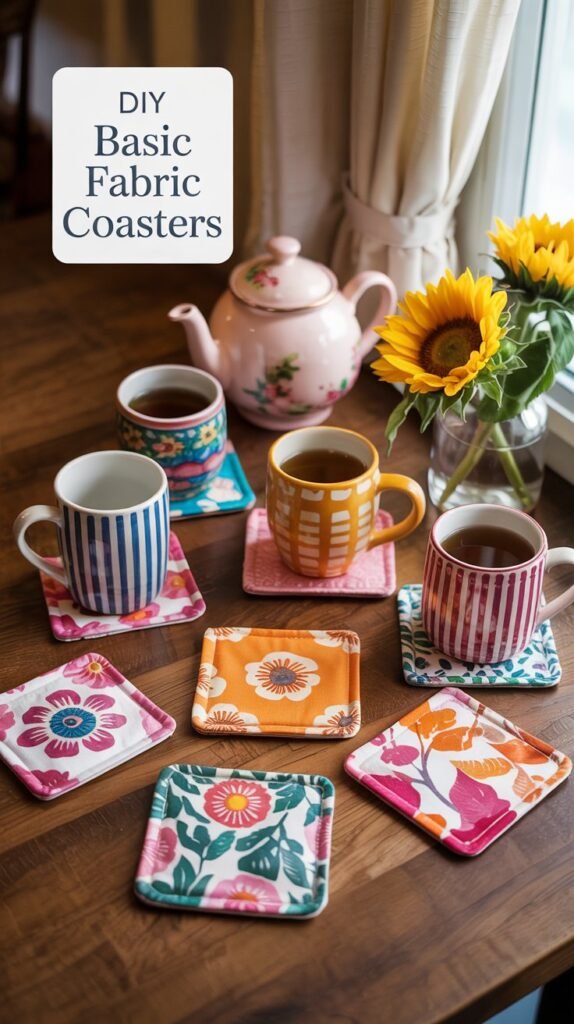
- Basic Fabric Coasters – A practical way to use up scraps and make something people actually want as a gift
- Easy Fabric Scrap Garland – No sewing required and a perfect excuse to finally use those leftover fabric pieces
- Beginner-Friendly Tote Bag – Just straight stitches, one afternoon, and something useful you made yourself
- Fabric-Covered Storage Boxes – The upcycling project that turns old cardboard into custom decor that matches your home
- Simple Pillowcase – Three seams, one yard of fabric, and a bedroom that feels a little more you
- Basic Fabric Bookmark – The quickest project on the list and one of the most thoughtful things you can give someone
The projects we’ve selected are perfect for absolute beginners – no sewing machine or special skills required. With just some basic materials and a little patience, you’ll be amazed at what you can create. Let’s dive into these simple yet rewarding fabric crafts that will build your confidence and spark your creativity!
1. No-Sew Fleece Blanket
A no-sew fleece blanket is one of the most satisfying fabric crafts for beginners. In just an hour or two, you’ll have a soft, cozy blanket that looks store-bought but has that special handmade touch. This project is incredibly forgiving and perfect for cold winter evenings.
Materials Needed:
- 2 yards of fleece fabric (for a medium-sized blanket)
- Sharp fabric scissors
- Ruler or measuring tape
- Pins or clips (optional)
Instructions:
- Lay both pieces of fleece on top of each other, with wrong sides together.
- Trim the edges to make them even if needed.
- Cut a 4-inch square from each corner.
- Cut 4-inch deep, 1-inch wide strips around all four sides of the blanket.
- Tie each pair of matching strips (one from each layer) together with a simple knot.
- Continue around the entire blanket until all strips are tied.
- Fluff and enjoy your new blanket!
Pro Tip: Choose complementary colors or patterns for the top and bottom layers to create a more visually interesting blanket. Solid colors paired with patterns work especially well!
2. Basic Fabric Coasters
These simple fabric coasters are not only practical but make great gifts too! They’re a perfect way to use up fabric scraps and add a personal touch to your home. The best part? You can make a set in under an hour!
Materials Needed:
- Cotton fabric scraps in your choice of patterns
- Felt or thin batting for the middle layer
- Scissors
- Pins
- Iron and ironing board
- Fabric glue or needle and thread
Instructions:
- Cut your fabric and felt into 4.5-inch squares (you’ll need two fabric squares and one felt square for each coaster).
- Place the felt square between the two fabric squares with right sides facing out.
- Pin around the edges to hold the layers together.
- Apply fabric glue around the edges, about 1/4 inch from the edge, pressing firmly.
- Let dry completely according to glue instructions.
- Alternatively, hand-stitch around the edges with a simple running stitch if you prefer.
Pro Tip: To make your coasters more absorbent, use cotton flannel for the top layer. This will help soak up condensation from cold drinks!
3. Easy Fabric Scrap Garland
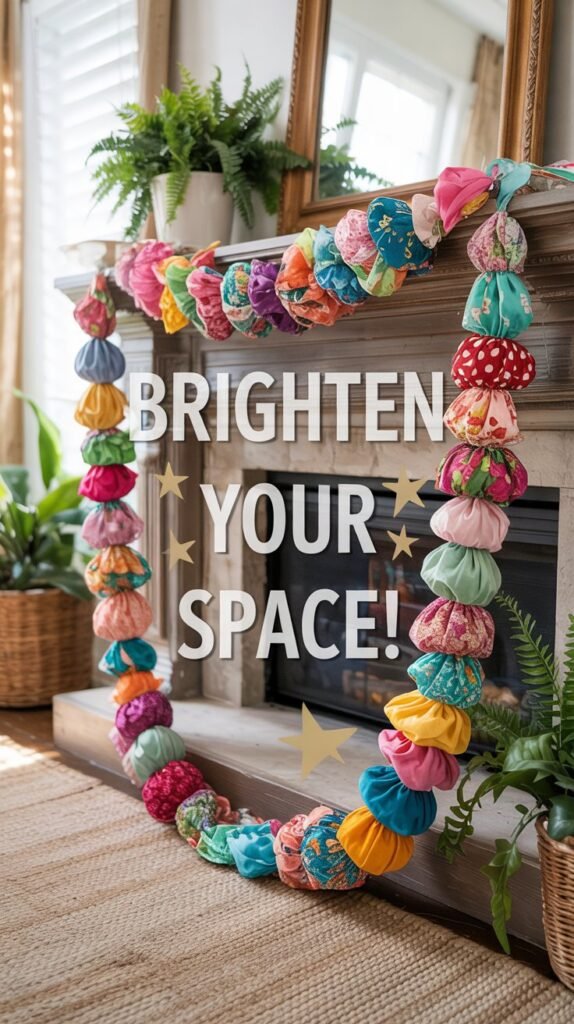
This fabric scrap garland is the perfect way to use up those leftover fabric pieces while creating something beautiful for your home. It adds a pop of color to any room and can be customized for different seasons or holidays. The best part? No sewing required!
Materials Needed:
- Fabric scraps in various colors and patterns
- Twine, ribbon, or string
- Scissors
- Ruler (optional)
Instructions:
- Cut your fabric scraps into strips approximately 1 inch wide and 6-8 inches long.
- Cut your twine to the desired length of your garland, plus a few extra inches for hanging.
- Take a fabric strip and fold it in half over the twine.
- Pull the two ends of the fabric strip through the loop created at the fold.
- Pull tight to secure the fabric to the twine.
- Repeat with all fabric strips, spacing them evenly along the twine.
- Hang your completed garland and adjust the fabric strips as needed.
Pro Tip: For a fuller garland, place the fabric strips close together. For a more minimalist look, space them further apart. You can also vary the length of the strips for added texture!
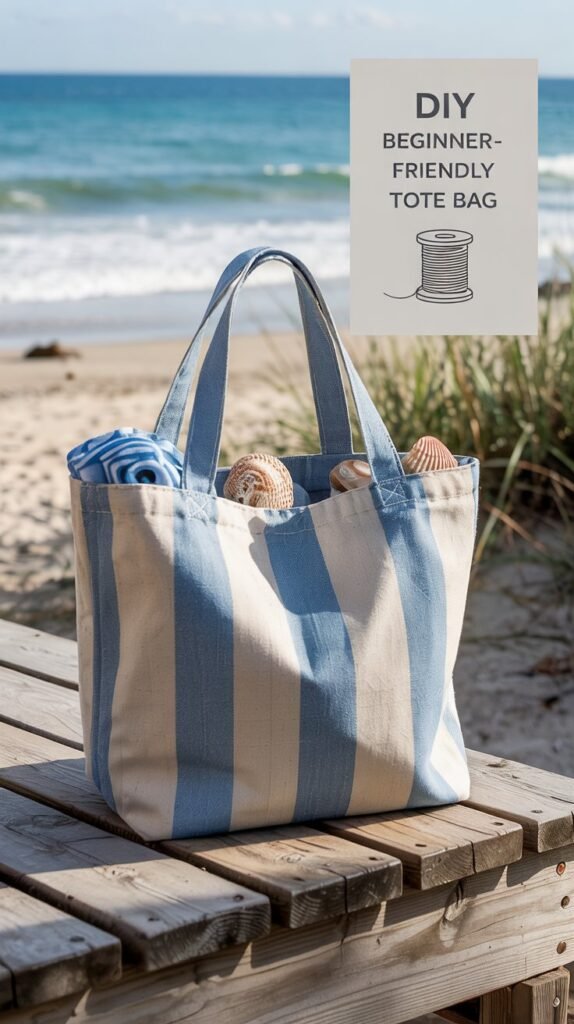
4. Beginner-Friendly Tote Bag
Don’t be intimidated by the idea of making a bag – this simple tote requires just basic straight stitches and can be completed in an afternoon. It’s the perfect project to practice your hand-sewing skills, and you’ll end up with a useful item you can proudly say you made yourself!
Materials Needed:
- 1 yard of medium-weight cotton fabric
- Matching thread
- Needle
- Pins
- Scissors
- Iron and ironing board
- Ruler or measuring tape
Instructions:
- Cut two identical rectangles of fabric, approximately 16 inches wide by 14 inches tall.
- For the handles, cut two strips of fabric, each 4 inches wide by 20 inches long.
- Fold each handle strip in half lengthwise with right sides together and sew along the long edge.
- Turn the handles right side out and press flat.
- Place the two main fabric pieces right sides together and pin the sides and bottom.
- Sew along the sides and bottom, leaving the top open.
- Attach the handles to the inside of the bag, about 4 inches in from each side, and sew securely.
Pro Tip: For a sturdier bag, use canvas or duck cloth fabric. You can also add a pocket to the inside by sewing a small fabric rectangle to one side before assembling the bag!
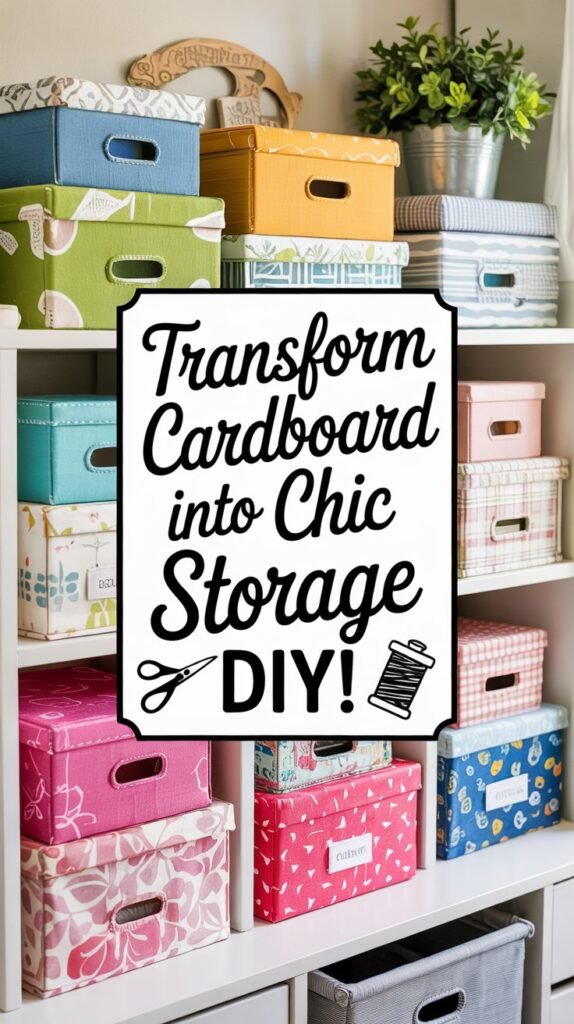
5. Fabric-Covered Storage Boxes
Give new life to old cardboard boxes by covering them with fabric! This upcycling project is not only eco-friendly but also allows you to create custom storage solutions that match your home decor. These fabric-covered boxes are perfect for organizing everything from craft supplies to office items.
Materials Needed:
- Cardboard box (shoebox, shipping box, etc.)
- Fabric (enough to cover the outside of your box)
- Fabric scissors
- Craft glue or fabric glue
- Paintbrush for applying glue
- Ruler
- Pencil
Instructions:
- Measure your box and cut fabric pieces for each side, adding about 1 inch extra on all sides for overlap.
- Apply glue to one side of the box and carefully press the corresponding fabric piece onto it.
- Fold the excess fabric over the edges and glue down inside the box.
- Repeat for all sides of the box, working on opposite sides first.
- For the inside of the box, cut fabric pieces to fit and glue them in place for a finished look.
- Let the glue dry completely before using your box.
Pro Tip: For a cleaner finish on the corners, try mitering them by folding the fabric at a 45-degree angle before gluing down the overlaps. This reduces bulk at the corners!
6. Simple Pillowcase
A handmade pillowcase is a simple project that adds a personal touch to your bedroom. With just three straight seams, this is an ideal project for beginners who want to practice basic sewing skills. Choose a fabric that matches your decor or makes you smile every time you see it!

Materials Needed:
- 1 yard of 44-45 inch wide cotton fabric
- Matching thread
- Needle
- Pins
- Scissors
- Iron and ironing board
- Ruler or measuring tape
Instructions:
- Cut your fabric to 42 inches by 36 inches (for a standard size pillow).
- Fold the fabric in half with right sides together, so it measures 21 inches by 36 inches.
- Pin along the long side and one short side, leaving one short end open.
- Sew along the pinned edges with a 1/2 inch seam allowance.
- Turn the pillowcase right side out and press the seams flat.
- Fold the open edge under 1/4 inch, then another 1/4 inch to create a hem.
- Sew the hem in place with a straight stitch.
Pro Tip: For a decorative touch, add a contrasting fabric band at the opening of your pillowcase. Cut a strip of contrasting fabric 44 inches by 10 inches, fold it in half lengthwise, and attach it to the main fabric before assembling the pillowcase!
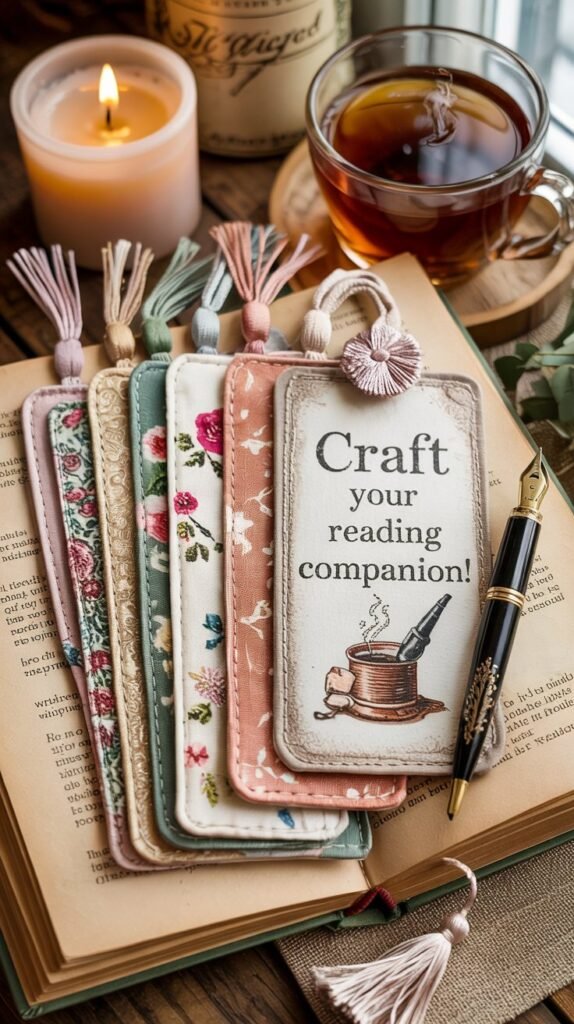
7. Basic Fabric Bookmark
These charming fabric bookmarks are perfect for book lovers and make wonderful gifts. They’re also a great way to use up small fabric scraps! With just a few simple steps, you can create a practical item that adds a personal touch to your reading experience.
Materials Needed:
- Fabric scraps in your choice of patterns
- Cardstock or thin cardboard (optional, for added stiffness)
- Scissors
- Fabric glue
- Ruler
- Ribbon, yarn, or embroidery floss for tassel (optional)
Instructions:
- Cut a rectangle of fabric approximately 2.5 inches wide by 8 inches long.
- If using cardstock for stiffness, cut it slightly smaller than your fabric piece.
- Fold the edges of the fabric over by about 1/4 inch and secure with fabric glue.
- If using cardstock, glue it to the center of your fabric piece.
- For a decorative touch, punch a hole at the top of the bookmark and thread ribbon through it.
- Tie the ribbon in a knot or make a small tassel for the end.
- Let the glue dry completely before using your bookmark.
Pro Tip: Create a set of bookmarks in coordinating fabrics for a thoughtful gift. Package them with a new book or a gift card to a bookstore for a complete present!
Start Your Fabric Crafting Journey Today!
These seven easy fabric crafts for beginners are just the beginning of your creative journey. Each project builds confidence and teaches you valuable skills that you can apply to more complex projects as you grow. Remember, crafting is about enjoying the process as much as the finished product, so don’t worry about perfection – embrace the handmade charm!