Handmade Gifts for Colleagues: 15 Small, Office-Friendly DIY Ideas
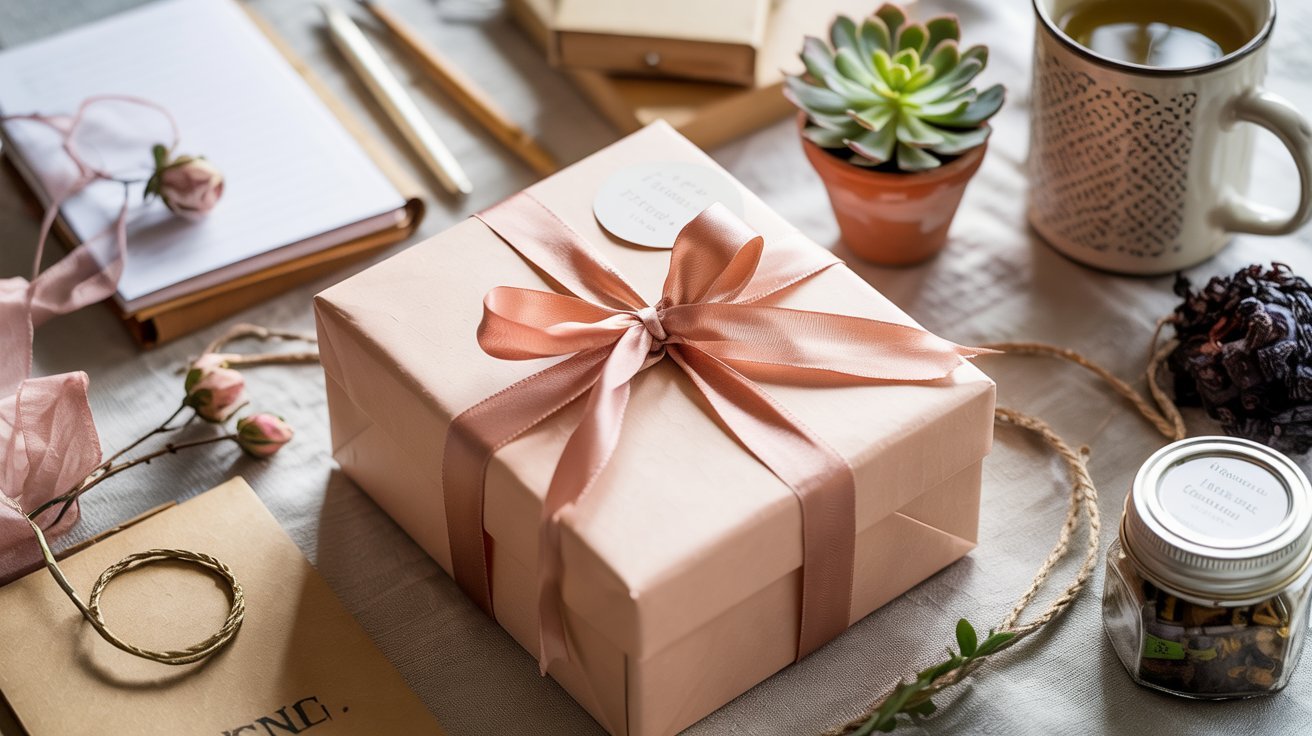
There’s something uniquely special about receiving a handmade gift. In a workplace where store-bought presents are the norm, taking the time to craft something with your own hands speaks volumes about how much you value your professional relationships. Handmade gifts for colleagues don’t need to be elaborate or expensive – in fact, the most appreciated ones are often small, thoughtful tokens that brighten someone’s workday.
Whether you’re preparing for the holiday season, acknowledging a work anniversary, or simply wanting to show appreciation, these 15 DIY gift ideas are perfectly sized for office environments and can be created with minimal crafting experience. Each project comes with clear instructions, material lists, and tips to ensure your handmade gesture hits just the right note of thoughtfulness without crossing into overly personal territory.
1. Personalized Mini Desk Plant
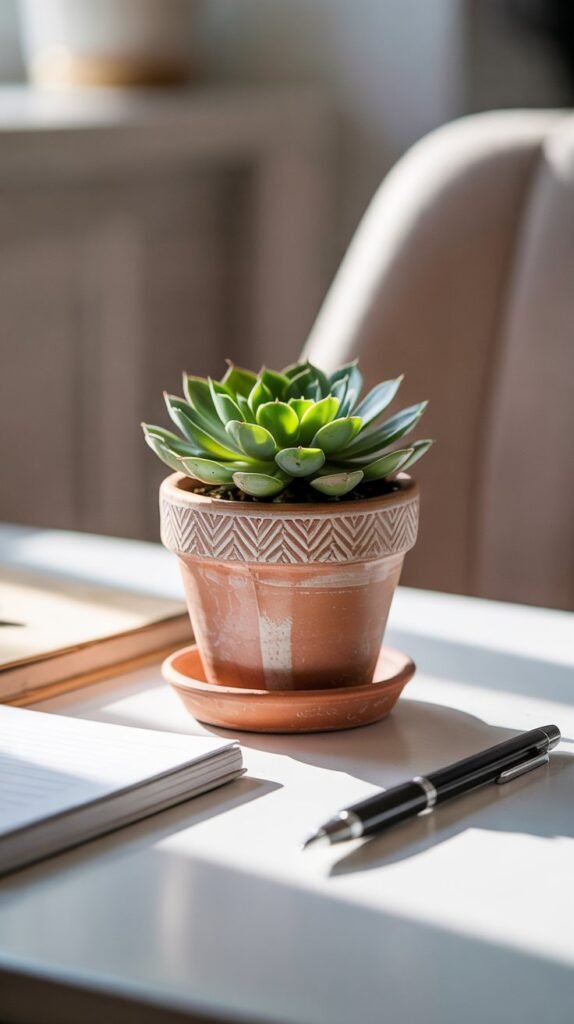
Materials Needed:
- Small terracotta pot (2-3 inches)
- Acrylic paint in office-appropriate colors
- Small succulent or air plant
- Potting soil
- Small decorative stones (optional)
- Clear acrylic sealer
- Small paintbrushes
Step-by-Step Instructions:
- Clean the terracotta pot and let it dry completely.
- Apply a base coat of paint to the exterior of the pot and let dry.
- Add simple designs, patterns, or your colleague’s initials.
- Once the paint is dry, apply a coat of clear sealer.
- Add potting soil to the pot.
- Plant the succulent or air plant.
- Top with decorative stones if desired.
Time Commitment & Skill Level:
30 minutes active time plus drying time | Beginner-friendly
Why It’s Perfect for the Office:
Small plants add life to desk spaces without taking up too much room. Succulents and air plants require minimal care, making them ideal office companions. The personalized pot shows thoughtfulness while keeping the gift professional.
Budget Considerations:
$5-10 per pot depending on plant choice. Save by buying plants and pots in bulk if gifting to multiple colleagues.
2. Customized Pocket Notebook

Materials Needed:
- Small blank notebooks (pocket-sized)
- Decorative paper or fabric
- Mod Podge or craft glue
- Scissors
- Foam brush
- Ribbon or twine
- Personalized tag (optional)
Step-by-Step Instructions:
- Measure and cut decorative paper to fit the notebook cover.
- Apply a thin layer of Mod Podge to the notebook cover.
- Carefully place the paper on the cover and smooth out any bubbles.
- Apply another thin layer of Mod Podge over the paper and let dry.
- Add a ribbon bookmark by gluing one end to the inside of the spine.
- Create a small tag with your colleague’s name or initials.
- Attach the tag to the ribbon for a personalized touch.
Time Commitment & Skill Level:
20 minutes active time plus 1 hour drying time | Beginner-friendly
Why It’s Perfect for the Office:
Everyone in an office environment needs notebooks for meetings and notes. This practical gift will be used daily, and the personalized touch makes it special without being too personal.
Budget Considerations:
$3-5 per notebook. Purchase plain notebooks in bulk and use scrap paper or fabric you already have to reduce costs.
3. Curated Tea Sampler
Materials Needed:
- Assortment of quality loose-leaf teas
- Small glass jars or paper envelopes
- Labels or tags
- Twine or ribbon
- Small box or basket
- Tea brewing instructions card
- Decorative tissue paper
Step-by-Step Instructions:
- Select 4-5 different tea varieties (consider including energizing morning teas and calming afternoon options).
- Fill each container with a different tea variety.
- Create labels with the tea name, brewing temperature, and steeping time.
- Attach labels to each container.
- Line the small box or basket with tissue paper.
- Arrange the tea containers in the box.
- Add a personalized note with brewing tips.
Time Commitment & Skill Level:
15-20 minutes | Beginner-friendly
Why It’s Perfect for the Office:
Tea is a workplace staple that helps colleagues through long afternoons. This gift is consumable, doesn’t take up permanent desk space, and allows your colleague to discover new favorites during their workday.
Budget Considerations:
$8-15 per sampler. Purchase loose tea in bulk and divide among multiple gifts to save money.
4. Upcycled Desk Organizer
Materials Needed:
- Empty cardboard boxes of various sizes
- Decorative paper or fabric
- Scissors and craft knife
- Ruler
- Glue or double-sided tape
- Clear packing tape (for reinforcement)
- Optional: small wooden feet or buttons
Step-by-Step Instructions:
- Collect small boxes (tea boxes, smartphone boxes work well).
- Arrange boxes in a configuration that works for different office supplies.
- Secure boxes together with strong tape.
- Measure and cut decorative paper to cover each visible surface.
- Adhere paper using glue or double-sided tape.
- Reinforce edges with clear tape if needed.
- Add small feet to the bottom for stability if desired.
Time Commitment & Skill Level:
45 minutes | Beginner to intermediate
Why It’s Perfect for the Office:
This practical gift helps colleagues organize their workspace while adding a personal touch. It’s functional, customizable to their specific needs, and shows creativity without being flashy.
Budget Considerations:
$2-5 per organizer. This project primarily uses upcycled materials, making it extremely budget-friendly.
5. Tile Coasters with Professional Designs
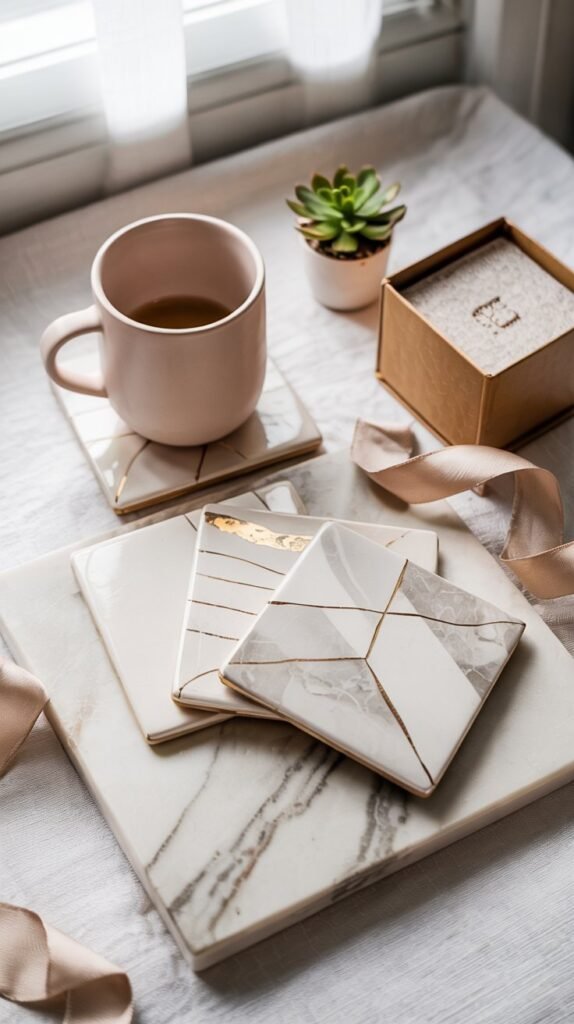
Materials Needed:
- 4″ x 4″ white ceramic tiles
- Alcohol inks or acrylic paints
- Mod Podge or clear spray sealer
- Felt or cork backing
- Strong adhesive
- Disposable gloves
- Small gift box
Step-by-Step Instructions:
- Clean tiles thoroughly and let dry completely.
- For alcohol ink design: Drop different colors of alcohol ink onto the tile and tilt to create patterns.
- For painted design: Use a small brush to create simple geometric patterns or marbled effects.
- Allow designs to dry completely.
- Apply 2-3 coats of Mod Podge or spray sealer, allowing drying time between coats.
- Cut felt or cork to fit the bottom of each tile and attach with adhesive.
- Package in a small box with tissue paper.
Time Commitment & Skill Level:
30 minutes active time plus drying time | Beginner-friendly
Why It’s Perfect for the Office:
Coasters are practical for protecting desk surfaces from coffee mugs and water glasses. The professional designs add a touch of personality without being too decorative or distracting in a work environment.
Budget Considerations:
$2-3 per coaster. Buy tiles in bulk from hardware stores for significant savings.
6. Leather Corner Bookmarks
Materials Needed:
- Faux leather or genuine leather scraps
- Scissors
- Hole punch
- Ruler
- Pencil
- Small tassels or charms (optional)
- Small gift envelope
Step-by-Step Instructions:
- Cut a 3″ x 3″ square from leather material.
- Fold the square in half diagonally to form a triangle.
- Fold two corners of the triangle toward the center to create a pocket.
- Optional: Punch a small hole in one corner and add a tassel.
- For a personalized touch, use a leather stamp to add initials.
- Create a small card explaining that it’s a corner bookmark.
- Place in a small envelope with the card.
Time Commitment & Skill Level:
15 minutes per bookmark | Beginner-friendly
Why It’s Perfect for the Office:
These bookmarks are subtle yet stylish, perfect for colleagues who frequently reference manuals, reports, or books. The professional look of leather makes them appropriate for work settings.
Budget Considerations:
$1-3 per bookmark. Look for leather scraps at craft stores or use faux leather for a more budget-friendly option.
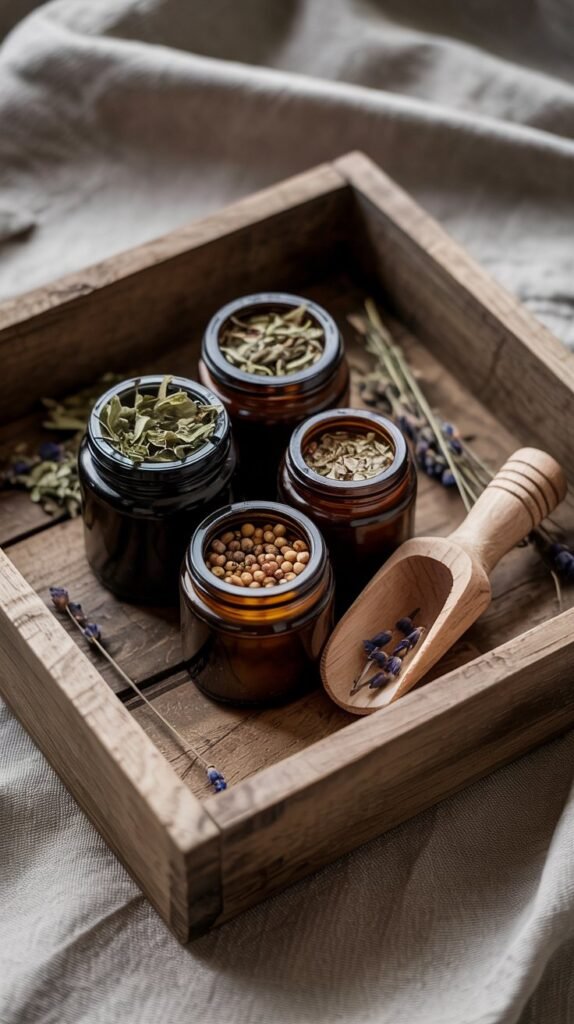
7. Herb-Infused Olive Oils
Materials Needed:
- Small glass bottles with corks or caps
- High-quality olive oil
- Dried herbs (rosemary, thyme, basil)
- Dried chili flakes or garlic (optional)
- Funnel
- Custom labels
- Twine or ribbon
Step-by-Step Instructions:
- Thoroughly wash and completely dry glass bottles.
- Add dried herbs to each bottle (fresh herbs can cause spoilage).
- Using a funnel, fill bottles with olive oil.
- Seal bottles tightly with corks or caps.
- Create labels with the type of infusion and a “use by” date (1 month from creation).
- Attach labels and decorate with twine or ribbon.
- Include a small card with usage suggestions.
Time Commitment & Skill Level:
20 minutes | Beginner-friendly
Why It’s Perfect for the Office:
This consumable gift doesn’t create clutter and appeals to colleagues who enjoy cooking. The small bottles are easy to transport home, and the professional presentation makes them suitable for workplace gifting.
Budget Considerations:
$3-5 per bottle. Purchase olive oil in bulk and small bottles online for the best value.
8. Hand-Painted Minimalist Mug
Materials Needed:
- Plain white ceramic mug
- Oil-based paint pens (Sharpie Oil-Based Paint Markers work well)
- Rubbing alcohol
- Cotton balls
- Pencil for sketching design
- Oven
- Gift box
Step-by-Step Instructions:
- Clean mug with rubbing alcohol and let dry completely.
- Sketch a simple design lightly with pencil (dots, lines, geometric shapes work well).
- Trace over the design with oil-based paint pens.
- Let the paint dry for 24 hours.
- Bake the mug according to paint pen instructions (typically 350°F for 30 minutes).
- Allow to cool completely in the oven.
- Package in a gift box with tissue paper.
Time Commitment & Skill Level:
30 minutes active time plus drying and baking time | Beginner to intermediate
Why It’s Perfect for the Office:
A personalized mug is practical for daily use at work while adding a touch of individuality to a colleague’s desk. Keeping designs minimal and professional ensures the gift is workplace-appropriate.
Budget Considerations:
$3-8 per mug. Look for plain mugs at dollar stores or purchase in bulk online.
9. Mini Stress Relief Kit
Materials Needed:
- Small decorative box or pouch
- Homemade stress ball (balloon filled with flour)
- Lavender sachet (small fabric pouch with dried lavender)
- Herbal tea bags (chamomile or lavender)
- Small notebook for gratitude notes
- Chocolate squares
- Instruction card for stress relief techniques
Step-by-Step Instructions:
- Create a stress ball by filling a balloon with flour using a funnel.
- Sew a small fabric pouch and fill with dried lavender.
- Write or print simple stress relief techniques on a small card.
- Select calming tea varieties and chocolate.
- Find or create a small notebook for gratitude journaling.
- Arrange all items in a decorative box or pouch.
- Add a personalized note explaining each item’s purpose.
Time Commitment & Skill Level:
45 minutes | Beginner to intermediate
Why It’s Perfect for the Office:
Work environments can be stressful, and this thoughtful kit provides small, discrete tools for managing stress throughout the workday. The professional presentation keeps it appropriate for office settings.
Budget Considerations:
$8-12 per kit. Create multiple kits at once to save on materials.
10. Personalized Notepad
Materials Needed:
- Plain white paper (letter size)
- Cardstock for backing
- Computer and printer
- Paper cutter or scissors
- Binding supplies (staples, glue, or binding machine)
- Decorative paper clip (optional)
- Cellophane bag for packaging
Step-by-Step Instructions:
- Design a simple header with your colleague’s name or initials.
- Print the header on multiple sheets of paper (25-50 sheets).
- Cut paper to desired notepad size (typically 5.5″ x 8.5″ for a half-sheet).
- Cut a piece of cardstock for the backing.
- Stack papers neatly with cardstock at the bottom.
- Bind the top edge with staples, glue, or a binding machine.
- Package in a cellophane bag with a decorative paper clip.
Time Commitment & Skill Level:
30 minutes | Beginner-friendly
Why It’s Perfect for the Office:
Notepads are essential office tools that get used daily. The personalization adds a thoughtful touch while keeping the gift practical and professional.
Budget Considerations:
$2-4 per notepad. Use paper you already have and print multiple notepads at once to save on ink and materials.
11. DIY Desk Calendar with Inspirational Quotes
Materials Needed:
- Cardstock in neutral colors
- Computer and printer
- Paper cutter or scissors
- Small wooden stand or easel
- Hole punch
- Binder rings
- Collection of professional inspirational quotes
Step-by-Step Instructions:
- Design calendar pages with months, dates, and inspirational quotes.
- Print designs on cardstock.
- Cut pages to uniform size (typically 4″ x 6″ or 5″ x 7″).
- Punch holes in the top of each page.
- Assemble pages in order using binder rings.
- Create or purchase a small stand to display the calendar.
- Package calendar and stand together with a note.
Time Commitment & Skill Level:
1 hour | Intermediate
Why It’s Perfect for the Office:
Desk calendars are practical tools that also provide daily inspiration. The small footprint makes it perfect for office desks, and the professional quotes keep it workplace-appropriate.
Budget Considerations:
$5-8 per calendar. Create multiple calendars at once to maximize your printing efficiency.
12. Decorated Wooden Pen with Custom Holder
Materials Needed:
- Wooden pen (unfinished)
- Small wooden block for holder
- Drill with bit sized for pen
- Sandpaper (fine grit)
- Wood stain or paint
- Clear sealer
- Thin decorative cord or washi tape
Step-by-Step Instructions:
- Sand the wooden pen and holder block until smooth.
- For the pen: Apply thin decorative cord or washi tape in a simple pattern.
- For the holder: Drill a hole slightly larger than the pen diameter.
- Apply wood stain or paint to both pieces and let dry.
- Apply clear sealer to protect the finish.
- Allow to dry completely.
- Package the pen and holder together in a small gift box.
Time Commitment & Skill Level:
45 minutes active time plus drying time | Intermediate
Why It’s Perfect for the Office:
A quality pen with a custom holder adds a touch of elegance to any desk. The wooden materials and professional finish make this gift sophisticated yet appropriate for workplace settings.
Budget Considerations:
$6-10 per set. Look for unfinished wooden pens in bulk online for better pricing.
13. Relaxing Bath Salts in Custom Jars
Materials Needed:
- Small glass jars with lids
- Epsom salt
- Sea salt
- Baking soda
- Essential oils (lavender, eucalyptus)
- Natural food coloring (optional)
- Dried herbs or flower petals (optional)
- Custom labels
Step-by-Step Instructions:
- In a large bowl, mix 2 cups Epsom salt, 1/2 cup sea salt, and 1/2 cup baking soda.
- Add 10-15 drops of essential oil and mix thoroughly.
- Add a few drops of natural food coloring if desired and mix until color is even.
- Fold in dried herbs or flower petals if using.
- Fill glass jars with the mixture.
- Create professional-looking labels with ingredients and usage instructions.
- Seal jars tightly and add a ribbon or twine around the lid.
Time Commitment & Skill Level:
20 minutes | Beginner-friendly
Why It’s Perfect for the Office:
This gift acknowledges work-life balance by encouraging relaxation after a busy workday. The professional packaging keeps it appropriate for office gifting, and it’s easy for colleagues to transport home.
Budget Considerations:
$3-5 per jar. Purchase ingredients in bulk to make multiple gifts at once.
14. Minimalist Wooden Photo Frame
Materials Needed:
- Thin wooden craft sticks or balsa wood strips
- Wood glue
- Sandpaper (fine grit)
- Wood stain or paint
- Clear sealer
- Small binder clips (for assembly)
- Cardboard backing
- Clear plastic sheet (optional)
Step-by-Step Instructions:
- Cut wooden sticks to desired frame size (typically for a 4″ x 6″ photo).
- Sand all pieces until smooth.
- Arrange sticks in a frame shape and glue corners together.
- Use binder clips to hold corners while drying.
- Apply wood stain or paint and let dry.
- Apply clear sealer for protection.
- Cut cardboard backing slightly smaller than outer frame dimensions.
- Attach backing with small dots of glue.
Time Commitment & Skill Level:
1 hour active time plus drying time | Intermediate
Why It’s Perfect for the Office:
A simple frame allows colleagues to personalize their workspace with important photos while maintaining a professional appearance. The minimalist design works well in office environments.
Budget Considerations:
$3-6 per frame. Purchase materials in bulk to make multiple frames at once.
15. Plantable Seed Paper Cards or Bookmarks
Materials Needed:
- Recycled paper (shredded)
- Blender
- Large bowl
- Wildflower or herb seeds
- Window screen or embroidery hoop with pantyhose
- Towels
- Optional: dried flowers or herbs for decoration
- Small envelopes or cellophane bags
Step-by-Step Instructions:
- Tear recycled paper into small pieces and soak in warm water for 30 minutes.
- Blend paper and water to create a pulp.
- Pour pulp into a large bowl and mix in seeds.
- Dip screen into the mixture and lift, allowing water to drain.
- Transfer wet pulp to a towel and press to remove excess water.
- Allow to dry completely (1-2 days).
- Cut dried paper into cards or bookmarks.
- Include planting instructions on a separate card.
Time Commitment & Skill Level:
1 hour active time plus 1-2 days drying time | Intermediate
Why It’s Perfect for the Office:
This eco-friendly gift combines functionality with sustainability. Colleagues can use the cards or bookmarks and then plant them later to grow flowers or herbs, making it a gift that keeps on giving.
Budget Considerations:
$2-4 per set. Use recycled paper you already have and purchase seeds in bulk.
Tips for Giving Handmade Gifts in the Workplace
Choosing the Right Gift for Different Colleagues
- For new colleagues: Stick with practical items like notepads or desk organizers that help them settle in.
- For your supervisor: Choose professional items that aren’t too personal, like a minimalist photo frame or quality pen.
- For close work friends: You can be slightly more personal with items like bath salts or infused oils.
- For the whole team: Consumables like tea samplers or seed paper cards work well for group gifting.
Presentation and Wrapping Ideas
- Use simple, professional wrapping in neutral colors rather than flashy patterns.
- Consider transparent packaging that showcases your handmade item.
- Add a small, tasteful gift tag rather than large bows or decorations.
- Include a brief, professional note explaining the gift if needed.
- For desk delivery, use flat packaging that won’t take up too much space.
Timing Considerations
- Holidays: The end-of-year holiday season is the most common and appropriate time for workplace gifts.
- Work Anniversaries: Acknowledge a colleague’s work milestone with a small handmade token.
- After Collaboration: Thank a colleague for their help on a project with a thoughtful handmade item.
- Team Transitions: Give a handmade gift when someone is leaving the team or being promoted.
Maintaining Professionalism
- Avoid overly personal items or gifts that might make colleagues uncomfortable.
- Consider your workplace culture before giving handmade gifts.
- Don’t expect reciprocation when giving gifts to colleagues.
- Be mindful of company policies regarding gift-giving.
- Present gifts privately or during appropriate gift-exchange occasions.
The Lasting Impact of Handmade Gifts in Professional Relationships
In our increasingly digital workplace, taking the time to create something by hand for a colleague stands out as a meaningful gesture that strengthens professional bonds. Handmade gifts for colleagues communicate thoughtfulness and appreciation in a way that store-bought items simply cannot match.
The beauty of these 15 DIY gift ideas lies in their simplicity and appropriateness for office environments. Each project requires minimal crafting experience yet results in a professional-looking gift that any colleague would be proud to display or use at work.