9 Thrift Finds That Will Transforms Your Backyard Like a Designer
Transforming your backyard into a stylish retreat doesn’t require emptying your wallet. With a creative eye and some elbow grease, those curbside castoffs and thrift store treasures can become stunning outdoor features that look surprisingly high-end. The secret lies in seeing potential where others see trash, reimagining old pallets as cozy seating, breathing new life into weathered planters, or transforming discarded furniture into conversation pieces. In this guide, we’ll walk through nine budget backyard projects that deliver designer results without the designer price tag.
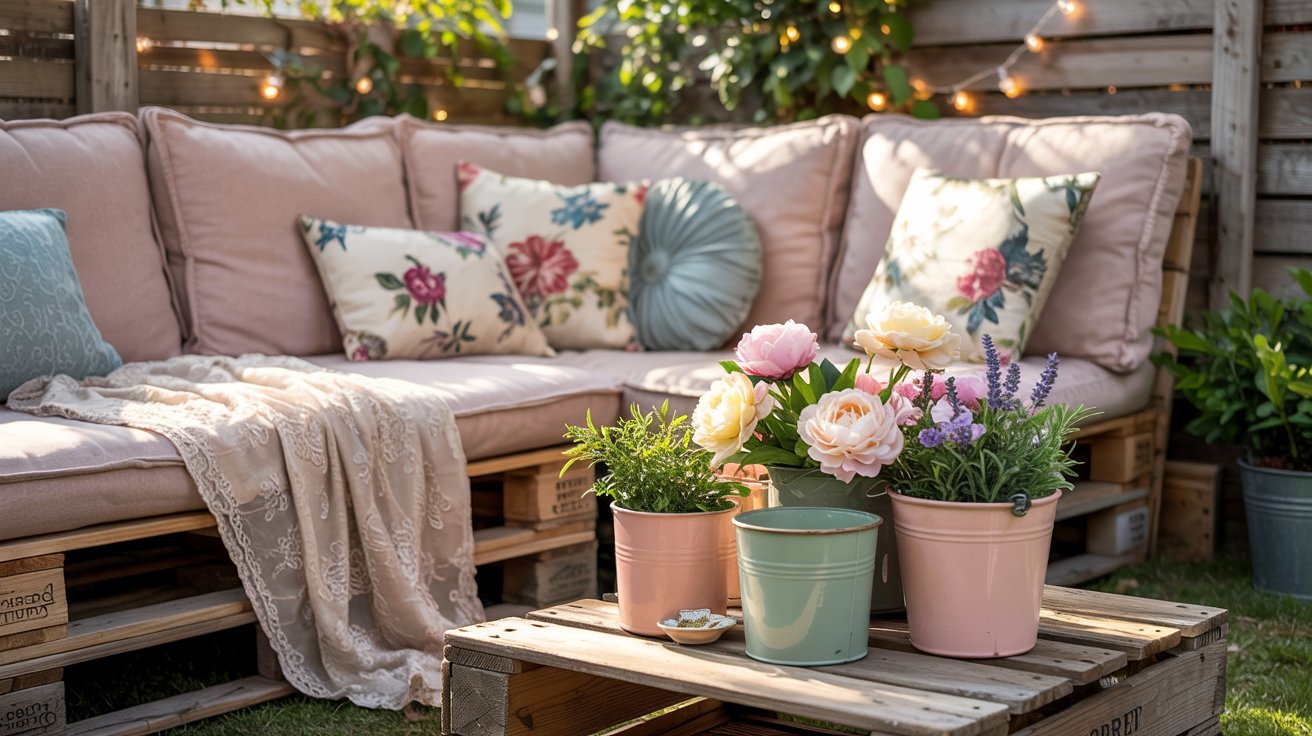
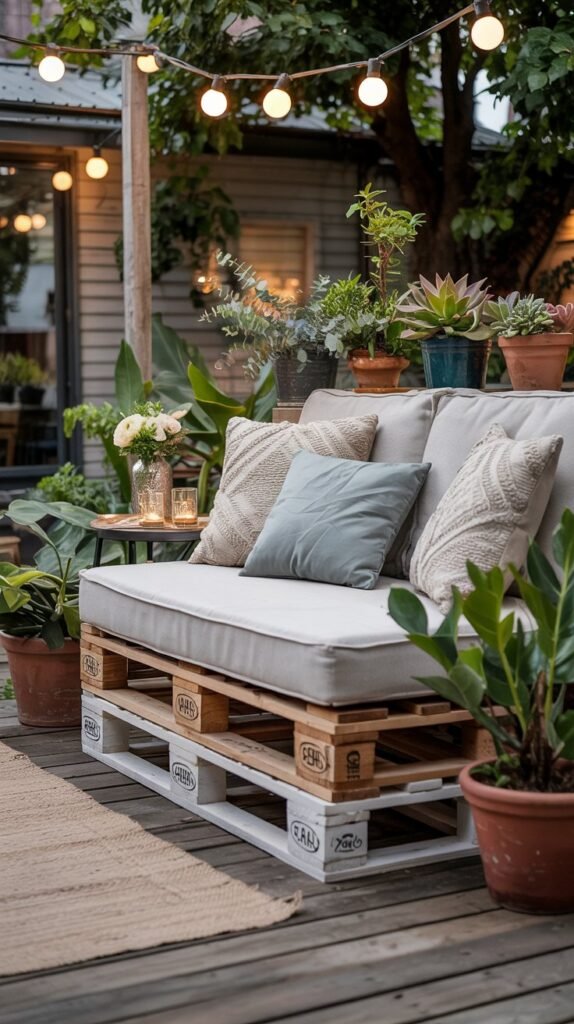
1. Luxe Pallet Outdoor Sofa
One of the most impressive budget backyard projects you can tackle is a custom outdoor sofa built from reclaimed pallets. This project delivers maximum impact with minimal investment, creating a comfortable seating area that looks far more expensive than its humble origins.
Materials Needed:
- 4-6 wooden pallets (free from local businesses or Facebook Marketplace)
- Electric sander and sandpaper (80 and 120 grit)
- Wood stain or exterior paint
- Screws and drill
- Outdoor fabric and foam for cushions (thrift store curtains work great!)
- Weather-resistant wood sealer
Step-by-Step Instructions:
- Inspect pallets carefully, removing any protruding nails and splinters.
- Arrange pallets in your desired sofa configuration (typically 2-3 pallets for the base, 1-2 for the backrest).
- Sand all surfaces thoroughly until smooth, starting with coarse grit and finishing with finer grit.
- Secure pallets together using screws at connection points for stability.
- Apply wood stain or paint in your chosen color, allowing proper drying time between coats.
- Seal with weather-resistant finish to protect from elements.
- Measure and cut foam to fit the seating area and backrest.
- Cover foam with thrifted outdoor fabric, securing with staples or heavy-duty fabric glue.
For a designer touch, add throw pillows made from mismatched thrift store fabrics in complementary colors. The contrast between rustic wood and bright textiles creates an eye-catching focal point for your outdoor space.
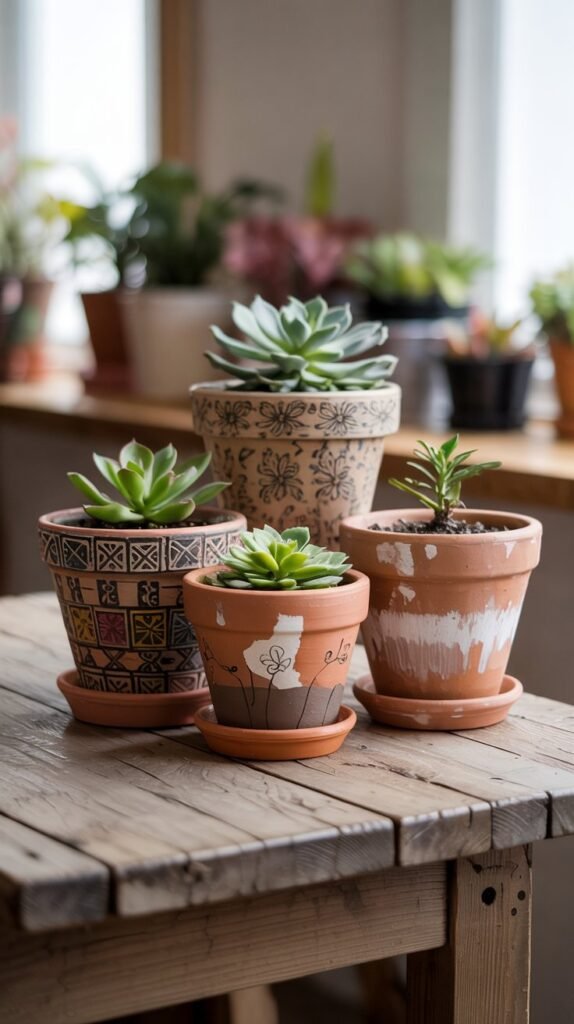
2. Terracotta Planter Makeover
Plain terracotta pots are affordable and readily available, but with a little creativity, they can become statement pieces in your backyard. This budget-friendly project allows you to create custom planters that look like they came from a high-end garden boutique.
Materials Needed:
- Terracotta pots (thrifted or inexpensive from garden centers)
- Exterior acrylic paint in your chosen colors
- Paintbrushes in various sizes
- Painter’s tape for creating patterns
- Clear outdoor sealer spray
- Optional: decorative paper and Mod Podge for decoupage
Step-by-Step Instructions:
- Clean pots thoroughly and allow to dry completely.
- Apply a base coat of paint and let dry.
- Create patterns with painter’s tape or freehand designs with contrasting colors.
- For decoupage option: Cut decorative paper to size, apply Mod Podge to pot, position paper, and seal with another layer of Mod Podge.
- Once designs are complete and dry, apply clear sealer to protect from weather.
- Plant with your favorite flowers or plants.
Budget-friendly tip: Look for damaged or chipped pots at garden centers, they’re often heavily discounted but perfect for this project since paint will cover imperfections!
3. Faux Tile-Painted Coffee Table
Transform an ordinary thrifted table into a stunning outdoor centerpiece with this clever painting technique that mimics expensive tile work. This budget backyard project delivers major visual impact for minimal cost.
Materials Needed:
- Secondhand coffee table or side table (wooden or metal)
- Exterior primer
- Exterior paint for base color
- Acrylic paints for tile design
- Small detail brushes
- Stencils (optional)
- Clear polyurethane outdoor sealer
Step-by-Step Instructions:
- Clean table thoroughly and sand if necessary.
- Apply primer and let dry completely.
- Paint entire table with base color (typically white or light blue for tile effect).
- Using a ruler and pencil, lightly mark a grid pattern on the tabletop.
- Paint individual “tiles” with your design, Moroccan patterns, Spanish motifs, or geometric designs work beautifully.
- Allow paint to dry completely between colors to prevent smudging.
- Apply 2-3 coats of clear polyurethane sealer, allowing proper drying time between coats.
Designer tip: For an aged look, lightly sand edges and corners after painting but before sealing. This creates a weathered patina that makes the piece look authentically vintage.
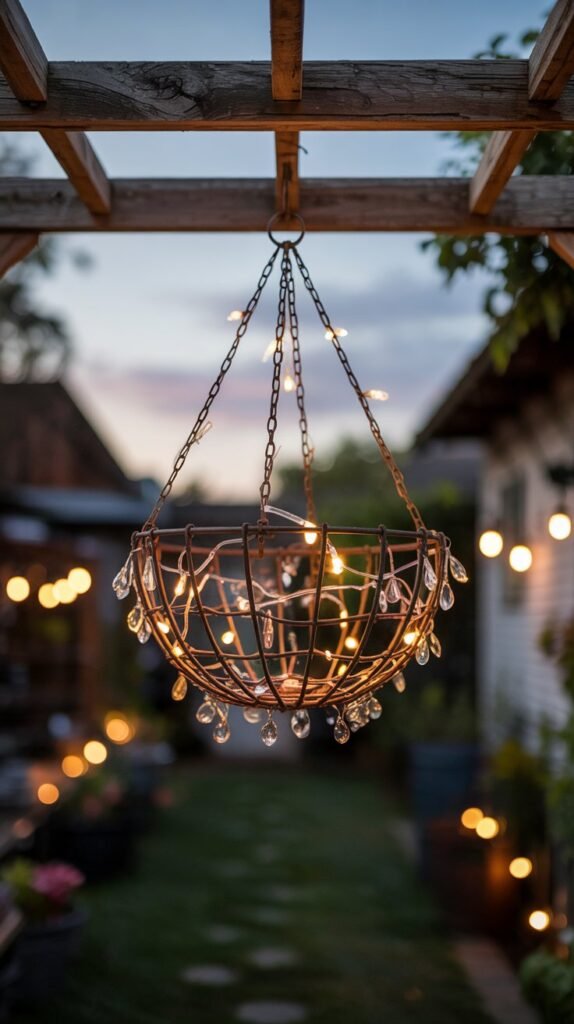
4. Upcycled Outdoor Chandelier
Proper lighting can transform any backyard into a magical retreat, and this upcycled chandelier project does exactly that without breaking the bank. By repurposing thrift store finds, you can create custom outdoor lighting that adds ambiance and style.
Materials Needed:
- Thrifted chandelier frame or hanging basket
- Solar-powered string lights
- Wire cutters and pliers
- Spray paint for outdoor use
- Optional: decorative elements like beads, crystals, or small mirrors from thrift stores
- Strong fishing line or thin wire
Step-by-Step Instructions:
- Remove any electrical components from the chandelier frame (if using an old light fixture).
- Clean thoroughly and spray paint with outdoor-rated paint in your chosen color.
- Wrap solar-powered string lights around the frame, securing with thin wire as needed.
- Add decorative elements, hanging them at varying lengths for visual interest.
- Position the solar panel where it will receive maximum sunlight.
- Hang your chandelier from a sturdy tree branch, pergola, or shepherd’s hook.
Budget-friendly tip: Check the clearance section at thrift stores for damaged chandeliers or light fixtures, even if parts are missing or broken, you only need the frame for this project!
5. Painted Concrete “Rug”
A beautiful outdoor rug can cost hundreds of dollars, but this clever budget backyard project creates the same effect for a fraction of the price. By painting a “rug” directly onto your concrete patio, you’ll add color and pattern that won’t fade, mildew, or blow away in the wind.
Materials Needed:
- Concrete patio or deck surface
- Concrete cleaner
- Exterior primer specifically for concrete
- Exterior porch and floor paint (base color and accent colors)
- Painter’s tape
- Large stencils (optional) or chalk for marking design
- Concrete sealer
Step-by-Step Instructions:
- Thoroughly clean concrete surface and allow to dry completely (24-48 hours).
- Apply concrete primer according to manufacturer’s instructions.
- Paint entire “rug” area with base color and allow to dry.
- Use painter’s tape to mark off borders and pattern elements.
- Paint design using accent colors, removing tape while paint is still slightly wet.
- For complex patterns, use stencils positioned carefully to maintain alignment.
- Once completely dry (at least 24 hours), apply concrete sealer for longevity.
Designer tip: Choose a pattern that complements your home’s architecture. Geometric designs are easiest for beginners, while more intricate patterns create a high-end custom look.
6. Repurposed Shutter Vertical Garden
Vertical gardening maximizes space and creates visual interest, but commercial systems can be expensive. This clever repurposing project uses thrifted wooden shutters or old doors to create a stunning vertical garden that looks straight out of a design magazine.
Materials Needed:
- Wooden shutters or old door (thrift stores, ReStore, or Facebook Marketplace)
- Exterior paint or stain
- Small pots that fit between slats (thrifted teacups work beautifully)
- S-hooks or cup hooks
- Drill and screws
- Small plants like succulents, herbs, or flowers
- Optional: small shelf brackets if using a door
Step-by-Step Instructions:
- Clean shutters/door thoroughly and repair any loose parts.
- Sand lightly and apply paint or stain in your chosen color.
- For shutters: Install cup hooks between slats to hang small pots.
- For doors: Attach small shelf brackets to create plant ledges.
- Secure the structure to a fence or wall, or create a base to allow it to stand freely.
- Arrange potted plants, varying heights and plant types for visual interest.
Budget-friendly tip: Look for damaged shutters with missing slats, they’re often deeply discounted and perfect for this project since the imperfections become part of the charm!
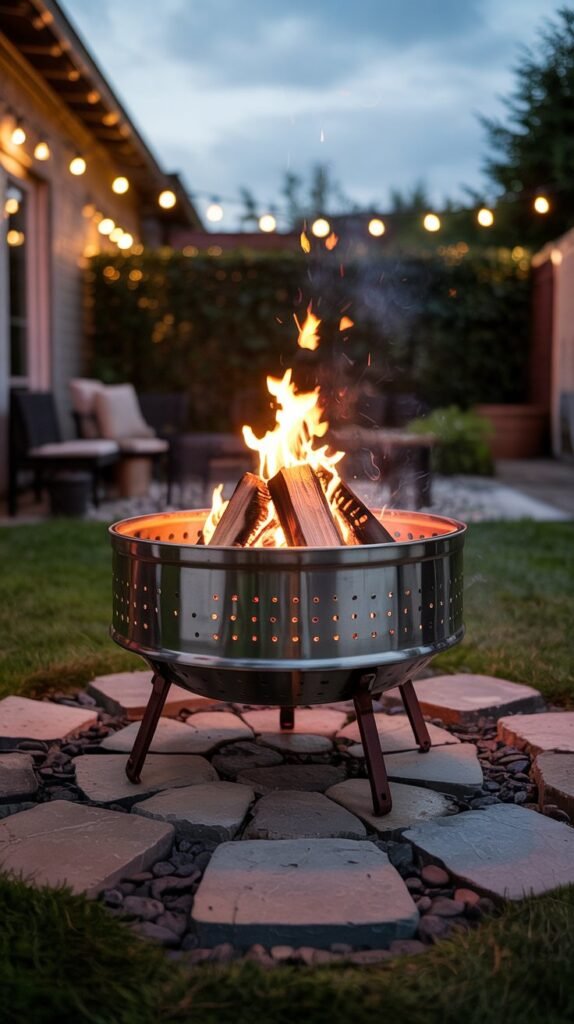
7. Washing Machine Drum Fire Pit
A fire pit creates an instant gathering spot in any backyard, but commercial versions can cost hundreds. This ingenious budget backyard project repurposes an old washing machine drum into a stylish, industrial-chic fire pit that looks like a custom designer piece.
Materials Needed:
- Stainless steel washing machine drum (free from appliance repair shops or online marketplaces)
- High-heat resistant spray paint (optional)
- Wire brush
- Metal legs or base (repurposed from furniture or purchased)
- Drill with metal bits
- Bolts and nuts
- Decorative rocks or pebbles
Step-by-Step Instructions:
- Clean the washing machine drum thoroughly, removing any plastic parts.
- Use a wire brush to remove any rust or residue.
- If desired, spray with high-heat resistant paint (though the natural metal look is quite stylish).
- Drill holes in the bottom for drainage if not already present.
- Attach legs or base using bolts and nuts for stability.
- Position on a fire-safe surface like concrete or paver stones.
- Surround with decorative rocks for a finished look.
Designer tip: For a cohesive look, create a seating area around your fire pit using thrifted outdoor chairs painted in the same color family. Mismatched chairs become a deliberate design choice when unified by color!
8. Dresser-Turned-Outdoor Bar
An outdoor bar elevates your entertaining game, but purpose-built versions can be pricey. This clever budget backyard project transforms a thrifted dresser or sideboard into a stylish outdoor bar that looks like a custom piece.
Materials Needed:
- Wooden dresser or sideboard (thrift stores or Facebook Marketplace)
- Exterior primer and paint
- Waterproof sealer
- Optional for top: ceramic tiles, grout, and adhesive
- Drawer pulls or knobs (can reuse existing or upgrade)
- Casters for mobility (optional)
Step-by-Step Instructions:
- Remove drawers and clean furniture thoroughly.
- Sand surfaces lightly to improve paint adhesion.
- Apply exterior primer and allow to dry completely.
- Paint with exterior paint in your chosen color (2-3 coats).
- For a tiled top: Apply tile adhesive, position tiles, and grout once dry.
- Apply several coats of waterproof sealer to all surfaces.
- Replace or update drawer pulls.
- If desired, install casters on the bottom for easy mobility.
Budget-friendly tip: Look for dressers with water damage or missing drawers, they’re often very inexpensive. The damaged top can be covered with tiles, and missing drawers create perfect spaces for ice buckets or bottle storage!
9. Mosaic Garden Path
A winding garden path adds structure and charm to any backyard, but professional installation can be costly. This creative budget backyard project uses repurposed materials to create a one-of-a-kind mosaic path that looks like it was designed by a professional landscaper.
Materials Needed:
- Broken concrete pieces (often free from construction sites)
- Thrifted ceramic plates, tiles, or pottery (chipped or cracked is fine!)
- Hammer and cloth (for breaking ceramics safely)
- Sand
- Concrete mix
- Grout (optional)
- Sealer
Step-by-Step Instructions:
- Plan your path layout using garden hoses or rope to mark the edges.
- Dig out the path area to a depth of about 4 inches.
- Add 2 inches of sand as a base and compact it.
- Break ceramic pieces into smaller fragments (wrap in cloth first for safety).
- Arrange concrete pieces as stepping stones, leaving gaps for mosaic designs.
- Mix small batches of concrete and press ceramic fragments into it to create mosaic sections.
- Allow to set completely (24-48 hours).
- Apply grout between pieces if desired, then seal the entire path once dry.
Designer tip: Create a cohesive look by choosing ceramic pieces in a specific color family, or tell a story with your path by incorporating meaningful items like seashells from family vacations or broken heirloom dishes.
Ready to Transform Your Backyard?
These nine budget backyard projects prove that creating a designer-worthy outdoor space doesn’t require a designer budget. With some creativity, elbow grease, and an eye for potential, you can transform thrift store finds and curbside castoffs into stunning backyard features that will have neighbors asking for your decorator’s contact information.
Remember that the most successful thrift flips start with good bones, look for solid construction and interesting shapes rather than perfect condition. Scratches, dents, and missing parts often mean steep discounts and can be easily remedied with paint, creative repurposing, or strategic placement.
Start small with a single project like the painted planters, then work your way up to larger transformations like the pallet sofa or outdoor bar. Before long, you’ll have created a personalized outdoor retreat that reflects your style without emptying your wallet.