Make Your Own Textured Foam Clay Vase Embellishments

Make Your Own Textured Foam Clay Vase Embellishments
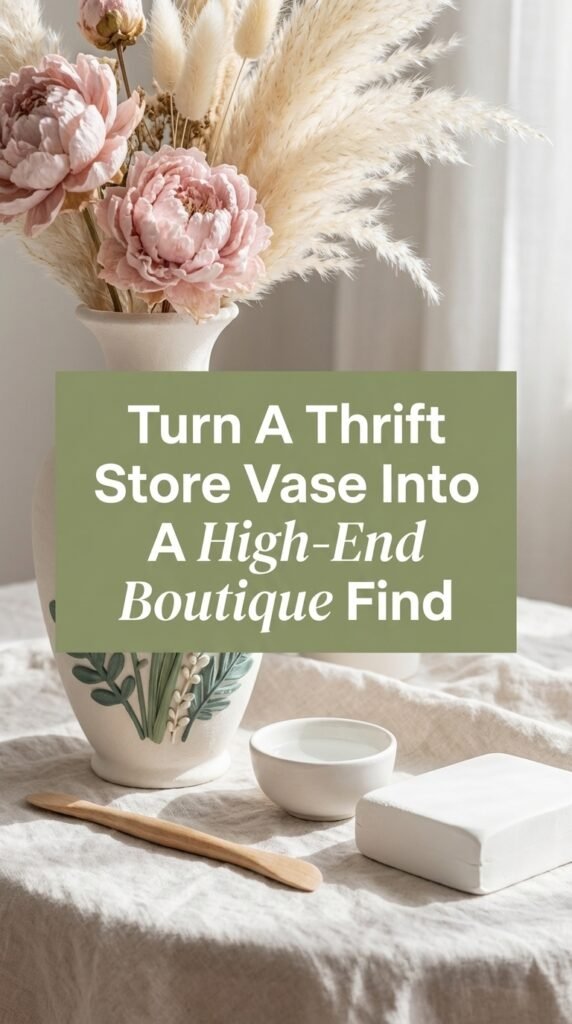
Transform a simple vase into a sculptural work of art. No pottery wheel, no kiln, no experience required.
Have you ever spotted a beautifully textured ceramic vase and thought, I wish I could make something like that? Well, here is your sign that you absolutely can. It is easier than you ever imagined. With foam clay, a little patience, and some creative inspiration from nature, you can craft stunning raised botanical embellishments that look like they belong in a high-end boutique.
Welcome to one of the most satisfying beginner crafts you will ever try.
In this tutorial, we are diving into the dreamy world of foam clay vase embellishments. Whether your style is cottagecore, boho, minimalist, or maximalist, this project adapts to your vision. The swirling fern fronds and spiral shell motifs you are about to create are timeless, organic, and endlessly customizable.
What Is Foam Clay and Why You Will Love It
Foam clay, also called foam modeling clay or light clay, is a lightweight air dry material that feels spongy and smooth in your hands. Unlike traditional pottery clay, it does not need firing. It simply air dries to a firm, matte finish over twenty-four to forty-eight hours.
The material stays workable for a long time. You are not racing against the clock. It adheres well to smooth vase surfaces with minimal prep. You can shape, smooth, and sculpt it with basic tools or even just your fingers.
For beginners, foam clay is an absolute dream because it creates that gorgeous raised relief texture seen on high-end ceramic pieces.

Why Beginners Love Foam Clay
- Stays workable for extended periods without drying out
- No expensive equipment or special workspace needed
- Holds fine detail beautifully once dry
- Lightweight and easy to handle for extended projects
- Forgiving material that allows for corrections and adjustments
This air dry clay offers incredible flexibility. You can work at your own pace. Take breaks. Come back to your project when inspiration strikes. The material waits patiently for you.
What You Will Need

Essential Materials
- White or natural foam clay (one standard pack is plenty for a medium vase)
- A smooth ceramic, glass, or plastic vase (thrift stores are gold for this!)
- A small bowl of water
- Sculpting tools or toothpicks for detail work
- A silicone mat or non-stick surface for rolling
- Optional: acrylic paint or chalk paint for finishing
Optional But Recommended
- A fern leaf or lace fabric for stamping real texture into the clay
- A rolling pin for thin sheets
- A small fan brush for blending edges seamlessly
You probably already have most of these supplies at home. The foam clay is the star of the show. Everything else supports your creative vision. A simple cup of water becomes your smoothing tool. A toothpick transforms into a precision detailing instrument.
This is accessible art. No specialty shop required for most items.
How to Make Foam Clay Vase Embellishments: Step by Step
Step 1: Prep Your Vase
Clean your vase thoroughly with rubbing alcohol or a damp cloth to remove any dust or oils. This helps the foam clay adhere properly.
If your vase is very glossy, a light sanding with fine-grit sandpaper gives the clay something to grip onto. Let it dry completely before you start.
This preparation step takes just a few minutes. It makes all the difference in how well your embellishments bond to the surface. Think of it as creating the perfect canvas for your art.

Step 2: Plan Your Design
Before you touch the clay, spend a few minutes sketching or visualizing your design. The botanical scroll style features flowing fern fronds, tight spiral shells, and sweeping curved vines that wrap organically around the vase.
Think of it as a garden in relief. Layers of texture building from the vase surface upward.
Tip: Loosely sketch your design on the vase with a soft pencil. This disappears under the clay but gives you a helpful guide to follow.
Planning saves time. It prevents that moment of staring at your vase wondering where to start. A simple sketch brings confidence to your first placement.
Step 3: Roll and Shape Your Botanical Elements

Start with the largest elements first. The fern fronds. Roll a thin log of foam clay and gently flatten one side. Use a toothpick or sculpting tool to press small diagonal lines along each side to mimic the leaflets of a fern.
Curl the tip inward for that elegant organic feel.
For the spirals, roll a thin rope of clay and coil it inward from the outside. Like a snail shell. Press gently to flatten slightly. For extra texture, add tiny dots or crosshatch lines with your sculpting tool.
Work slowly. Enjoy the process. The foam clay responds beautifully to gentle pressure. You will find a rhythm as you shape each piece. This is where the meditation begins.
Step 4: Apply Elements to the Vase
Dip your finger in water and lightly dampen the back of each clay piece before pressing it onto the vase. Start with your large fronds and spirals, then fill in with smaller curling vines and accent dots.
Use a damp brush to smooth and blend the edges of each element into the vase surface. This creates that seamless, sculpted look.
Work in sections and step back often to check balance and flow. The design should feel like it is dancing around the vase, not stuck in one spot.
This is your moment to breathe life into the piece. Each placement is a small decision that builds toward the whole. Trust your instincts. Nature is never perfectly symmetrical.
Step 5: Dry and Finish
Allow your vase to dry undisturbed for at least twenty-four to forty-eight hours. Keep it away from direct sunlight or heat during drying. Slow and even drying prevents cracking.
Once fully dry, you can leave the natural clay color for that raw, stoneware look. Stunning! Or paint over the entire piece in chalk paint for a smooth, unified finish.

A wash of watered-down paint that you wipe back can also beautifully highlight the raised texture.
The drying time is part of the magic. Anticipation builds. You watch your creation transform from soft and pliable to firm and permanent. This waiting teaches patience in our instant world.
Pro Tips for Beginners
Water Is Your Friend
Keep a small cup of water nearby and keep your fingers slightly damp. This prevents the clay from cracking as you work. Just a bit of moisture helps the foam clay stay smooth and cooperative.
Do Not Rush the Process
Foam clay is forgiving. If a piece does not look right, peel it off and re-roll it. Take your time. This is not a race. The material waits patiently for your creative decisions.
Use Nature as Your Stamp
Press real fern leaves or lace into flat pieces of clay before cutting them into shapes for effortless, stunning texture. Nature provides the most beautiful patterns already designed for you.
Start Simple First
Start with a simple single-stem design on a small vase before tackling a full wraparound piece. Build your confidence with smaller projects. Master the basics before going bold.

These tips come from experience. They save you frustration. They guide you toward success. Remember that every artist started exactly where you are now.
Styling Your Finished Vase
Your finished foam clay vase deserves a spotlight moment. Style it on a windowsill in soft natural light. Place it on a stack of linen books. Group it with dried botanicals and warm candlelight.
The raw clay finish looks breathtaking in Scandi, cottagecore, or earthy boho interiors. But truly works in any space that craves a handmade, soulful touch.
Cottagecore Display
Pair with dried lavender bundles, vintage books, and soft linen textiles for that dreamy countryside aesthetic.
Minimalist Styling
Let the vase stand alone on a clean surface with a single stem of pampas grass for modern simplicity.
Boho Collection
Group with terracotta pots, macrame, and warm candlelight for layered, eclectic home decor charm.
These vases also make incredibly thoughtful handmade gifts. Imagine gifting a friend a vase you made yourself, decorated with her favorite flowers in relief. That is the kind of magic this craft creates.
Your home decor tells your story. A handmade piece carries energy that mass-produced items never can. This is art that reflects your own hands, your own time, your own creativity.
Your Turn to Create
There is something quietly magical about making art with your hands. Foam clay vase embellishments are one of those rare crafts that feel meditative in the making and genuinely impressive in the result. Even when you are a complete beginner.
You do not need a studio, a kiln, or years of practice. You just need clay, curiosity, and a little time.
So go ahead. Pull out that plain vase from the back of your cupboard. Give it a second life that will have everyone asking where did you get that?
Frequently Asked Questions
Can I use regular air dry clay instead of foam clay?
Yes! Regular air dry clay works beautifully too, though it is heavier and dries a little faster. Foam clay is ideal for beginners because it is more forgiving and lighter for larger embellishments. Both materials create stunning results. Choose based on your comfort level and project size.
How long does the foam clay last on the vase?
When properly adhered and sealed with a matte varnish, foam clay embellishments are very durable. Avoid submerging the vase in water. Use it for dried flowers or as a decorative piece rather than for fresh-cut stems in water. With proper care, your creation can last for years.
What paint should I use to finish the vase?
Chalk paint gives the most beautiful, cohesive finish and adheres well to both clay and the vase underneath. Acrylic paint works too. Seal with a matte varnish once painted. The paint choice affects the final aesthetic. Chalk paint creates a soft, matte look perfect for farmhouse or cottagecore styles.
How do I prevent the clay from cracking while drying?
Let your vase dry slowly at room temperature away from direct heat sources or sunlight. Rapid drying causes cracking. Keep the air dry clay pieces relatively thin and even in thickness. If you notice small cracks forming, you can fill them with a bit of fresh clay smoothed with water before the piece fully dries.
Can I make embellishments for glass vases?
Absolutely! Glass vases work wonderfully for this project. Clean the glass thoroughly with rubbing alcohol to remove any oils or residue. The foam clay adheres well to smooth glass surfaces. The transparency of glass creates interesting depth when viewing the vase from different angles.
What is the best way to store leftover foam clay?
Wrap unused foam clay tightly in plastic wrap or store it in an airtight container or ziplock bag. This prevents it from drying out. Properly stored foam clay can last for several months. If it starts to feel a bit dry, knead in a tiny amount of water to restore flexibility.